Top Posters


Popular Content
Showing content with the highest reputation since 06/24/2015 in all areas
-
Note: This giveaway ended 7/12/16. For summer, we're giving away a new ZPacks 4-in-1 MultiPack filled with a $50 Gift Certificate to REI and a choice of shirt or hat from the TrailGroove Store! If you're not familiar with this versatile storage solution from ZPacks check out our Multi-Pack Review from back in Issue 17 for all the details - I personally use one as a ~3 ounce solution to keep my camera easily accessible (in chest pack mode) on every hike. Just make sure you're subscribed to TrailGroove and then like this blog post to let us know you'd like to be included in the drawing. Full details below. Above: Our review setup in pack lid mode strapped to a ULA Circuit backpack. The ZPacks Multi-Pack can also be used as a chest pack, waist pack, or satchel. How to Enter 1) Like this blog entry in the lower right hand corner of this post. Simply login with your TrailGroove account and like this blog entry in the lower right hand corner of this post to let us know you'd like to be entered to win. New to TrailGroove? Click here to sign up for a new account - make sure to select the subscribe option on the sign up screen as well - it will help with step 2. The button you then need to click to like this post will look like the one below, albeit a bit smaller: 2) Subscribe to TrailGroove. Odds are you might already be subscribed, but you can subscribe below or verify by typing in your email if needed. (Hint: Receive an email from us about this giveaway? If so, you're subscribed!) Note that you won't be subscribed twice, so it doesn't hurt to check - make sure you're subscribed with the same email you used here for your TrailGroove account: Subscribe Here 3) Premium TrailGroove Member? You've been automatically entered into this giveaway - like this blog post for an additional entry and chance to win! Or sign up for a premium membership anytime before 7/12 to take advantage of this benefit. 4) Optional: This isn't required and doesn't even earn additional entries, but since you're here feel free to give us a like on Facebook and a follow on Twitter below - we'd appreciate it! (And it helps us keep you up to date with any future giveaways and TrailGroove news from time to time) 5) As always, if you're new to TrailGroove or perhaps just haven't dropped by in a while, feel free to stop by the forum to jump in the discussion or just to say hello. We'll randomly draw from all entries on Tuesday 7/12 at 7 p.m. Mountain Time and will contact the winner here via a private message - Good luck!162 points
-
Note: This giveaway ended 5/16/16. This month enter to win a $100 REI e-Gift Card plus your choice of a shirt or hat from the TrailGroove Store! Just make sure you're subscribed to TrailGroove and then like this blog post to let us know you'd like to be included in the drawing. Full details below. How to Enter 1) Like this blog entry in the lower right hand corner of this post. Simply login with your TrailGroove account and like this blog entry in the lower right hand corner of this post to let us know you'd like to be entered to win. New to TrailGroove? Click here to sign up for a new account - make sure to select the subscribe option on the sign up screen as well - it will help with step 2. The button you then need to click to like this post will look like the one below, albeit a bit smaller: 2) Subscribe to TrailGroove. Odds are you might already be subscribed, but you can subscribe below or verify by typing in your email if needed. (Hint: Receive an email from us about this giveaway? If so, you're subscribed!) Note that you won't be subscribed twice, so it doesn't hurt to check - make sure you're subscribed with the same email you used here for your TrailGroove account: Subscribe Here 3) Premium TrailGroove Member? You've been automatically entered into this giveaway - like this blog post for an additional entry and chance to win! Or sign up for a premium membership anytime before 5/16 to take advantage of this benefit. 4) Optional: This isn't required and doesn't even earn additional entries, but since you're here feel free to give us a like on Facebook and a follow on Twitter below - we'd appreciate it! (And it helps us keep you up to date with any future giveaways and TrailGroove news from time to time) 5) As always, if you're new to TrailGroove or perhaps just haven't dropped by in a while, feel free to stop by the forum to jump in the discussion or just to say hello. We'll randomly draw from all entries on Monday 5/16 at 7 p.m. Mountain Time and will contact the winner here via a private message - Good luck!144 points
-
Note: This Giveaway Ended 3/15/17. For our winter giveaway (and just in time!), we're giving away a new Helinox Chair Zero and the choice of any shirt or hat from the TrailGroove Store! This new camp comfort seating solution from Helinox is a comfortable chair that's both packable and light enough for those backpacking and hiking excursions where some extra comfort might be on your list of priorities - for more info on the Chair Zero, take a look here at REI and read our recent review. Just make sure you're subscribed to TrailGroove and then like this blog post to let us know you'd like to be included in the drawing. That's it! Be sure to check out a Premium Membership for more chances to win. Full details below. Our review Chair Zero How to Enter 1) Like this blog entry in the lower right hand corner of this post. Simply login with your TrailGroove account and like this blog entry in the lower right hand corner of this post to let us know you'd like to be entered to win. New to TrailGroove? Click here to sign up for a new account - make sure to select the subscribe option on the sign up screen as well - it will help with step 2. The button you then need to click to like this post will look like the one below, albeit a bit smaller: 2) Subscribe to TrailGroove. Odds are you might already be subscribed, but you can subscribe below or verify by typing in your email if needed. (Hint: Receive an email from us about this giveaway? If so, you're subscribed!) Note that you won't be subscribed twice, so it doesn't hurt to check - make sure you're subscribed with the same email you used here for your TrailGroove account: Subscribe Here 3) Premium TrailGroove Member? You've been automatically entered into this giveaway - like this blog post for an additional entry and chance to win! You can sign up for a Premium Membership anytime before 3/15 to take advantage of this benefit. 4) Optional: This isn't required and doesn't even earn additional entries, but since you're here feel free to give us a like and follow below - it's always nice to stay in touch! (And it helps us keep you up to date with any future giveaways and TrailGroove news from time to time) .ig-b- { display: inline-block; } .ig-b- img { visibility: hidden; } .ig-b-:hover { background-position: 0 -60px; } .ig-b-:active { background-position: 0 -120px; } .ig-b-v-24 { width: 137px; height: 24px; background: url(//badges.instagram.com/static/images/ig-badge-view-sprite-24.png) no-repeat 0 0; } @media only screen and (-webkit-min-device-pixel-ratio: 2), only screen and (min--moz-device-pixel-ratio: 2), only screen and (-o-min-device-pixel-ratio: 2 / 1), only screen and (min-device-pixel-ratio: 2), only screen and (min-resolution: 192dpi), only screen and (min-resolution: 2dppx) { .ig-b-v-24 { background-image: url(//badges.instagram.com/static/images/ig-badge-view-sprite-24@2x.png); background-size: 160px 178px; } } 5) As always, if you're new to TrailGroove or perhaps just haven't dropped by in a while, feel free to stop by the forum to jump in the discussion or just to say hello. We'll randomly draw from all entries on Wednesday 3/15 at 7 p.m. Mountain Time and will contact the winner here via a private message - Good luck!136 points
-
Note: This giveaway ended 6/2/17 For spring, we're giving away a $100 REI e-Gift Card plus your choice of a shirt or hat from the TrailGroove Store! Just make sure you're subscribed to TrailGroove and then like this blog post to let us know you'd like to be included in the drawing. Full details below. How to Enter 1) Like this blog entry in the lower right hand corner of this post. Simply login with your TrailGroove account and like this blog entry in the lower right hand corner of this post to let us know you'd like to be entered to win. New to TrailGroove? Click here to sign up for a new account - make sure to select the subscribe option on the sign up screen as well - it will help with step 2. 2) Subscribe to TrailGroove. Odds are you might already be subscribed, but you can subscribe below or verify by typing in your email if needed. (Hint: Receive an email from us about this giveaway? If so, you're subscribed!) Note that you won't be subscribed twice, so it doesn't hurt to check - make sure you're subscribed with the same email you used here for your TrailGroove account: Subscribe Here 3) Premium TrailGroove Member? You've been automatically entered into this giveaway - like this blog post for an additional entry and chance to win! Or sign up for a premium membership anytime before 6/2 to take advantage of this benefit. 4) Optional: This isn't required and doesn't even earn additional entries, but since you're here feel free to follow us below on Facebook, Twitter, and Instagram - we'd appreciate it! (And it helps us keep you up to date with any future giveaways and TrailGroove news from time to time) .ig-b- { display: inline-block; } .ig-b- img { visibility: hidden; } .ig-b-:hover { background-position: 0 -60px; } .ig-b-:active { background-position: 0 -120px; } .ig-b-v-24 { width: 137px; height: 24px; background: url(//badges.instagram.com/static/images/ig-badge-view-sprite-24.png) no-repeat 0 0; } @media only screen and (-webkit-min-device-pixel-ratio: 2), only screen and (min--moz-device-pixel-ratio: 2), only screen and (-o-min-device-pixel-ratio: 2 / 1), only screen and (min-device-pixel-ratio: 2), only screen and (min-resolution: 192dpi), only screen and (min-resolution: 2dppx) { .ig-b-v-24 { background-image: url(//badges.instagram.com/static/images/ig-badge-view-sprite-24@2x.png); background-size: 160px 178px; } } 5) As always, if you're new to TrailGroove or perhaps just haven't dropped by in a while, feel free to stop by the forum to jump in the discussion or just to say hello! We'll randomly draw from all entries on Friday 6/2 at Noon Mountain Time and will contact the winner here via a private message - Good luck!128 points
-
Note: This giveaway ended 7/28/17. For summer, we're giving away a $100 Backcountry.com Gift Certificate plus your choice of a shirt or hat from the TrailGroove Store! Just make sure you're subscribed to TrailGroove and then like this blog post to let us know you'd like to be included in the drawing. Full details below. How to Enter 1) Like this blog entry in the lower right hand corner of this post. Simply login with your TrailGroove account and like this blog entry in the lower right hand corner of this post to let us know you'd like to be entered to win. New to TrailGroove? Click here to sign up for a new account - make sure to select the subscribe option on the sign up screen as well - it will help with step 2. The button you then need to click to like this post will look like the one below, albeit a bit smaller: 2) Subscribe to TrailGroove. Odds are you might already be subscribed, but you can subscribe below or verify by typing in your email if needed. (Hint: Receive an email from us about this giveaway? If so, you're subscribed!) Note that you won't be subscribed twice, so it doesn't hurt to check - make sure you're subscribed with the same email you used here for your TrailGroove account: Subscribe 3) Premium TrailGroove Member? You've been automatically entered into this giveaway - like this blog post for an additional entry and chance to win! Or sign up for a premium membership anytime before 7/28 to take advantage of this benefit. 4) Optional: This isn't required and doesn't even earn additional entries, but since you're here feel free to follow us below on Facebook, Twitter, and Instagram - we'd appreciate it! (And it helps us keep you up to date with any future giveaways and TrailGroove news from time to time) .ig-b- { display: inline-block; } .ig-b- img { visibility: hidden; } .ig-b-:hover { background-position: 0 -60px; } .ig-b-:active { background-position: 0 -120px; } .ig-b-v-24 { width: 137px; height: 24px; background: url(//badges.instagram.com/static/images/ig-badge-view-sprite-24.png) no-repeat 0 0; } @media only screen and (-webkit-min-device-pixel-ratio: 2), only screen and (min--moz-device-pixel-ratio: 2), only screen and (-o-min-device-pixel-ratio: 2 / 1), only screen and (min-device-pixel-ratio: 2), only screen and (min-resolution: 192dpi), only screen and (min-resolution: 2dppx) { .ig-b-v-24 { background-image: url(//badges.instagram.com/static/images/ig-badge-view-sprite-24@2x.png); background-size: 160px 178px; } } 5) As always, if you're new to TrailGroove or perhaps just haven't dropped by in a while, feel free to stop by the forum to jump in the discussion or just to say hello! We'll randomly draw from all entries on Friday 7/28 at Noon Mountain Time and we'll contact the winner here via a private message - Good luck!82 points
-
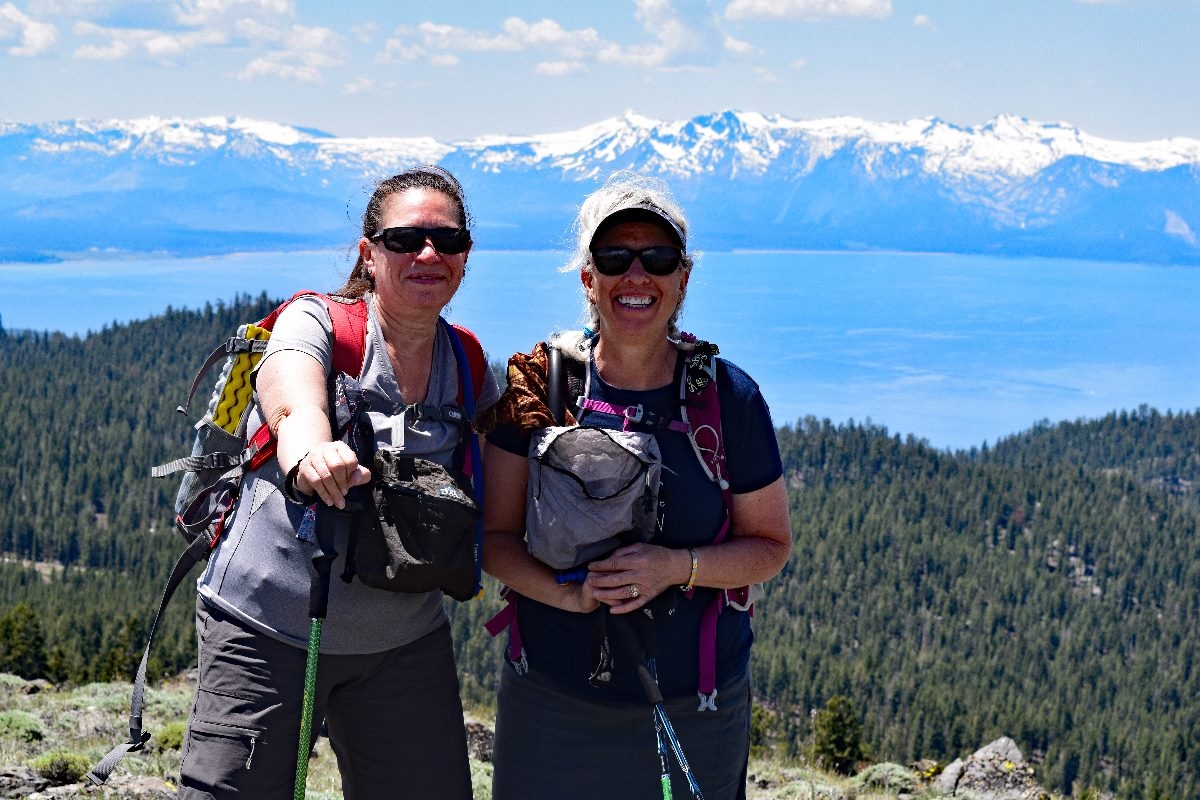
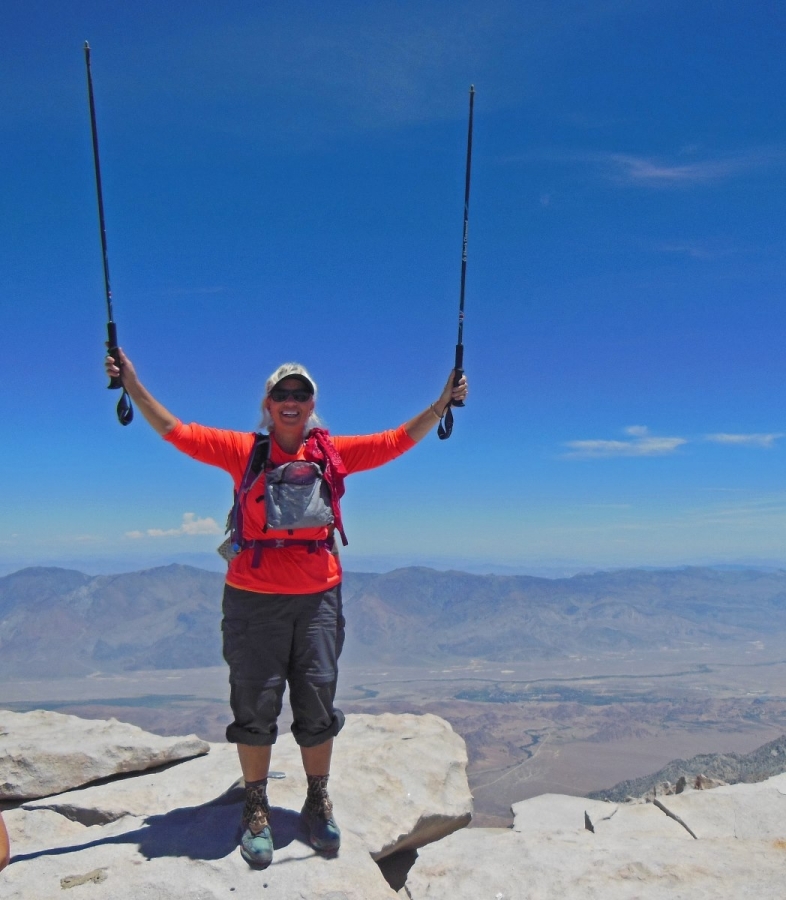
I wear the multi pack on every hike, too! My camera loves it.. On Whitney, I used it as my go-to food bag.
 7 points
 -
TrailGroove, thank you once again for putting one of these giveaways. I was fortunate enough to win the Patagonia Houdini wind-shirt giveaway last year and have been utterly delighted with the jacket, which is now a firm favourite. I say a quiet thank you ever time I use it. Thanks once again Richard7 points
-
Gossamer Gear has been refining their ultralight oriented backpacks since 1998, including multiple iterations of the Gorilla – their medium volume framed pack. The Gorilla was redesigned in early 2015 using gray Robic fabric instead of the white Dyneema Grid fabric as seen on older packs. The shoulder straps are now unisex, more contoured, thicker, and slightly narrower than the previous version. The hip belt was also redesigned to have more padding with a mesh inner face to wick sweat. Trekking pole holders were also added along with heavier stitching for prolonged pack life. As a result, the listed weight increased slightly to 26 ounces for the size medium pack. The Gossamer Gear Gorilla at the northern terminus of the CDT. Design The Gossamer Gear Gorilla is a typical ultralight style backpack with one large main pocket, but it uses an integrated lid to close the pack. It features two large side pockets that each easily fit a 1 liter Gatorade or Nalgene bottle. There is a small zippered pocket on the non-removable lid which can fit maps or other small items, a single large mesh pocket on the front of the pack, and a pair of mesh pockets to hold the included sit pad or other compatible foam pad on the back on the pack. The pad is the only back padding of the pack to save weight. The pack also features an ice axe loop, side compression straps, and trekking pole holders. The bottom of the pack and side pockets are made of a heavier duty version of the Robic fabric to resist abrasion. The pack hip belt (available in 5 sizes) is purchased separately and has one large zippered pocket on either side, sized for 3 cliff bars or a large point and shoot camera. It is attached to the pack with a large swatch of Velcro and sandwiched between the pack and the included sit pad (or your own sleeping pad). Note that the extra-small hip belt does not include pockets. The Gorilla is available in 3 torso sizes and a pack + hip belt goes for $275. The Gorilla has been a companion on all types of hikes through all types of environments and weather. The Test I purchased my size large Gorilla nearing the end of Rachel and I’s through-hike of the Arizona Trail to replace a larger volume frameless pack that was giving me shoulder pain. I used the pack for the remaining 100 miles of the Arizona Trail (AZT), 75 miles of backpacking in Zion and Buckskin Gulch, over 2,200 miles of the Continental Divide Trail (CDT), and about 500 miles on the Grand Enchantment Trail (GET). Round it all up slightly and I have about 3,000 miles in 7 states over 7 months on this pack. I typically carried a base weight of about 12 to 14 pounds with some variation along the way. My longest food carry was 7 days and the most water I carried was about 5 liters. I used this pack both on trail and off-trail to bushwhack on the Grand Enchantment and for many cross country alternates on the CDT. Most recently, the Gorilla has served as my winter day pack for snowshoeing in Colorado. To call this a long term review would be an understatement. As a bonus, Rachel purchased a Gossamer Gear Mariposa at the end of our AZT hike and used it for the CDT and GET. She decided to downsize to the Gorilla after we got home, so I have some comparison photos of an almost brand new but size small Gorilla. Side detail of the Gossamer Gear Gorilla. Initial Impressions Prior to this pack, I was used to large volume frameless packs that had lots of excess room taken up by only partially compressing my sleeping bag and down jacket. This strategy worked well when the food carries were 5 days or less with ample on-trail water, but my shoulders were not happy with the long dry stretches on the AZT. My daily mileages were also lower than normal due to an injured partner leading to longer food and heavier water carries. The two problems led me to move to a more supportive but still lightweight framed backpack, and Gossamer Gear was the only ultralight backpack manufacturer at the time that had anything in stock. I had heard good things from my friend Section Hiker on his review of the Mariposa and “pulled the trigger” last May but opted to go for the smaller volume Gorilla. When I unboxed the pack sitting at a picnic table in front of the south rim general store, I was a little shocked by the small size in comparison to my voluminous frameless pack. How was I going to make this work exactly? I quickly realized that smarter packing was the answer and that I had all the volume I needed. My sleeping bag would have to be more compressed and instead of simply piling food in my 20 liter food bag I now had to carefully pack it, fitting smaller items in the spaces between the larger to reduce volume. Fully packed with 5 days of food and three liters of water, the Gorilla felt dense but carried much better than my old pack. The center of gravity of the pack was much closer to my body than my old pack and the shoulder straps were much more comfortable with very thick padding. The pack’s frame did an okay job of transferring weight to my hips, I would estimate about 50-75% of the 30 or so pounds the pack weight versus the 25-50% of my frameless pack. I also found that the size large fit my 21 to 22 inch size torso perfectly without much of a gap between the shoulder strap and my back. I would not recommend buying this pack if your torso measures significantly larger. I also immediately noticed several minor things I didn’t care for on the pack. Gossamer Gear sized the straps that cinch the lid and compression straps on the side of the pack excessively long and included clips on the ends of the shoulder straps. The shoulder strap clips are supposed to be clipped together to create a second lower sternum strap but the shoulder straps were the only straps not sized extra long! I tried to remove them to trim a little useless weight but was only able to get one off without pliers. In the end I decided not to cut the straps since I could foresee using the extra length for strapping snowshoes or ski’s to the pack in the distant future, which I do now. Further, the size large torso length is several inches longer than the 20-inch Gossamer Gear Nightlight sleeping pad I know and love. That meant the pad rides up the pack as you hike and exposes the lower 2 inches of the hip belt. It’s not a big issue and can be mitigated somewhat by stuffing your extra socks or liner gloves into the top of the upper pad pocket. Rachel did not have this problem with the size small pack using the same sleeping pad as her pack is shorter. Hopefully in future versions of the Gorilla, Gossamer Gear will attach the mesh pad holder separately from the top of the pack and lower so solve this issue. Backpanel view showing removable sit pad. In Use I really like the traditional layout of ultralight packs which consist of one large pocket and several exterior pockets and the Gorilla follows suit perfectly. A typical day for me involved stuffing my sleeping bag into the bottom of the pack sans stuff sack but inside a waterproof trash compactor bag, piling my sleeping clothes on top, closing the compactor bag, and adding our Fly Creek UL2 tent and gas canister on top. Next in was the 1/8” foam sleeping pad I double over and put under my legs. My food bag sat on top of everything and was accessible by opening the main compartment of the pack and held in place by stuffing my down jacket around the edges. My maps, first aid kit and repair kit, and electronics would slide in between the food bag and front of the pack. My wind jacket, rain skirt, stove, and pot lived in the front mesh pocket and umbrella in one of the side pockets held in place with the side compression straps. While hiking I could easily reach either water bottle, eat snacks from one hip belt pocket or use my camera from the other hip belt pocket. If I needed the next map, it was easily accessible in the top of the pack. Lunch breaks just meant opening the pack and accessing my food bag. Being able to continue moving without stopping for food and water is the key to putting in those big miles. The pack is not waterproof but in my experience everything waterproof eventually wears holes so you end up using some kind of pack liner anyway. The Robic fabric also doesn’t seem to soak up as much water as silnylon so a pack cover wasn’t needed. At camp, I would remove the food bag and immediately be able to access our tent, stove, down jacket, and food. The sleeping pads, sleep clothes, and quilt would come out last inside the tent. This system negates any need for a sleeping bag or other compartments in the pack, simplifying the design and shedding the weight of additional zippers, seams and fabric. After 3,000 miles, the Gorilla has impressed with its durability. 3,000 Miles Later It goes without saying that if I didn’t replace the pack for 3,000 miles that I must really like it. To me, it’s a good compromise between weight, durability and load carrying capacity. I also find the size and shape of the pack to be perfect for what I carry for 3-season backpacking and exceptionally good for off-trail travel. The narrow shape doesn’t snag on brush and the small size means my balance isn’t thrown off as badly on talus or scree as a larger pack would. However, this is a review and I want to delve into the nitty-gritty. That said, I did have some minor issues. The pack shoulder straps start extremely fluffy but quickly compress. On my size large the solid material that actually carries the load is only about half the width of the shoulder strap and squishes down the foam within one to two hundred hours of use. This puts more weight on a narrower section of the shoulder straps so I did experience some discomfort, but only with more than 25 pounds in the pack and only after hiking for close to 2 hours without taking the pack off. Part of the problem is because the hip belt lacks shape and doesn’t do a the best job transferring weight to my bony man-hips; it’s basically a rectangle with rounded corners and a wide strap across the center. In my experience hip belts with two strap attachment points further back from the edge of the belt contour to your hips better and transfer the load more efficiently – like the ULA hipbelts. In fact, my girlfriend/hiking partner Rachel converted a ULA hipbelt to work with her Gossamer Gear Mariposa by removing the Velcro and replacing it with the opposite type to match the Mariposa Velcro – apparently an easy thing to do for something with some sewing abilities. She says it made a huge difference and recommends buying the Gossamer Gear pack and a separate ULA hipbelt (if you can sew) since Gossamer Gear sells the packs without hip belts. I did not do the same because it was a minor enough problem that I could just ignore it. Like I said – it’s a compromise. You can’t expect a 26 ounce pack to carry weight like a traditional 50+ ounce pack. Other minor issues include the fact that the trekking pole holders don’t work when you set the pack on the ground. The pole tips easily push up out of the holders and the poles fall out. I think you’re better off securing them upside down in a side pocket with the side compression straps. Also when using an ice axe, the handle is secured with the top lid of the pack strap – presumably to save weight over using a dedicated Velcro loop. However, if you want to open the pack you now have to let the ice axe fall to the ground and re-secure it when you close the pack. Both are minor inconveniences but could be redesigned with just a minor increase in weight. Also a note about the weight – my pack with hipbelt and aluminum stay but no foam back pad weighs 28.5 ounces while the listed weight for the pack and hipbelt in size large is 24.8 ounces. Where the Gorilla really shines for an ultralight pack is durability. Rachel and I saw many lightweight packs fail completely on the CDT but both of our packs held up exceptionally well. Rachel’s pack had virtually no wear on it by the end of our trip, mine has multiple small holes in the front mesh, significant wear on the lower pad mesh pocket, and one tear on the water bottle pocket where it got snagged on a door latch in town. I did tear some cosmetic stitching from the right shoulder strap and reinforced it with dental floss but that was over 1,000 miles before we finished hiking with no further damage. The remainder of the stitching is in great shape. Most impressively, the hip belt zippers lasted the entire trip which to me is almost inexplicable for a zipper. Considering the amount of talus our packs were dragged across and the number of barbed wire fences we crawled under, this is a very small amount of wear for a 26 ounce pack. I think with some minor repairs to the mesh pad pocket I could easily get another multi-thousand mile hike out of this pack. Even better, it has replaced my old winter day pack as the lid easily fits snowshoes since I left the straps long as previously described. The Gorilla has proven to offer a good balance for a thru-hiking and backpacking pack for up to 7 day stretches. Conclusion Overall and in the lightweight backpack market, the Gossamer Gear Gorilla strikes a great balance between comfort, weight, durability and price and is best suited for lightweight, low volume loads for trips up to 7 days long. The pack does exceptionally well with off trail travel and is very user friendly. An average user could easily expect this pack to last a decade or more. There are some minor inconveniences that I hope Gossamer Gear will address with the next generation but in day to day use these issues amount to very little. In summary, and while there’s room for improvement my experience the Gossamer Gorilla was very good and it’s a great choice for those looking for a suitable long-distance pack that can handle the miles. The Gorilla backpack retails for $275 (with a hipbelt) and can be found at Gossamer Gear. The Author Mike "Hiker Box Special" Henrick and Rachel "Heartbreaker" Brown spent 8 months of 2015 backpacking over 3,600 miles across the American West on the Arizona, Continental Divide and Grand Enchantment Trails after meeting just two months prior. Mike thru-hiked the Pacific Crest Trail in 2013 and has been bike touring, backpacking and traveling since 2008. Look for more stories from Mike and Rachel's hikes in future issues of TrailGroove Magazine and on the TrailGroove Blog.5 points
-
awesome giveaway. Thank you for the chance .5 points
-
It's kind of an interesting line of questioning to ask if something is necessary. You don't "need" a backpack. You can easily fold a tarp up into a pouch to hold all your gear and hang it from a sling. But not many people would make an argument not to use a backpack, despite the significant expense. Continuing the thought process, you don't need a tent, a tarp is just fine. You don't need a cook kit or water filtration, as you can cook on a fire or boil water to drink. Bottom line, most things in this hobby are optional. We choose to use things that make the experience more enjoyable and safer. As do trek poles.5 points
-
Note: This giveaway ended 10/30/15. For fall, we're giving away a brand new Helinox Ground Chair, (Reviewed here in Issue 23) a ~22 ounce chair that's great for those more relaxed backpacking trips, day hikes, or even while car camping or just about anything else you can think of. We'll also throw in a TrailGroove hat or shirt of the winner's choosing! How to Enter: Leave a comment below on this blog entry describing the single backpacking/hiking luxury item you'd never leave behind on a backpacking/hiking trip, and why that's the case. Your comment counts as one entry. Once entered, head over to the forum for an additional entry per post between 10/24 and the giveaway drawing. (Maximum 10 entries total) Entries end Friday 10/30 at 5 p.m. Mountain Time. We'll randomly draw one winner from available entries and we'll contact the winner via a private message. The winner will receive a brand new Helinox Ground Chair, and we'll throw in any shirt or hat from the TrailGroove Store. Premium Members automatically receive an entry into the drawing, and can earn up to 20 total entries! The Fine Print: For entries to count, the posts should be applicable to backpacking, hiking, the outdoors, etc., and at least somewhat constructive. For instance, we won't be able to count intentionally repeated posts, one word posts (Unless it's a really good one word post), or posts that don't meet our basic forum guidelines agreed to when you register. Essentially, we'll be able to count all normal discussion. Thanks for visiting, and good luck!4 points
-
In the summer of 2009 I was sitting in a hotel room in Hirosaki, a small city in the far north of Japan’s main island of Honshu, eagerly anticipating my upcoming hike. It was to be the second big hike I’d ever gone on in Japan, and I was determined that unlike my first journey into this country’s wilderness, this one would be perfect. Unfortunately for me, though, neither of the two friends I was traveling with seemed particularly enthusiastic about hitting the trails, and we had yet to make the final decision as to whether or not we’d even be going out to the mountain. The reason we had yet to decide was because, as I had recently discovered, I’m not always the best at planning a trip. This is also where my two as-yet-unconvinced hiking partners come in, because this hike was in fact only one small part of a larger trip I was on with my friends Dan and Brian. Dan was visiting Japan for a few weeks on vacation, and Brian and I were showing him around. Since I lived in the north of Japan and Brian lived in Tokyo, we’d agreed to split the planning of this trip between us into northern and southern portions. For the southern leg of our trip, Brian had created a detailed spreadsheet of activities, including concerts, restaurants, shops, attractions, events to see, plans about reservations and tickets, and even scheduled down time. Along with that, he demonstrated a willingness to be flexible with regards to Dan’s interests and abilities. I, on the other hand, had little more than a bulleted checklist scribbled on a piece of paper. Despite that, though, and in the face of numerous other difficulties involving transportation during one of Japan’s biggest and most travel-intensive holidays, we had arrived here in Hirosaki, near the base of Mt. Iwaki, and it seemed like the perfect place to go hiking if you needed to keep a flexible schedule. There’s a toll road that goes most of the way up the mountain, with buses that run along it every so often, and also a cable car from the parking lot at the end of the road that takes customers to within half an hour of reaching the peak. In other words, if the object of the trip was to quickly get to the summit, enjoy the view, and get back to town, that could easily be accomplished. On the other hand, for someone more interested in an authentic hiking experience, there is also an old path starting at a Japanese shrine where you can trek up the mountain from its base. According to the internet, the estimated time from the start of this trail to the summit was about four hours. Armed with these facts, I made my case for climbing the mountain to my two friends who were, it seemed to me, leaning towards just getting out of this place already. I argued that we could spend the full four hours climbing up from the base, then take the cable car down the other side and catch a bus back into Hirosaki. This would both save us some time and give us the chance to see all that the mountain had to offer. I would have liked to take the trail both ways myself, seasoned hiker with one whole mountain’s worth of experience that I was, but I knew my friends probably wouldn’t go for it. Somehow I managed to convince them that this would be a good idea, and then it was merely a matter of coordinating how we would get to and from the mountain, which was about an hour outside the city. I found out when the last cable car ride would be, and we based the time we would need to arrive by off of that. Remembering the rain and mud from my last hike, I was also quite sure to check the weather repeatedly, but the forecast was for a nice, sunny day. It looked like everything was good to go. Looks, however, can be deceiving, and by the time this hike was over I’d be wondering whether I should ever be allowed to plan anything ever again. To begin with, we were not well prepared. Nobody had hiking gear of any kind except for Brian, who’d thought to bring along a backpack that we used to store a few bottles of water. Also, there was the issue of finding the trail that we hadn’t considered. Since there’s a perfectly accessible parking lot and cable car on the other side of the mountain, not many people walk the path from the shrine anymore, leaving it a thin, overgrown thing that was a real challenge to locate at times, especially at the beginning. At the shrine Hiking Mount Iwaki Fortunately, we could ask for directions at the shrine, and as we started on our way we discovered an old signpost that told us how far we had to go in both distance and time. Once again the time estimate was about four hours, and we wasted no time beginning our ascent. Or at least, we soon began fighting our way through the woods. The first part of the trail was so thick with vegetation that it was difficult to go forward. Also, a lot of the greenery had grown up over the top of the path, making it nearly impossible to stand up straight. So we all hunched forward, stumbling along a thin path through the woods with what we all hoped was the trail turning to mud at our feet. At first I wasn’t sure why there was any mud involved at all, since the forecast had been so promising, but we soon found that the path involved crossing over a small stream before starting up the mountain in earnest. We also discovered another error in planning on my part, because though I had checked the weather, I hadn’t paid attention to the temperature. Yes, it was the middle of summer, and I knew it would be fairly hot, but Aomori is located pretty far up north and the weather had been mild for the past few days. How bad could it be? As it turns out, it could be very bad indeed. It got so bad, in fact, that within half an hour of starting up the trail I was already drenched in sweat. I felt miserably hot, my clothes had been reduced to a soggy, clinging mess, and I was stumbling along through the mud unable to even stand up straight. Besides all that, I had only the most vague assurance that the path we were following was actually the correct way up the mountain. All I could count on was that the plants were so thick everywhere else that this seemed like the only viable option. When we got to an area where things finally cleared up a bit and everyone could stretch out and rehydrate, thanks to Brian and his carrying that water, we were nearly on the point of turning around and putting an end to this once and for all. Two things stopped us. First was the thought of having to walk all the way back through the area we’d just gotten out of. Second was the signpost that we discovered collapsed nearby. Like the first post, this one included an estimate of how much further we would have to go in order to reach the summit, and despite our having only been on the trail for half an hour, it clearly said we were now only three hours from the top. This was extremely encouraging, since it meant we were moving about twice as fast as the estimates had indicated that we would. Still feeling pretty miserable, but emboldened and not wanting to retread the terrible section of trail we’d just staggered through, we continued on our way. Every now and then we’d pass another fallen signpost, and joke about the strength of our long foreign legs. After all, we were practically flying up the mountain, and the path itself seemed to reflect our newfound sense of confidence. Vegetation became sparse and less intrusive. Once or twice, we could actually look back out over the trail we’d covered and get a sense of how far we’d come. This was turning into quite a pleasant hike. After we’d been on the trail for about two hours, though, we began to get tired. A nonstop uphill climb does take its toll after a while, and some parts of the trail were very steep. Still, we reasoned that by now we must be closing in on the summit, and since we’d caught sight of a couple of hikers coming down the trail in the opposite direction, we decided to wait and ask if we were anywhere close to the summit. One of the two hikers looked at us like we were crazy and said we were a good two hours or so from the top, while the other jokingly answered that yes, we could just go straight for another five minutes and take a left. Confused by this advice, we decided to simply continue on, hoping for the best but aware that we may in fact still have a long way to go. What we were close to, it turned out, was the mountain hut, which in this case was just a small, unmanned rest house. There we looked over the maps and signposts on display and, much to our chagrin, found that we had only traveled a little more than half the distance to the summit. So much for those long foreigner legs of ours. Apparently we were in for a four-hour climb after all. This was of course dispiriting, but I didn’t let myself feel too down about it. If it hadn’t been for that earlier mistake, we might never have made it this far. And now that we were this far, things only seemed to be improving. The increase in elevation had tempered the heat, the trail was now clearly marked and well-traveled, and we’d reached a natural water source where we could rest and replenish our supplies before moving on. It was as if the higher up the mountain we got, the better everything else was getting too. This even seemed to include the scenery. Up until now, we’d mostly been looking at small shrubs and tree roots while watching out for overhead branches and focusing on the trail. Now we’d reached the point where the trees had mostly stopped growing, so when we looked around we could see lots of deep green grasses, rich mineral hues in the rock faces, and an expanse of forested areas and farms below. There were also long, thin clearings with houses and shops clustered around the barely-visible lines of roads beneath us, faint signs of modern life in an otherwise green landscape. Before long, clouds began blowing past us on the mountain as well, many of them below us now, obscuring the path we’d been climbing and covering our surroundings with a bright sheen. It made it feel as if we were walking along at the top of a world untouched, still wet and fresh and new. Then, as we got to within half an hour of the summit, just before our path merged with the one leading up from the cable car, there was a brief flattening of the mountainside, revealing a peaceful pool of water surrounded by green grass and wreathed in mist. There was a kind of serenity to the place, emphasized by the feel of the now-cool mountain air on my skin, the fresh alpine scent, and the pervading sense of natural isolation. It was a stirring sight, one that would almost have made all the trouble we’d had at the beginning of the climb worth it in and of itself. Towards the top, the landscape suddenly seemed to transform. To the Summit All three of us took our time admiring this sudden transformation of the landscape, until finally we had to move on. Then the path led us to a change just as abrupt as when that pool had come into view as soon as we’d gotten over the next rise. We’d reached the final section of the hike, where the path grew crowded with people who’d taken the easy option and the entire area grew rocky. Despite the sudden presence of these crowds, though, by the time we reached the summit, it felt magical. There was something almost visceral to the feeling that I was now standing on a giant piece of rock thrust up above the clouds, surrounded by both friends and strangers alike. After four hours of almost constant climbing I was thoroughly exhausted, but also immensely satisfied. The scenery had been amazing, and the act of actually climbing the whole way made me feel both accomplished and like I’d had a much deeper experience with the mountain. The hike itself had almost perfectly mirrored my feelings about it, starting out difficult and conflicted, and constantly improving as we went along until finally culminating in triumph. Still, I was glad that we planned on taking the bus back into town. My friends seemed to have had a similar reaction to my own. There had been a number of moments when we had seriously questioned hiking the mountain at all, not to mention tackling it the way we had, but everyone was happy we’d decided to do this in the end. So, feeling both tired and proud, we all climbed into one of the last cable cars and descended to the parking lot nearby where we planned to catch a bus. And that’s when we discovered that the last bus had, in fact, left hours ago. This is not the kind of problem one expects to encounter at the end of a hike, nor is it an entirely welcome one to deal with when you’re exhausted. Since we’d gotten off the lift so late, we were now pretty much the only people left on the mountain. The sun would be setting soon, and even if we did manage to get a ride down to the edge of the toll road, we were still at least 45 minutes outside Hirosaki, where our hotel was. To top it all off, after all our efforts to cool down when we were at the base of the mountain, here at the summit it was quite chilly. Once again, I’d failed to plan appropriately, and we were all essentially stranded. Fortunately, I had made sure to get the number of the local taxi company the previous day, and I had a working cell phone signal, so I was able to call and have them send a car. It was to be the most expensive cab ride of my life. But even with everything that went wrong, still more had ended up going right. Somehow, we’d all managed to have a great time out on this crazy hike, and that made me feel like maybe it would be worth planning more trips like it in the future. Need to Know Information Mt Iwaki (岩木山) stands as the highest peak in Aomori prefecture with an elevation of 1,625 meters (5,331 feet). It is also sometimes referred to as “Tsugaru Fuji” because of its conical shape and its location in the Tsugaru region of Aomori. An inactive volcano, its last eruption was on March 23, 1863. No permits are required to hike it, and the toll road leading to a chair lift on one side of the mountain makes it a relatively accessible climb if you’re in the area. (in Japanese) The website can be browsed for the timetable of the bus that runs to the Mt. Iwaki Shrine and Dake Onsen. It also includes the relevant times for the Skyline Shuttle bus in blue. The table on the left with pink headers includes times going to the mountain while the table on the right with blue headers has the times heading back to Hirosaki station. Times listed in red do not run on weekends or holidays. Best Time to Go Mt. Iwaki is most safely ascended between early June and late October. During the winter there is an avalanche risk near the summit, and there can be quite a lot of snow on the mountain until after the rainy season. My recommendation would be to climb it in late June or early July as that will also be your best chance at seeing a unique variety of primrose (known as the Michinoku- or Iwaki-Kozakura) near the 9th station (located at the top of the chairlift). Getting There For the shuttle to the chairlift, catch a bus going to Karekidai (枯木平) from stop number 6 outside Hirosaki station. Get off at Dake Onsen (岳温泉) and transfer to the Skyline Shuttle Bus (スカイラインシャトルバス) heading for the 8th station (八合目). The chairlift will then take you to the 9th station where you can easily hike to the summit. Note that the Skyline Shuttle Bus is not in operation from mid-November to mid-May. For the full hike, take the same bus from Hirosaki station but get off at the stop for the Mt. Iwaki Shrine (Iwakisanjinjamae [岩木山神社前]) instead. Maps See the official website for further details and maps. Books While there aren’t any books specifically about Mt. Iwaki, it is one of the 100 famous mountains of Japan, which were originally chosen by the author Kyuya Fukada in his book of the same name, a translation of which is now finally available in English here on Amazon.4 points
-
It is one thing to conceptually understand that you have the gear to bivy at 7,500 feet in the Northern Rockies with a forecast of six degrees below zero. It is another thing entirely to find yourself in circumstances where you end up having to do exactly that. And it was in such circumstances that I found myself on the last night of the year. Perhaps I shouldn’t have turned down that invitation to a New Year’s Eve party after all. At the trailhead The Trip Begins I left home that morning later than I would’ve liked and drove for more than five minutes but less than five hours to the trailhead. Montana, Idaho, Washington, Wyoming...all within striking distance given the equation of time and space using motorized transportation. Discretion is the better part of many things in life, including keeping special places special by not indiscriminately broadcasting their details on the Internet. Hoisting my pack and stepping into snowshoes shortly after noon, I began what would be one of the most challenging hikes I’ve ever had the joy of undertaking. From where I parked to the lookout tower where I planned to spend the night was a bit over five miles. The last two miles gained over 2,000 feet of elevation in the final ascent to the ridge. Intimidating, but certainly not impossible. I had gone less than a hundred feet up the road (the first three miles were on a snow-covered road, the remainder on an indistinct trail) before I recognized the enormity of the effort that would be required. I was sinking in at least half a foot with each step and the weight of the snowshoes on each foot conspired with gravity to make each step forward feel like it used twice the effort, and twice the muscle groups, as it should have. Given the conditions, I made surprisingly good time on the first section, arriving at the “summer” trailhead in just under two hours. Blue skies and temperatures in the mid-teens made it a crisp, beautiful day. The sun glowed warmly without the faintest atmospheric obstruction and was high enough to allow me plenty of time to cover the remaining ground at a reasonable pace. I sipped some water, ate a quick snack, enjoyed some coffee from my thermos, and began the crux of my trip up to the lookout tower. Two thousand feet of climbing in just over two miles, in snowshoes, with a winter-weight pack, is not a task to underestimate. Add in the fact that the guidebook noted some minor routefinding issues and it goes without saying that the last section of this hike required mental effort commensurate with the physical. In good shape and experienced with backcountry navigation, I deliberately and confidently began the uphill grind. And it was a grind in every sense of the word. I found myself having to stop much more often than anticipated simply to catch my breath. I also found myself having to stop much more often than I would have liked to make sure my sense of direction was functioning correctly. Attempting to follow the trail would have been a futile effort, although our paths did overlap from time to time. Two feet of snow made it indistinguishable for most of its length, even to a keen eye, but I did pick up on it for several sections of switchbacks as I climbed toward the ridge and the shelter of the lookout. Sidehilling for a mile or so in snowshoes with a pack is physically demanding. On the bright side, it turned out to be a great warm up for bootkicking steps into ridiculously steep sections of mountainside to continue forward and upward progress. In a cruel twist of fate, just as the terrain reached its zenith of difficulty, I began to notice the unmistakable signs of fatigue and a hint of minor frostnip in my toes. It was taking me longer to get up when I fell; and I fell more times than I can count on two hands. I couldn’t catch my breath. Snack, water, and coffee breaks helped, but were a double-edged sword. The brief respite from activity amplified the chilling, damp discomfort in my toes. I’d figured my normal high-top, waterproof hiking boots would be sufficient for this trip. Wrong. Proper snow boots are now at the top of my fortunately short list of gear to buy. It was late in the afternoon, during one of the bittersweet breaks, that I found myself confronted with the possibility that I might not make it to the lookout. This was concerning, but not panic inducing. Nothing I could do but continue on until I reached the lookout or an alternate reality for the evening was imposed on me. So onward I pushed. An alternate reality was imposed on me about a half-hour before sunset when I reached the ridgecrest, exhausted, knowing that regardless of how close I was to the lookout that continuing vaguely toward it, with my right thigh cramping, my toes numbing, and judgment declining, would be foolhardy and unsafe. Part of good judgment is knowing how to avoid situations where you will be tempted to make a bad decision. Setting up a bivy seemed to be a more prudent choice than pushing toward the lookout in steep terrain, fatigued, in the dark. So that is how on New Year’s Eve I found myself stamping out a spot in the snow to throw down my bivy sack, insert my sleeping pad and sleeping bag, and spend the night under the stars. I’d picked as nice a spot to bivy as possible – reasonably flat, sheltered by a few trees, and oriented for maximum exposure to the warming rays of the morning sun. All things considered, I was rather comfortable after changing into dry baselayers, a midweight wool layer, a down jacket, and sliding into my sleeping bag. By the time I’d gotten myself situated and was ready to fire up my stove and make dinner the first stars were shining overhead. It was when I attempted to pressurize the stove (MSR Whisperlite) that I experienced an “Oh, crap...” type of moment that can make the hair on the back of your neck stand up. This was due to the fact that the plunger on the pump system was seemingly stuck and nearly impossible to operate. I figured maybe it was frozen, so I wrapped it in a bandana and put it against my body, ate a large chocolate bar, and waited for it to warm up. Fifteen minutes later and still no luck. This was going to take some troubleshooting. I’d spilled some curry paste on the plunger last winter during a cross-country ski tour, but had replaced everything affected by that culinary catastrophe, including the rubber pump cup. But this problem showed eerily similar symptoms, and lo and behold, it was a faulty pump cup. Tired as I’ve ever been, in single digit temperatures, I replaced and lubricated the pump cup by headlamp and hoped for the best. The sight of the flame priming the fully pressurized stove was one of the most beautiful things I’ve seen. That flame meant warm food, warm drinks, and plenty of water from melted snow. It’s absence would’ve meant gorging on Clif bars and trail mix, rationing my remaining half-liter of water and mixing it with a handful or two of snow at a time to melt inside my sleeping bag, then hiking out the next morning. But the flame was there, the stove repaired, and I enjoyed perhaps the best tasting pasta and tuna, with fresh spinach, mushrooms and grated cheese mixed in, that I’ve ever had. After devouring my dinner, I filled my thermos with hot chocolate, filled two Nalgene bottles with warm water from melted snow and dropped them into my sleeping bag, organized my gear as best as I could, and then took two sips of single-barrel bourbon before laying down and gazing at the stars until I feel asleep. Happy New Year’s. I slept soundly and warmly through the calm night, but woke up a few times just long enough to notice that the constellations had shifted and that time wasn’t standing still. I awoke around sunrise and laid in my bag patiently waiting for the warming promise of the sun to be fulfilled. Taking it slow, it wasn’t until 10:30 a.m. that I found myself packed up and heading toward to the lookout. In an amusing twist of fate, I’d camped less than a quarter-mile from the lookout. From the time I left my bivy site to the time I was opening the door on the lookout was no more than half an hour. I don’t think I’d ever been so glad to see a manmade structure in all my years of backpacking. And what a setting the structure was in! Endless mountain views, with several mountains above 9,000 feet pushing skyward, and one peak over 10,000 feet being the focal point of one of the grandest skylines I’ve seen. The lookout tower is an indescribably special place. No locks, no fees, no reservations. Officially abandoned by any government agency, it is for use at your own risk and for your own pleasure. Some great stories are recorded for posterity in the logbooks and the worn floorboards and weathered shutters tell a story of their own. Unsung heroes keep up with the constant maintenance informally but effectively. I entered the lookout and set about reversing the task I’d completed less than an hour before, pulling gear out of my pack and arranging it in some semblance of order. While nothing was exceedingly damp, I took advantage of the clotheslines stretched across the ceiling and aired out all the gear and clothes I wasn’t using or wearing. As I made my way around the lookout’s catwalk and opened the shutters, I took time to appreciate the stunning vantage from each cardinal direction. Sun filled the lookout as I organized my gear and my thoughts, spending much more time with the latter than the former. The day unfolded at a perfect and purposeless pace, with my only accomplishments of note being much needed stretching, reading all the log book entries (including one dated September 11, 2001; the author completely unaware of the tragic events unfolding in the world at large) and arranging the notebooks in chronological order. I arranged the entries in subject order in my head; you can take the man out of the library but you can’t always take the library out of the man. Although there was a cast iron stove and plenty of firewood, I decided to forego that luxury and simply wore enough layers to be comfortable. Although it was in the low 20s outside, the sunlit sanctuary of the lookout was noticeably warmer, or at least it felt that way. I paged through a year-old magazine, reading an enthralling article about ancient manuscripts saved from looters in Timbuktu, and ate a delicious mid-afternoon snack of white cheddar cheese, gouda cheese, and jerky, washed down with a few sips of bourbon. It was New Year’s Day and, in my defense, my ability to celebrate on New Year’s Eve was a bit hindered by location and circumstance. Here’s to hard-earned and delayed gratification, the best kind in my humble opinion. Wanting to make the most of the amazing view from the catwalk, I brewed up some tea just prior to sunset so I’d have a warm beverage to sip as I soaked up the sunset with every sense available to me. Tasting the air, seeing the colors meld together and simultaneously lighten and deepen, truly hearing the silence and the creaks of the catwalk which occasionally interrupted it, feeling the chill breeze across my face. That was the easy part. Trying to fully contextualize myself and better appreciate such a vast landscape proved impossible. Gazing out at mountains near and far and mulling over the passing of another year, one of millions seen by the mountains and one of less than a hundred I’ll likely see, themes of timelessness and endlessness were hard to avoid. The phrase “forever ain’t as long as it is wide” came to mind and never really left for the rest of the evening. I ducked inside to enjoy dinner, then put on all my insulating layers and took my closed-cell foam sleeping pad out onto the catwalk for a four-hour shift of stargazing. Artificially and unnecessarily aided by a choice selection of music and bourbon, I laid outside from 7 p.m. to 11 p.m., moving from one section of the catwalk to another and laying on my back gazing up at the stars with an attentiveness bordering on entrancement. After seeing a dozen shooting stars and the Milky Way establish itself with awe-inspiring intensity above the silhouetted mountains, I called it a night. Zipping myself into my bag in the shelter of the lookout was a much more reassuring way to transition to a night of sleep than crawling into the bag inside a bivy sack. My first night of rest in the new year was blissful. However, determined to use the perspective of the lookout to its full potential, through sheer force of will I removed myself from the comfort of down feathers and synthetic fabrics, placed my feet on the frigid floorboards, arose and dressed, and exposed myself to the elements to witness the beauty of sunrise. The second day of the new year dawned crisp, clear and full of promise – my spirits rising with the sun and my soul swelling. The power of place and rejuvenation resulting from a pure focus on the beauty of the workings of the planet cannot be understated. Dawn and dusk from the lookout added incredible colors to the already stellar view. The Trail Out As the sun rose in its inevitable arc above the mountains and it rays illuminated the landscape, I packed up my gear and attended to closing up the lookout. Shutters were lowered and latched. The floor swept, the tables wiped down. Leaving the lookout was an emotional challenge on the same level with the physical challenge of arriving. It’s always incredible to me the sense of comfort and sanctuary that can be gained from spending less than 24 hours in such beautiful and special places. I followed my tracks on the descent, but also opted to shortcut them in a few places. Owing gratitude in no particular order to gravity, a substantially lighter pack from consumption of food and fuel, and the lack of routefinding, my descent took half the time as my ascent had two days prior. For the second day in a row, the sun shined with a pleasant ferocity that allowed every aspect of the environment – the snow, the ponderosa pine bark, the spruce needles – to shine with a radiant and contagious joy. I made it back to the trailhead early in the afternoon, stretched, changed, and put the wheels in motion to return home. This brief trip gave me much to ponder on the way home. I’d ended up with more “adventure” than I’d planned on, but not more than I was prepared for. Not necessarily a bad thing in backpacking or when applied to most aspects of human experience. The passing of one year to the next and of life and time in general weighed heavily on me as I traveled along the highway at 55 miles per hour, which was about 55 times faster than my pace had been when I was passing through the forest on my way to the lookout. The thoughts on existence and emotion that I’d found myself immersed in at the lookout continued to run through my mind on the drive home. While the drive had an end in sight, the sentiments seemed to be infinite in nature. As usual, I found myself comforted by poignant lyrics which fit the time and place perfectly, and which seem a perfect way to end this particular trip report: There’s a stretch of road in Wyoming across a timeless interstate You can drive a hundred miles and not see a Wyoming license plate Just some truckers and some hard-luck bands on tour In stormy weather Nobody actually lives there, they’re all just passing through... We’re only passing through We’re all just passing through We’re passing through indeed, through life and landscapes, with people and places changing at varying paces. Sometimes predictable, sometimes not. I can only hope that I pass through more places as special as this lookout and remember to truly value the people in my life who are passing through it with me and to whom I return from my journeys to the backcountry. First light illuminating the high peaks Need to Know Information For liability, specific information about this lookout is not included. Many books, listed below, provide information about lookout towers and information about visiting and/or renting them if available. You can also search recreation.gov for "lookout" and see which lookouts are available for rent. For more on backpacking to fire lookouts, see this Issue 44 article. Maps & Books Numerous books provide information about lookout towers; this list is a great place to start. Plenty of books are available such as Fire Season: Field Notes from a Wilderness Lookout as well as Hiking Washington's Fire Lookouts. The Forest Fire Lookout Association has a wealth of information on their website. The Author Mark Wetherington is an avid backpacker and occasional writer. Since 2008 he has attempted, with varying degrees of success, to spend 10% of each year on backpacking trips. Born in Tennessee and raised in Kentucky, he now lives on the edge of the Selway-Bitterroot Wilderness in Montana.4 points
-
In typical backpacker fashion, I did my solemn duty of taking off the Thursday before a federal holiday falling on a Friday to schedule a two-night trip followed by a day of rest. A stroke of good fortune allowed me to book Christmas Eve and Christmas night at a small, rustic Forest Service rental cabin in the mountains of the Beaverhead-Deerlodge National Forest. Given the frigid forecast, it was well worth the nominal fee to know that after skiing around all day I’d have four walls, a roof, and a wood stove to wind down in and not have to put in the full effort required of winter backpacking in the northern Rockies. Skiing to Hogan Cabin Parked at noon on Christmas Eve, I skied away from Chief Joseph Pass under overcast but nonthreatening skies. It was in the mid-teens, but I shed my hardshell jacket within a mile of the trailhead. I’d forgotten how much effort cross-country skiing with a pack took and was grateful that it was only six miles to the cabin, on a slightly downhill grade. My gratitude mixed with distraction and enchantment at the snow-covered landscape and my blissful inattention led to me missing the painfully obvious turn to the cabin. By the time I reached the cabin, around 3:30 p.m., I’d skied closer to nine miles than the six I'd planned on. I rarely comment on footwear, but I was glad to be out of ski boots and in down booties as I worked at getting a fire started in the wood stove. As a consistently non-traditional individual (please forgive or embrace the contradiction), I spent Christmas Eve in a quintessential Christmas scene, sitting beside a crackling fire watching snow fall from the window of a snow-covered cabin in a stand of evergreens on the edge of a meadow, while doing absolutely nothing related to Christmas. I stretched to try and loosen up my muscles, with a slight degree of success. I unpacked and arranged my gear in what seemed like a logical manner. I listened to a bit of music (Palace Brothers) and read from a travel-worn book of poetry by David Berman and from “Outer Dark” by Cormac McCarthy. Each of these three were perhaps equally incongruent with the time and place, but somehow it worked. After a filling meal of mushroom ravioli and pesto, and a glass of pinot grigio, I took a brief stroll outside to admire the scenery. It was too cloudy for moonlight skiing, but perfect conditions to stand outside in the single-digit temperatures and ponder the vastness of the planet with as much or as little effort as desired. I tucked myself into bed at an embarrassingly early hour and hoped that Santa might bring some fresh muscles to me overnight. I awoke on Christmas morning to a chilly cabin, slightly stiff legs, and an inch or so of powdery snow. No complaints. I made a quick breakfast, packed up my gear for the day, and headed out the door into crisp temperatures and a cloudy but clearing sky. About halfway through my 8-mile loop I encountered the trail groomer (the forest roads in the area are machine-groomed for skiing by the Bitterroot Cross-Country Ski Club) and stepped off the road to let him pass. We exchanged brief pleasantries and I received some unpleasant news. A close friend of the groomer’s had been solo backcountry skiing two days earlier and was missing; presumed dead. I offered my condolences and we spoke with detached but intense mortality about the dangers of beautiful places before wishing each other well and parting ways. Needless to say, that exchange didn’t exactly lighten my mood. It was a somber and introspective event as I skied back toward the cabin. Successfully resisting melancholy, I reflected considerably on the themes of loss, of love, of change, and rattled through my mental catalog of personal experiences in each category. The miles slid by on the freshly groomed road as people, places, and decisions streamed across my internal projector and bubbled into my consciousness. Some of these I examined with more purpose than others; some it was almost like watching someone else’s life, especially when speculating on the what-might’ve-beens. But as always, truth and reality were most certainly stranger than fiction or speculation. This should perhaps be a mere footnote, but I’ve always found strange solace when ruminating on loss or love, or loss of love, in the poetic profundity of a specific line in one of the songs penned by David Berman: I asked a painter why the roads are colored black He said, “Steve, it’s because people leave and no highway brings them back." Not exactly Zen Buddhism, but I’ve always found more than enough to ponder upon. And ponder I did – about certainty, finality, mortality. All good in moderation, I suppose. I arrived back at the cabin in mid-afternoon and immediately started a fire to warm the cabin. While waiting for the stove to heat up, I warmed myself by hauling a few loads of wood from the barn on a sled and splitting some for the next guests. More tired, both physically and mentally, than I had anticipated, I enjoyed some tea and read a few chapters before indulging in a brief nap. It was nearing dusk when I awoke and I stoked the fire, ate a large snack, and got excited about the clearing skies and the prospect of skiing under a full moon. It took a couple of hours, and I had to kill some time by reading, writing a letter to a friend, and taking a cautious sip or two of bourbon, but the clouds thinned out and I was able to enjoy the sublime pleasure of moonlight skiing. Gliding across an expansive meadow illuminated in a monochromatic and surreal light is something I would highly recommend. Not having to rely on the beam of a headlamp to enjoy a landscape after sunset is such a freeing and novel experience. The quiet, the beauty, the vastness – all were amplified by the moonlight and I skied aimlessly outside for the better part of an hour before returning to the cabin. I’d worked up an appetite and consumed my meal of Thai peanut noodles with chili-lime jerky and fresh-squeezed lime juice in record time. A satisfying meal any time or place, but particularly enjoyable on a cold night after skiing. I stretched some more after dinner and did what bit of pre-packing I could to ensure an early start and limit the chance I would forget something (I was successful on both counts). More reading and I was ready for bed; with a full stomach and tired body I fell asleep quickly. The Trip Out I woke a half-hour before sunrise and began packing up by lantern light. Two cups of coffee, a light breakfast, and a few simple housekeeping chores later and I was heading out the door. I stepped into my skies under an impossibly blue sky in temperatures a few degrees shy of zero and began the six-mile trip back to the trailhead. The trip out was pleasant and I was alone on the trail for the most part, although a caravan of snowmobiles briefly interrupted my reverie. In keeping with my eclectic entertainment choices on this trip, I listened to the criminally under-appreciated Beach Boys album “Friends”. Featuring excellent harmonies, but much deeper lyrics than their more radio-friendly material, this seemingly absurd choice was actually a great soundtrack. Certain lines just fit right in with the glorious sunshine and positive energy of aerobic activity in an idyllic setting: Your life is beautiful A seed becomes a tree A mountain into a sky This life is meant to be, oh Now is the time, life begins I reached the lively trailhead just before noon and it brought a smile to my face to see so many others out enjoying a beautiful day in the mountains. Not wishing to delay the inevitable, I packed up and changed into fresh clothes and then headed out. Rather than head straight home, I made the 40-mile detour to Jackson Hot Springs for a soak and a late lunch. It was a beautiful trip, which is a compliment I rarely pay to journeys taken on pavement, through the lonesome Big Hole Valley to Jackson. I think I saw as many mountain ranges as I did other cars. Pioneers, Beaverheads, Anaconda-Pintlers. Dodge, Ford, Honda. Soaking in a hot spring is a treat that needs no justification, but it always feels even better after a hiking or skiing trip. Watching steam float from the outdoor pool into the blue sky to mix in with the few clouds overhead was a great way to wind down what might be my last backpacking trip of the year. Forty-two nights backpacking in 2015, each one incredible in its own right. By the time I left the hot spring I was already planning well into 2016, thinking about which new places to explore and which favorites to visit again. All I knew for certain was that there wouldn’t be enough holidays or vacations for half the adventures I had planned. Need to Know Information Visitors are requested to sign in at the trailhead. Hogan Cabin can be booked via recreation.gov by searching "Hogan Cabin" and completing the reservation process. For additional information, call the Wisdom Ranger District of the Beaverhead-Deerlodge National Forest at (406) 689-3243. Getting There The trailhead for Chief Joseph Pass and its system of cross-country ski trails is located on Montana Highway 43 a mile or so east of the junction with US Highway 93, near the Montana-Idaho border. Missoula, Montana is the nearest major town (about 100 miles away), although most goods and services can be procured in Darby, Montana or Salmon, Idaho. Best Time to Go The best time to go is somewhat dependent on snow, but anytime from December to early March should be good conditions on groomed trails. Maps & Books Maps can be obtained from the US Forest Service ranger stations in the area, as well as a nifty brochure map published by the Bitterroot Cross-Country Ski Club that should be available at the trailhead registration booth. This area is also exceedingly well-signed, with maps posted on trees at each major junction. The Delorme Atlas and Gazetteer and / or the Benchmark Montana Atlas can help with getting to and from the trailhead, and can be a help when it comes to exploring other Montana hiking (or skiing) opportunities. For additional ideas on hikes in the state, see Hiking Montana. The Author Mark Wetherington is an avid backpacker and occasional writer. Since 2008 he has attempted, with varying degrees of success, to spend 10% of each year on backpacking trips. Born in Tennessee and raised in Kentucky, he now lives on the edge of the Selway-Bitterroot Wilderness in Montana.4 points
-
With so many places to explore in Montana, it might seem a bit strange to visit the same place for a second time – much less a third time. But one lake in particular has drawn me back to it three times over the last few years. My first visit to this lake was coincidentally my first summer in Montana. My eagerness for mountain scenery led me to visiting it so early (late May) that even though it had been a mild winter, the lake was still frozen over and although the scenery was magical I wasn’t able to fish it. That trip also resulted in a memory that made an impression on me and that I’ve succeeded in avoiding repeating – camping on top of slowly melting snow in a thunderstorm. It was four years before I would visit the lake again, this time in mid-June. I hoped the extra two weeks of warm temperatures would allow me to arrive right as the lake completed its thaw and might provide excellent fishing. No such luck – the lake was approximately 90% covered in ice, only a swimming pool sized area near the outlet stream was open water. I descended to a nearby and much larger lake that, a thousand feet lower, was totally free of ice and even warm enough for a brisk swim. Or perhaps it could better be described as “barely warm enough to not make hypothermia a certainty”. A few fish were rising on that lake, but none were interested in the flies I tossed out. It should be mentioned that this lake is not an easily reached or often visited body of water. The trail that leads up to it has long been abandoned and its description in a guidebook was equal parts discouraging and intriguing. Sweetening the description of a seldom visited, unnamed lake was the comment that “a cutthroat fishery thrives in these deep, cold waters.” I hoped to finally get to see for myself what swam beneath the lake’s beautiful waters that reflected sheer granite cliffs stretching toward the crest of the Bitterroot Mountains. According to the guidebook, I’d already succeeded in perhaps the toughest part of reaching the lake which is simply knowing where to begin the 1000 foot climb from the trail that passes along the shore of the lower lake. While that description – of the toughest part being where to know where to turn off onto the faint trail to the lake – may have been true a decade or two ago, since the trail has all but disappeared I would counter that the steep ascent from thick brush and downed trees is the most difficult part. After my most recent experience with hiking to the lake, I’m not entirely sure I will do it again. Conveniently, it will compel me to visit new areas. On the downside, it makes me wary of returning to an absolutely beautiful lake that has (spoiler alert) decent fishing and two stellar side-trip options, only one of which I’ve done in its entirety. Return to the Bitterroots On a beautiful mid-July day, I hiked the 8.5 miles to the large lake where I then began the real effort of my day – hiking another 1000 feet (I’d already gained 2000 feet to reach the first lake) off-trail to the unnamed lake where I would spend the night. Despite having done it twice before, the final push up to the lake really made a miserable impression on me this time. The steepness, the unstable footing, and the downed trees all seemed worse this time around. After finally making it to the lake, it was like seeing it for the first time as it wasn’t covered in ice. The beauty of this place had blown me away on the previous trips, but finally seeing it in its summer scene was incredible. Snowdrifts still abounded in the shady spots and some went all the way down to the shore of the lake. A lovely and tall waterfall provided a charming soundtrack as it cascaded down the granite slopes and entered the lake. I’ve been to over a hundred mountain lakes ranging from Glacier National Park, the Olympics, the Cascades, and the Northern Rockies and this is one is definitely among my favorites. After admiring the scenery and scanning the water for rising trout (none that I could see), I hastily set up camp and then headed over to a large granite ramp that went to the water’s edge and which would make an ideal place to cast from. A dozen casts later – perfect casts, in my eyes – I began to worry that maybe the trout, like the trail, had become a shadow of their former selves or disappeared completely from the lake. Between deep freezes and other environmental factors, it is not out of the question for lakes to go “dead” from time to time. Fortunately, a few casts later a beautiful cutthroat trout took my fly and ran with it. After releasing that fish, I began to see a few of the tell-tale circles dot the water and I realized that there were plenty other fish to catch. I caught another half-dozen trout before stopping to eat dinner and caught a few more after that. My luck didn’t hold out the next morning and I left the lake on a beautiful cross-country trip to a basin filled with beautiful (but fishless) tarns on my way back to the trailhead. Despite it not being a record-breaking outing for my personal fishing stats, I’d succeed in something I’d set out to do several years prior and that was a satisfying feeling. Apparently, the third time was a charm! Information No permits are required for backpacking in the Selway-Bitterroot Wilderness. The USFS Selway-Bitterroot Wilderness map set (north and south half) is sufficient for most navigation, but using CalTopo or similar software to print more detailed maps is recommended if you plan on doing much cross-country hiking. Cairn Cartographics also offers north half and south half maps for the Selway-Bitterroot. Most subalpine lakes in the Bitterroot Mountains aren't ice-free until late June. Elevation and aspect impact this to a large degree, but by early July in most years you can rest assured that pretty much all lakes will be ice-free. And once they're ice-free, the trout are usually pretty hungry and eager for dry flies! By mid-October most lakes are starting to freeze again. It's a cruelly short window, but worth planning to make the most of it. Hiking the Selway-Bitterroot Wilderness by Scott Steinberg (Falcon Press) is a useful resource for planning trips. For more information, see TrailGroove Issue 41 for our guide on exploring the Selway-Bitterroot Wilderness.4 points
-
The Red Desert of Wyoming holds a unique appeal no matter your approach – it’s a country just as suitable for backpacking as it is for exploring and camping beside your vehicle off a rough and long forgotten dirt road. Either way, you’re likely to be in the middle of the nowhere. Adding to its allure, to begin the year the desert can only be comfortably explored for a short time each spring after the roads have sufficiently dried from melting snow to make passage by vehicle (just to get there) possible, and before this treeless and shadeless expanse becomes too hot for comfortable hiking. And especially for family hiking as would be the case on this trip. And even hot weather aside, admittedly as summer arrives in full swing the high country opens up to distract a hiker up and into the mountains to enjoy those alpine meadows and valleys with pleasant summer mountain weather. Colors, shadows, and light in the red desert. Into the Red Desert of Wyoming Recently a quick backpacking trip was made into a particularly scenic corner of the Red Desert to explore one of the numerous Wilderness Study Areas that can be found in central Wyoming. One of my favorite things about backpacking is the pure adaptability of one’s existence, with your home on your back and as long as you have water and food, you don’t really need to be anywhere other than where you currently stand. Thus, as we left the highway and the dirt road progressively became rougher, and began to become only muddier as we turned onto a more obscure high clearance road passable only with the assistance of 4 wheel drive and patient driving, it gradually became apparent that plans would need to be changed. Not wanting to only get stuck farther in on the slick road, maps were consulted and an alternate entry into the Wilderness Study Area located. In this park anywhere, trail-less, camp wherever you can pitch your tent country, we pulled off the side of the road and shouldering packs laden with water picked our way through the sagebrush and hiked south. Although it wasn’t even officially summer at the time, the early afternoon sun was unrelenting and as a family trip, we’d need to make the most of our miles. Descending to the bottom of a rim we followed the contours and canyons that made up its base, with a multitude of unique formations serving as ample entertainment for all of us. Eventually, a suitable alcove was located to serve as a campsite, and the rest of the day was spent photographing, exploring from camp, and observing the numerous wildflowers and local residents of the area…from prairie dogs to prairie falcons. At sunset thunderstorms threatened and made for an amazing display, while gusty winds covered everything we had in fine sand. That night coyotes howled not much farther than a stone’s throw from our tent. The rain held off – meaning we’d actually be able to drive out the next day. Red Desert sunset An Easy Next Day With storms again threatening the next day however, a lazy hike out – stopping to take photos nearly every few feet – became the plan as temperatures climbed and clouds grew taller in the distance. Ascending the rim we passed a herd of cows, then elk, then a lone antelope and eventually reached our lone vehicle. It hadn’t yet rained though, and the road seemed just a bit drier than yesterday, so we drove on to explore the area around what had been originally planned to serve as a starting point only to find that the road had been closed by the BLM and we were lucky we’d stopped where we had the previous day. But the further exploration was beneficial as much for the additionally scenery as for the knowledge gained when further exploration of the area is due. Turning around and after an hour of bumpy driving, we reached pavement just as the first drops of rain coated the windshield and with the satisfaction of this quick trip into the desert…along with plenty of ideas for the next. A storm approaches in Wyoming's Red Desert. Need to Know Information Exploring this area can be a bit difficult as the BLM web pages covering the Wilderness Study Areas in this region have recently gone offline, but information can be found with a little sleuthing and by using web archive services. Take plenty of water, gas, and provisions and check your spare. Watch the weather and forecast before the trip and the weather during, roads are often impassable when wet even with 4 wheel drive. Best Time to Go Spring after the roads have dried enough for easy passage (timing varies), and early fall – check hunting seasons. Getting There The Red Desert is located in south-central Wyoming. Numerous, somewhat maintained dirt country roads act as convenient ways to access more remote areas of interest from main highways. High clearance and 4 wheel drive are not required to get there, but are nice features to have, can help access more remote areas, and might help get you out! Maps Printing USGS topo maps at home for hiking and combining with a detailed atlas like the Delorme Atlas and / or the Benchmark Map offerings to get you around while driving is a good strategy.4 points
-
They say fire warms the soul, better yet when that fire is in a potbelly stove set inside a historic cabin atop the spine of the continent burning wood you didn’t have to chop! Rachel and I decided to celebrate my 31st birthday and our recent move to Colorado by booking an overnight stay at one of the over 30 backcountry huts for rent in Colorado through the 10th Mountain Hut Association and the above scenario is exactly what we found. Based on some advice from fellow TrailGroove writer @PaulMags, we decided on Section House – a historic railroad cabin built in 1887, restored in the 1990’s and situated at the top of the Continental Divide at Boreas Pass just outside Breckenridge, CO. The trip promised mellow skiing and excellent views along with the ample snow Colorado has received this winter. A $30 per night fee gave us a roof over our head, a warm bed, gas and wood stoves and a propane cook top – not a bad way to spend a gusty winter night at 11,500 feet! Through the forest on the way to Section House. The Trip Begins We started our trip on the Bakers Tank trail from the Boreas Pass trailhead – the start of the winter closure of Boreas Pass Road. The trail was well graded for Nordic skis, wide and well used. Barely out of the parking lot we both noticed a total lack of grip to our skis when we started to slide backwards instead of glide forwards. Rachel and I use waxable metal edged Nordic touring ski’s which provide better glide than their waxless counterparts but require selection of the correct sticky kick wax for the snow conditions to provide grip on the snow. When the skis don’t grip, you switch to a warmer wax. The only problem was the giant balls of snow that formed under the warmer kick wax! Warm, wet, fresh snow is extremely unstable and will easily melt and refreeze to form large clumps under your ski, waxless or not. We quickly gave up on wax and switched to kicker skins – short segments of patterned nylon that do the gripping. The skins worked for a while but as the day warmed and we skied through slush on the trail even those iced up and we resorted to strapping the skis to our backpacks and bare-booting our way down the trail. Our boots made only shallow imprints on the well packed trail so we didn’t feel so bad. On the Bakers Tank Trail we passed several intersecting trails not shown on the hut association map, then ran into some other skiers planning on staying at Ken’s Cabin – a private cabin next to Section House. They gave us some rub on glide wax for our skins which made skiing possible again. Next time my rub on glide wax is getting packed with my skins! We had a quick lunch with our new friends and skied our way up the former railroad grade covered in several feet of snow. The snow depth was fantastic and we frequently stopped to take in the views of the snow-covered Tenmile Range across the valley below. With a little imagination the recent snowfall turned the distant mountains into sinister marshmallows, fluffy and white but still steep and avalanche prone. Just out of view was the sprawling Breckenridge ski area, both out of our budgets and out of our minds as we swished our way up to the Continental Divide. The ski up Boreas Pass Road was pleasant and we were even getting good kick and glide with the skins on the slight uphill. Soon the hut was in view and we opened the lock using the code in our reservation email. Several Forest Service placards dot the area and explain some of the history of the narrow gauge railroad used to ferry miners, equipment, and ore between the Front Range and Leadville. The town of Boreas used to exist at the top of the pass to house railroad workers but was abandoned in 1937 along with the railway which was plagued with avalanches and rock falls during its service life. The Army Core of Engineers reconstructed the old rail grade for automobile traffic shortly after World War 2. The house we stayed in decayed until 1992 when it was restored by a joint effort through the U.S. Forest Service, Park County, Texas A&M University, the Colorado Department of Transportation, and Harris Construction. Summit Huts Association now has a permit to rent out the hut to ski, snowboard, and fat biker enthusiasts during the winter. Ken’s Cabin next door to Section House was also restored and sleeps 3 for a more private setting but at a higher nightly rate. Inside the hut we found an ample kitchen and common space stocked with tables, couches, a three burner propane cook top, two woodstoves, and all the cleaning supplies we would need. The night before our trip I prepared and froze some potato chicken stew and baked some brownies for dessert. Rachel brought pastries from work for breakfast along with ample hot chocolate. While the food cooked on the stovetop, we got a roaring fire going in the woodstove and I successfully practiced not losing any fingers while making kindling with the provided hatchet. Two enormous pots of water from melting snow made cleanup a cinch and we worked fruitlessly on a 500 piece puzzle until bed. Upstairs the beds were all reasonably comfortable and came with sheets and pillows that we used alongside our 3 season sleeping bags. There are even some double beds for couples! There is a gas heater but I couldn’t figure out how to regulate the heat so ended up turning it off after the room reached sweltering temperatures. Despite howling winds, we slept warm in 3 season bags and were able to dry our boots by the wood stove. A Quick Exit The next morning was an easy downhill ski out although the grade wasn’t quite enough to glide the whole way down as we had imagined. We decided to stick to the road all the way back to the trailhead instead of taking the Bakers Tank Trail for a change of scenery. The views were even better on the way out but we hit several sections of road that lacked enough snow to ski on. Still, we made it back in under 2 hours and enough time for Rachel to get her first Colorado downhill resort skiing in at Loveland ski area. Mild grades make for relatively easy skiing. Need to Know Information There are many, many huts for rent in Colorado to the point where it’s hard to tell what hut is suitable for your abilities at what time of year. Section House and most of the more accessible huts can be booked at www.huts.org with additional information at http://summithuts.org/. Prospective hut users should be aware of which huts require winter routes with avalanche danger, which is listed with the hut information and found in any guidebook. Hut skiing is very popular in Colorado but since we were able to go midweek, our hut was available on short notice but booked on weekends for the next month. You should definitely book well in advance for weekend trips or other more popular huts. Best Time to Go Generally December through April or later depending on the year will have the best snow conditions; also some huts are only open certain months of the year. For Section House, check the weather in Breckenridge and keep an eye on the snow totals at the ski area. Warmer temperatures during the day can lead to icy trails so you may have to time your skiing when the trails are softer. Getting There From I-70 take Exit 203 for Route 9 South towards Breckenridge. Stay on I-9 around the outside of the Breckenridge and take a left onto Boreas Pass Road. The road is closed at the trailhead with ample parking. Maps & Books Free maps are located here. The map for Section House didn’t include several trail intersections so it would be wise to bring a larger overview map of the area such as Trails Illustrated 109. I recommend picking up Colorado Hut to Hut: Skiing, Hiking and Biking to Colorado's Backcountry Cabins by Brian Litz which covers most of the huts. Recommended Gear For the ski up Boreas Pass Road any Nordic ski will work great. The grades are very mellow and metal edges wouldn’t be critical even for moderate ice. One of the benefits to a hut is being able to dry your boots overnight so there are no worries about removable liners. You won’t need a shelter, stove or cooking equipment which leaves room for good food and beer! Slippers for the hut and a warm jacket to wear until the wood stove kicks in (1 to 2 hours after lighting) are critical. Any 3 season sleeping bag will work since the hut is heated. Don’t forget the hot chocolate!4 points
-
The last two winters I’ve spent living in the American southwest, and before I left I planned to take a long bike ride. I wasn’t quite sure where I wanted to go, but I was leaning towards somewhere way out in the desert. I changed my mind many times in the months before the trip, but eventually decided to leave sunny California, and drive further inland, to Utah. I had driven this highway once before, a scenic route through the southern part of Utah. Highway 12, “The All American Road.” I knew there was a route. I could bike out to this highway, turn right in the town of Boulder onto “Burr Trail Road” and bike it to the end. Then head north on the dirt Notom Road from there, turn left onto the pavement to pass through Capitol Reef National Park, and finally, reconnect to Highway 12 in the town of Torrey making a giant loop ride. It might’ve seemed ambitious; I wasn’t totally sure how far it was. I was going foolishly ahead with no map and only a basic knowledge of the simple country highways. The Burr Trail takes you through some of the most scenic country in Utah. An Uphill Start The day finally came when I drove the careening road, leaving a high plateau and descending through an orange and cream colored slick-rock badland. I parked at the trailhead for the Escalante River, near the Calf Creek Falls Recreation Area. My bike wheels bit the road in this red, dry country, and I began to climb steeply away from the sparkling green cottonwood choked river where I parked. I put all my effort forth to climb the mountain, twenty grueling miles of uphill. I was thoroughly enjoying the climb, still being fresh in the crisp, spring morning. Huge monoliths of rock towered around me, the desert landscape was much more intimidating by bike than by car. My backpack was heavy, carrying my supplies and enough water to dry camp that night, hopefully being able to finish the loop ride the following day. I knew one thing, it was 75 miles of no services, no water. Hopefully I could do all that today, I thought, even though I had gotten a late start. For some reason, I tend to grossly over-estimate what I am capable of, and today was a day like that. The highway, as I climbed, dropped away on both sides of me to rugged canyons dissecting the earth in all directions. After passing through beautiful Boulder, Utah I turned left on the Burr Trail to find a thrilling roller coaster ride. The legendary route winded rough and rarely traveled across the white slick-rock. I knew next I’d I entered the final frontier desert. Soon I was flying downhill fast through a brilliant red canyon with walls of pockmarked and intensely carved stone. This amazing and enormous canyon, known as Long Canyon, became a claustrophobic cathedral all around me. This descent was taking the plunge, I knew now I was biking into the remote, desert backcountry. Mile after mile I biked the Burr Trail, growing bumpier the deeper in I went. I snaked around countless corners through the red canyon maze. Needless to say I had become ridiculously haggard and fatigued. The sun was low now and cast the towering spires in a malicious light, and anxiety was growing inside me from this place so epic, far away, and unknown. The anxiety was growing stronger around each corner as I realized what a poor plan I had made for this trip. I came finally at long last to the end of the canyon around sunset and stopped where the road viciously switchbacked down. The view showed that the landscape was unequivocally vast. The effort it took to get to this spot had me traumatized and in great pain as I looked out to the Henry Mountains, still so distant. In fact the distance, exposed to me all at once from this overlook towards the Circle Cliffs, terrified and humbled me. I had come forty intense miles and still had thirty-five to go to arrive at town, then who knows how far the next day to make the loop! No, I said, this is crazy, I’m not doing it. I knew if I biked down this next mountain, it would be unappealing to return, so I simply chose to camp on the BLM-managed land close by. A scenic view along the Burr Trail. The End of the Trail In the morning I retreated, abort the mission! Biking back through the colorful undulating desert filled me with such joy, that I decided to go ahead and bike Boulder Mountain, the road rising to nearly 10,000 feet. By the time I was halfway up I realized I had bit off more than I could chew...again. I was so exhausted that I made it to within a mere hundred feet of the summit before collapsing and giving up. From there it was thirty miles of flying downhill to get back to the truck and I was so wrecked by the time I arrived back I couldn’t think straight. I didn’t complete my loop, but I had more fun letting my plans be flexible. What a wonderful memory it was and a trip of a lifetime. The moral is, don’t let anyone tell you not to do something simply because you won’t be able to do it. Get out there, give it a shot, (always be ready to reevaluate your decision) and see what happens. Biking the Burr Trail was a test of both man and machine. Need to Know Information No permits are required to ride the Burr Trail or to camp on BLM land, and there is a campground you can stay at for 7$ per night called Deer Creek. If you choose to do the entire loop ride, then camping within the Capitol Reef National Park requires a free permit picked up at the ranger’s station. Bring enough water to expect a 75 mile dry stretch on the Burr Trail and Notom Road, so as much as possible but not less than 9 liters. Getting There The Burr Trail passes through central Utah, the heart of the state. If coming from Colorado or from Salt Lake City, find your way to interstate 70. Green River, Utah will be the nearest town to the road junction of highway 24. Take 24 and follow it to Hanksville where you turn right to stay on 24, and eventually it will pass through Capitol Reef National Park. Keep going straight and you’ll pick up highway 12 in the town of Torrey, head south and when you get to the town of Boulder, the Burr Trail is on your left. If coming from the south take interstate 15 to Cedar City where you turn right on Highway 14. Take a left on Highway 89 and soon you will see the junction with 12 on your right. Best Time to Go Fall is the best time to experience Utah, dry with comfortable days and chilly nights. Spring is second best but could be rainy. Winter can be possible if the road if free of snow, but not ideal, and summer is not advisable because it becomes very hot. Books & Maps Beyond Capitol Reef: South-central Utah: A Guide to the Area Surrounding Capitol Reef National Park is an excellent guide book to the area. The Geology of Capitol Reef National Park is a fascinating book telling how the Waterpocket Fold formation shaped the beautiful structures within Capitol Reef. The National Geographic Capitol Reef National Park map should contain all the information you will need for this route. The Author Michael Swanbeck is an adventure seeker and aspiring author. He learned culinary arts in school, and has been using his trade to work seasonal jobs in America’s fantastic national parks. In Glacier National Park, Montana, he found that his true passion was hiking. During the off-season from restaurant work, he is free to explore the world, and focuses on seeing the beauty of our diverse natural environment. He spends his time in the wilderness when possible, having hiked southbound on the Pacific Crest Trail for 100 days in 2014. He finds his inspiration in nature, and draws his writing from that inspiration.4 points
-
After a season of hiking, sleeping and sweating in your down jacket or sleeping bag things can get a little stinky. You might even notice a slight loss of loft as body oils compromise the fluffiness of the down feathers. Or, as in my case, the jacket is just grubby. Fortunately washing your jacket or sleeping bag is a lot easier than you may fear. In this article I’ll go step by step through washing one of my down jackets but the same process can be used for nearly all down sleeping bags. The only difference is more soap (typically a capful) and using a clean bathtub instead of a sink. Total washing time for me is about half an hour long for a jacket with two to three hours of drying time. A down sleeping bag may take double that time depending on the amount of down fill and your dryer. You Will Need Down specific soap / down specific detergent (Nikwax Down Wash or Granger's solution have worked equally well for me) A clean sink and a stuff sack for your jacket/bag (or appropriately sized zip lock) A front loading dryer with a low heat or air fluff setting Note that Nikwax recently came out with Down Wash Direct – a new detergent for both hydrophobic treated and non-treated down, so if you have a mix of treated and untreated products that detergent might be best. Whatever the case, make sure you're not using whatever laundry detergent you happen to have on hand – a down specific cleaner is required. Cover Your Bases Before you get ahead of yourself, check the manufacturer’s recommendations for how to wash the garment. They might be on a tag on the jacket or on the website. Generally the website will have more specific information than the tag so it’s always worth a check. Most instructions will require the use of down specific soap to avoid removing the natural oils from your down, a front loading washer and dryer, and recommend avoiding any type of fabric softener. I’m washing a Feathered Friends Daybreak jacket with untreated down, similar to most down jackets in the 7-9 ounce total weight range. Their instructions for washing all their products are located here. Check the Jacket or Sleeping Bag Before we start, check the jacket for any holes and repair them with circular or oval pieces of repair tape so there are no corners to snag. Also look for spot stains that can be cleaned by lightly scrubbing with a mild detergent and a damp sponge. After that’s done, close all the zippers to prevent tearing in your dryer and turn the jacket or sleeping bag inside out to prevent wear to the outside fabric. Lastly, stuff the jacket into the stuff sack or the jacket pocket if it was designed to stuff into its own pocket. A Ziploc bag might work in a pinch as well. Get Ready Now that the jacket is ready, thoroughly clean your sink and fill it about half way with warm water, no need for your jacket to smell like your toothpaste. Make sure you get any soap residue off the sink as well. Add a capful of down soap to your warm sink water, two if it’s an especially large sink. I find you don’t need much down soap washing things by hand and too much soap takes a lot of rinsing to get rid of. You can successfully machine wash a down jacket (not a sleeping bag) in a normal washing machine and always on the most gentle cycle, but a front loading washing machine will be best if you choose to go this route and would be the only washing machine option for a sleeping bag. This is all a bit at your own risk (check the tags or the manufacturer's washing directions). When it comes to your ultralight type gear however, a hand wash is a sure bet and is our suggested method here for jackets and sleeping bags. A small sink works just fine for jackets, with a bathtub working better for washing down sleeping bags. Start Your Washing Immerse the stuffed jacket into the sink water and slowly pull the jacket out, exposing it to the water. Uncompressing the down in the water helps it wet out faster. Swish the jacket around in the wash water while squeezing it to move the water through the down. Notice the color change! Gently agitate by hand and ensure the soapy water solution fully soaks in. Drain and Rinse Now we want to get that soapy water out of the jacket, so drain the dirty water and let the faucet run over the jacket. Carefully squeeze different parts of the jacket to work the clean water through until you get very few bubbles each squeeze. Some bubbles are normal since you’re pushing air around as well as water, but it should be a noticeable decrease. 5 to 10 minutes of rinsing is a good estimate to remove all the soap. Then turn the faucet off and carefully squeeze as much water as you can out of the jacket. This will speed the drying time. Repeatedly rinse until no more soap runs out of the garment or sleeping bag. Off to the Dryer Next, take your jacket to the front loading dryer to start the drying process. Pick it up in one big clump and try not to let anything hang off as you carry it – the jacket is much heavier when wet and may overstress a seam or the fabric. This is more critical with sleeping bags but the same care should be taken for a jacket. You’ll often hear people recommending new, clean tennis balls to help break up the down clumps but I don’t think they really help. I have had to break apart down clumps by hand on a stubborn sleeping bag that was taking all day to dry and I don’t see how tennis balls would have helped in that case. Make sure to set the dryer to “air fluff” or the non-heated mode. It will take longer this way but you won’t risk melting any of the fabrics. The low heat setting will often work but you want to check that the temperature isn’t high enough to damage the fabric. Either way, be sure to check the jacket after a few minutes just to make sure it isn’t tangled and then every 45 minutes thereafter. In 2 hours or so you should have a nice clean jacket!4 points
-
A bit of a followup to http://www.trailgroove.com/issue31.html?autoflip=17 I made a return trip to the Ah-shi-sle-pah Wilderness in October 2017. I had been to this rough badland area before where we saw the ‘King of Wings’ formation, but his time we were headed farther west toward the ‘Valley of Dreams’ area where the ‘Alien Throne’ was located. After miles of driving mostly unmarked dirt roads across the boring plains, we came to a spot in the road where there was one other car, and my GPS showed us to be a little over a mile from the destination. We loaded our backpacks and headed off toward the badlands. There were a scattering of interesting hoodoos on the way, but the best was yet to come. It had been a week of clear, sunny days without a cloud in sight. This day, however, was different - there were some high wispy cirrus clouds moving in, promising a colorful sunset, and we were not disappointed (especially me!). We arrived at the eastern part of the ‘Valley of Dreams’ in late afternoon and it struck me as being some of the densest concentration of hoodoos and bizarrely-shaped rocks that I’ve ever seen! It was both a photographer’s dream and a photographer’s nightmare - so many shooting possibilities. We wandered around the hoodoos slowly making our way to the west. Once on the west side, we met a couple from Germany (and the people whose car we had seen earlier). They had been out both the evening before and that same morning. They were in the midst of a 25-day trip through the American west. They pointed out the ‘Alien Throne’ and we all proceeded to take piles of pictures of that hoodoo and the surrounding area. The sunset was spectacular as hoped for, and even after sunset the pictures show the otherworldly beauty of this spot. We set up camp nearby and had our coldest night of the trip (probably around 40 degrees). I got up early the next morning, which was once again mostly clear skies, but still shot a few excellent pics. Pictures #2, 4, and 5 are the Alien Throne. First picture is a Giant Mushroom - over 6 feet tall.

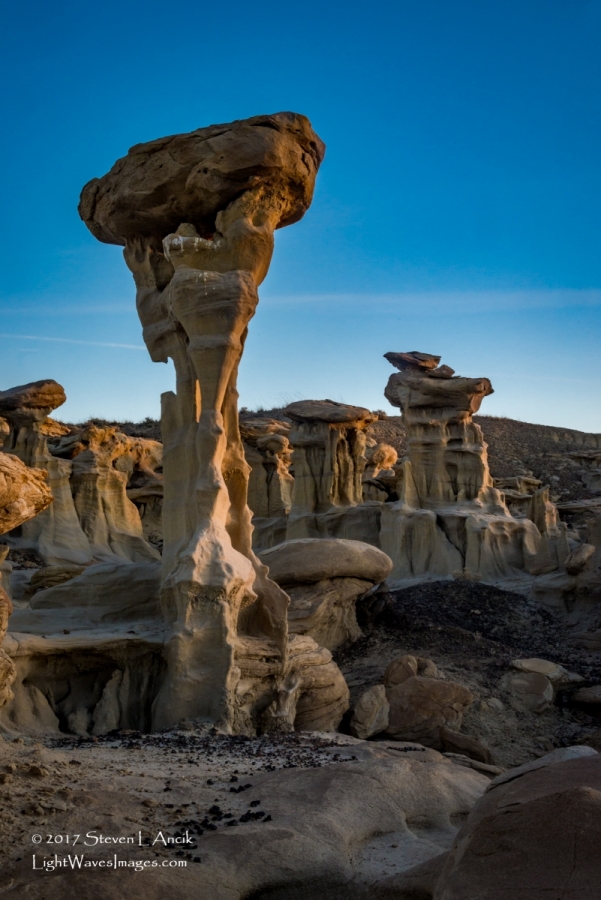
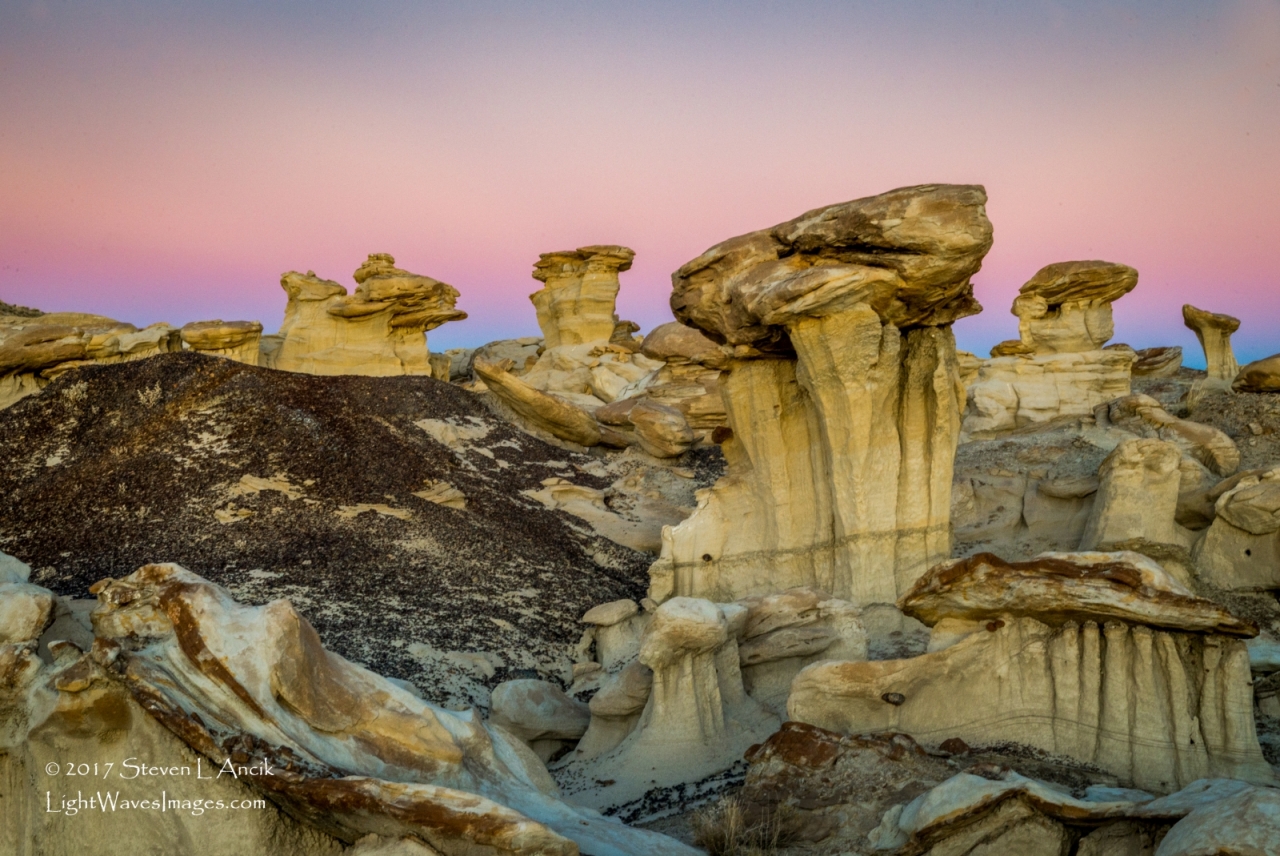
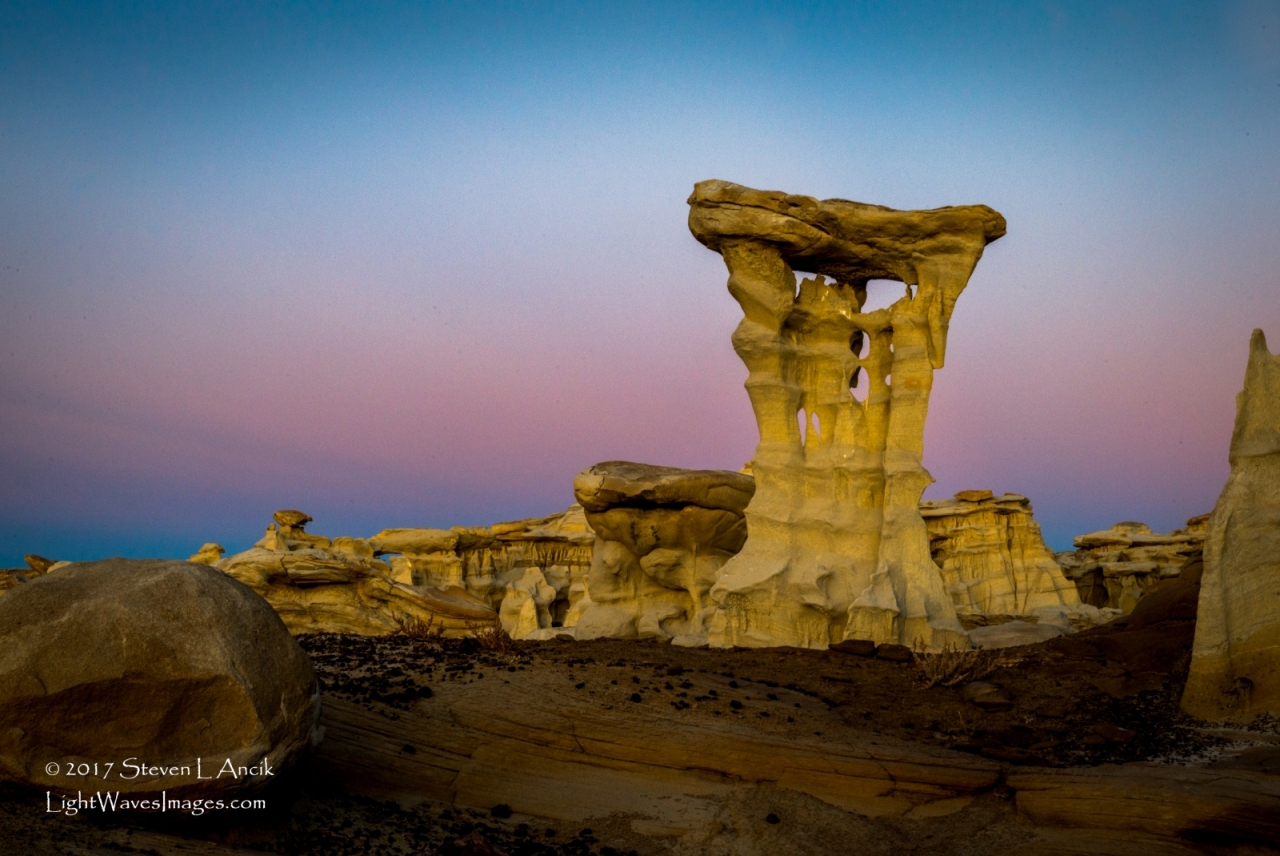
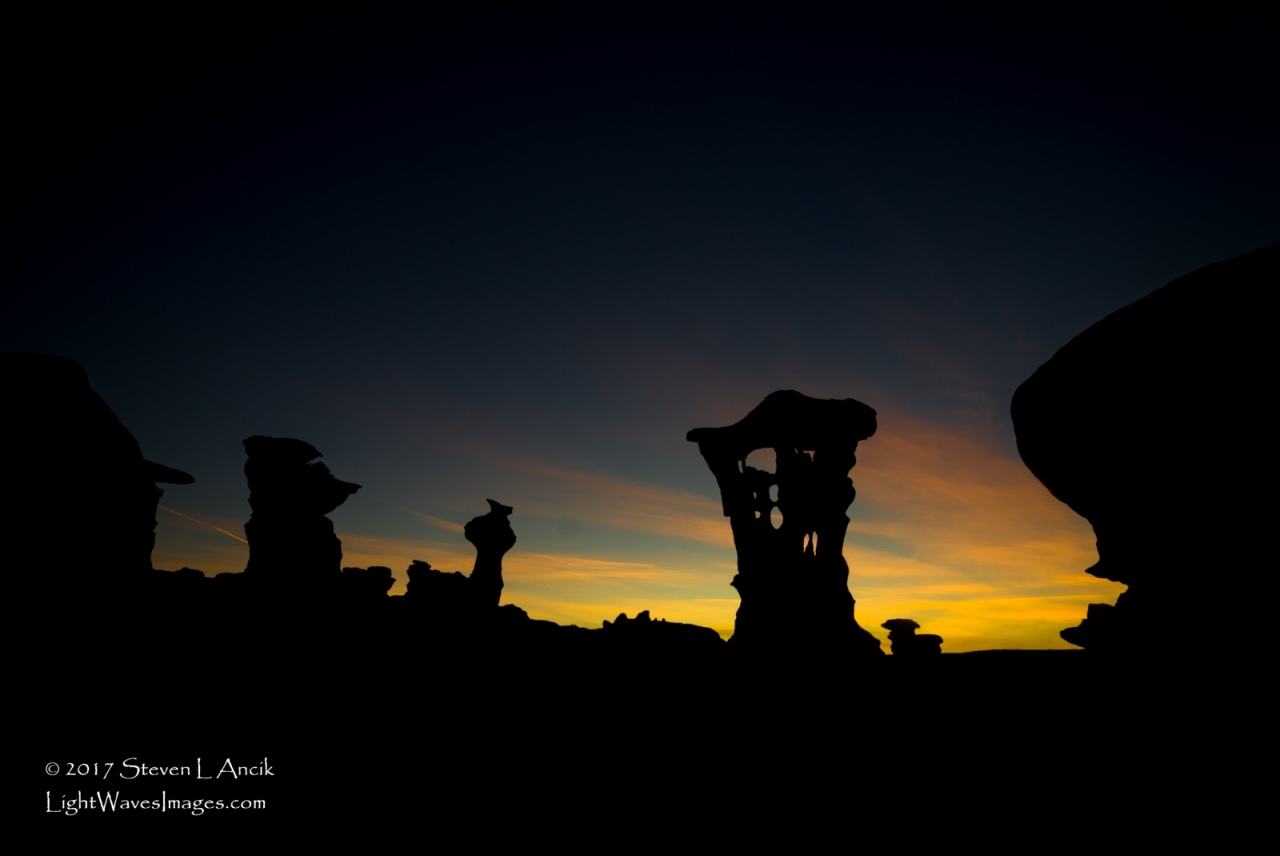
 4 points
 -
I know this is an old post, but I noticed that there were no factual data posted about the safety of aluminum cookware. As a critical thinker and an REI employee, I believe that people should make informed decisions based on facts from credible sources, not someone's own personal beliefs. (Disclaimer: This post in no way represents the opinions or recommendations of REI and I am not posting as an employee, but as a private individual.) According to the Centers for Disease Control (CDC), aluminum is safe to cook with. Aluminum is naturally present soil, water, and the air, but account for minimal exposure in humans. Primary exposure (about 7-9 mg/day) is via ingestion of aluminum containing food, including baked goods and goods containing anti-caking and coloring agents. Aspirin contains 10-20 mg. of aluminum and antacids have 300-600 mg of aluminum hydroxide, very little of which is absorbed. Most of the aluminum ingested passes through the digestive system and leaves the body in the feces. Smaller amounts that enter the bloodstream are voided via urine. Aluminum is applied topically via cosmetics and antiperspirants. Aluminum poses no health risks in these very minute exposure because healthy individuals do not store aluminum. However, some people who have kidney disease do store aluminum that enters the bloodstream as the kidneys fail to remove it. Some studies show aluminum in high levels are correlated with Alzheimer's; but other studies contradict that finding and there is no scientific consensus of a link between aluminum and Alzheimer's. The CDC recommends that concerns regarding typical aluminum exposure should be addressed by reducing or eliminating aluminum containing processed foods and avoiding cooking acidic foods in aluminum pots, although the levels of aluminum found in food cooked aluminum pots are safe. From here: https://www.atsdr.cdc.gov/phs/phs.asp?id=1076&tid=34 With regard to anodized aluminum, according to Clemson University, anodized aluminum is hardened to prevent reaction to acidic foods cooked within, but storing acidic foods in the pot does cause pitting like non-anodized aluminum contact with acidic foods. From here: https://www.clemson.edu/extension/hgic/food/pdf/hgic3864.pdf Since it's uncommon for backpackers to cook or store acidic foods in their cookware, I would suggest that unless you have kidney disease you should be fine with aluminum pots, whether anodized or not, and would be better off basing your decision on factors other than safety such as weight, cost, and durability. Here comes my "gear nerd" answer: Titanium is chosen primarily for weight-saving and strength, but is generally much more expensive than aluminum/anodized aluminum. Aluminum is an excellent heat conductor making it a more efficient metal for cooking. However, the difference in heat transfer is negligible because even though titanium is more of an insulator than a conductor of heat, its greater strength allows for extremely thin walls which pose little barrier for heat to pass through. This is why I can't hold my titanium pot filled with boiling water with bare hands and why it's as efficient as an aluminum pot. Whether it's worth the added cost is really an individual choice. I am personally very happy with my 600 ml titanium cup that weighs 88 grams and can easily boil 2 cups of water. But I would also greatly consider anodized aluminum as an alternative since the weight cost is negligible and the cost is much less. The GSI Hallulite Minimalist is a 600 ml anodized aluminum pot with a cover, folding plastic spork (useless, IMO), a silicone pot gripper, and an insulating sleeve for 177 grams. If you ditch everything but the pot, you're down to 92 grams, only 4 grams heavier than titanium for (currently) $9 less. Hope that helps anyone considering new cookware or replacing old cookware.4 points
-
So there's a foot of snow on the ground, the temps have been in the single digits (both positive and negative). I should get out and go for a ski, but the NWS says winds of 30+ MPH in the high country. Clearly, the proper thing to do today is start planning a long-distance hike. For section-hiking the PCT, I have relied on Craigs PCT Planner to help me estimate how many miles I'll hike per day and thus how many days it will take to get from one resupply point to another. It does this by having you put in an average pace, hours hiked per day, and an elevation gain factor. It works pretty well, and I highly recommend you use it (and donate) if you are hiking the PCT. But I am thinking of the AZT this spring and there is no ready-made app that I know of for it. But I do a lot of quantitative analysis in my line of work, and wondered if I could come up with my own predictive formula. I hiked the PCT from Walker Pass to Lake Tahoe last summer. Thanks to Halfmile's PCT maps and app I could estimate the miles hiked and the elevation gained and lost pretty accurately. I put these into a data table in JMP, and then added in other factors that I thought might affect my daily mileage: days on the trail, days of food carried, ± bear canister. I put these together into a model that also looked for interactions between factors and non-linearities within them, and then ran multivariate regressions to determine which were the most influential and fit the data best. The model did a pretty good job: About 77% of the day-to-day variance in miles hiked is accounted for, and the average error between predicted and actual miles hiked is 1.5 miles. What surprised me was the factor that turned out to be far and away the most influential: how many days I had been hiking. In fact, if I just plot miles per day vs days on the trail I get a pretty good correlation: This wasn't totally unexpected. I knew I was hiking longer distances as I got in better shape. But I was surprised at just how little influence other factors like weight carried or elevation gain or loss had on mileage. Here's the plot for elevation gain vs miles hiked: It has a negative correlation, just as you'd expect, but the effect is fairly small and in fact is of weak significance (P = 0.11 vs P < 0.0001 for trail days). A Pareto plot illustrates the relative influence of the factors (all other factors were insignificant and were left out of the model): That central term accounts for the non-linearity of the EG effects, meaning that going from 400 ft/mile to 500 ft/mile slowed me down more than going from 100 ft/mile to 200 ft/mile. I don't think I have to convince anyone in this forum that this makes sense. There is an obvious problem with this model - it predicts that if I were on the trail for 50 days I would be hiking some 35 miles/day, which is not likely. My mileage would surely flatten out at some point in the hike, if for no other reason than that I like to swim, fish and take naps when the conditions are opportune. The prediction expression ends up being miles/day = 18.4 + 0.31*Day - 0.014*EG/mi + (EG/mi-193*((EG/mi-193)*-0.00014). It's fairly easy to plug this into a spreadsheet and limit the intercept + Day factors to ≤ 25 miles a day and then use the rest of the equation to adjust for elevation gain. Of course this just applies to me. Your mileage, as they say, may vary. But I wonder if anyone else has seen a similar pattern on their long hikes.

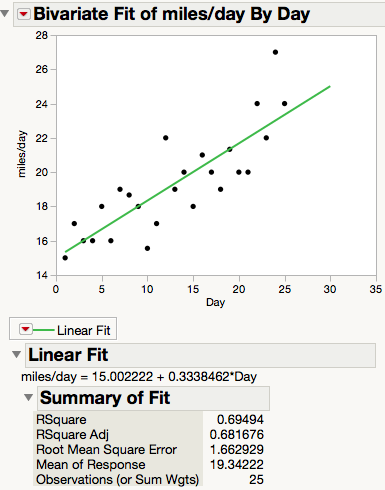
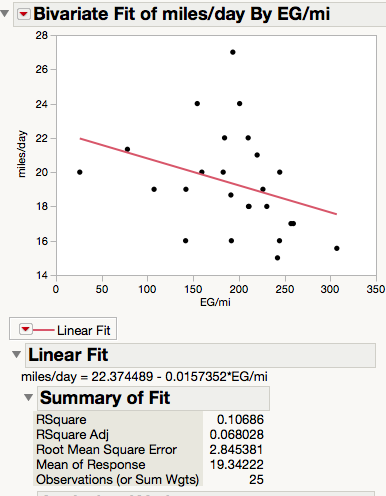
 4 points
 -
What a great contest! Just in time hiking season. Thanks..4 points
-
Hike to Backcountry Hot Springs Selway-Bitterroot Wilderness Clearwater National Forest Idaho November 26-28, 2015 Soaking in a hot spring and stargazing on a winter night certainly meets the definition of sublime. When the hot spring is reached after a delightful five-mile hike and you have it all to yourself, the charm of the experience increases exponentially. When there’s just enough snow on the ground to provide a lovely contrast to the lush evergreen forest without causing the slightest inconvenience to camping or hiking, then the setting and experience approaches perfection. It should go without saying that finding myself in such a blissful place on Thanksgiving that I was indeed grateful, peaceful, and content in the utmost. Being an only child of divorced parents and having lived a few hours away for a decade, and a day’s drive from extended family since birth, I’ve allowed myself a certain amount of flexibility and indulgence -- perhaps even selfishness -- around the holidays, for better or worse. For most of my adult life I’ve spent the Thanksgiving holiday with either girlfriends and their families or out backpacking. In each circumstance I’ve created some cherished memories. Thanksgiving with my friend John in the Joyce Kilmer-Slickrock Wilderness of southern Appalachia, tents pitched amidst old-growth poplar trees and a glorious Black Friday climb to the Hangover and its magnificent vista. Thanksgiving spent gorging on gourmet food and bourbon with a girlfriend and her family in the heart of Kentucky’s Bluegrass region -- followed the next day by the two of us heading out on one of the most rugged overnight trips I ever did in the Red River Gorge, working off the turkey and camping at an obscure waterfall. So, I suppose on this most recent Thanksgiving sojourn I was merely continuing a tradition I started in my early 20s rather than breaking from any tradition. Given its popularity and prominence in numerous guidebooks and on the Internet, I’d delayed a visit to this destination until I felt that circumstances were in my favor to have at least 24 hours of solitude at such a prime location. Between the Thanksgiving holiday, the frigid forecast (highs just below freezing, lows on either side of 10 degrees), and the short days of late November in the northern Rockies, I put my chips on those odds and planned the trip. It was five degrees when I loaded my car up and left Hamilton and the sun was shining on the snowcapped peaks of the Bitterroot Mountains as I began the two-hour drive to the trailhead. The drive was breathtaking and, given a recent snowstorm, the road conditions were surprisingly decent. Two feet of snow were present at the mountain pass as I crossed into Idaho and began the descent to the Lochsa River, which I would follow to the trailhead. As I lost elevation, the snow thinned out considerably and was patchy in the campground where I parked. Shortly after 11 a.m., I shouldered my pack in the empty trailhead and headed up the trail. It felt like the temperatures were in the upper teens and there wasn’t a cloud in the sky. The trail started off with a steep climb that got my blood flowing and my zippers opening. It remained a gentle grade for the next few miles and I vented or zipped up according to my level of exertion, the amount of shade I was in, or the combination of the two. The views of the Boulder Creek drainage were scenic, but a but intimidating as I knew an unbridged creek crossing loomed ahead of me. I took a break at the wilderness boundary at two-miles then continued on to the crossing. Boulder Creek, true to its namesake, featured a streambed of uncountable boulders and rushing water. Ice crept in from each bank and surrounded the rocks, while a swift current pushed frigid water downstream via the path of least resistance. Crossing this creek would be the crux of the hike and I was determined to take my time and minimize the not-inconsequential risk of crossing a large stream in sub-freezing temperatures. First, I took a sip of water. Then I put traction devices on my shoes and ensured my trekking poles were adequately locked and extended. Finally, I shifted my pack and zipped up my jacket so that I was as comfortable as possible. Satisfied that I’d adjusted all the variable I had control over in my favor, I looked for the best place to cross. Despite the abundance of boulders, all were inconveniently spaced and covered with snow and ice. I spotted a downed tree a few hundred feet downstream that resembled a bridge and made my to it. Not wishing to tempt fate, I straddled the snow-covered log and scooted across. Although I was on solid ground after dismounting the log, there was still another channel of the creek to cross. Fortunately, this was a much smaller channel of the creek and I was able to walk across a downed log to the other side of the creek without incident. While the crossing had been as good as I could have hoped for, I had inadvertently ended up pretty far downstream from the trail. Fortunately, the forest wasn’t very thick, although it was boggy in spots, and I was able to easily work myself back towards the path. When I encountered a large downed tree, I joked to myself that “Well, trees usually fall across trails, so I might as well see where this one landed.” I couldn’t help but smile when I stepped off the tree and onto the trail. The last half-mile to the hot springs was bathed in the glorious and fleeting light of early afternoon in winter and was especially fragrant with spruce and pine. As the narrow footpath closed in on the hot springs, my anticipation increased. When I saw steam wafting through the forest I became almost ecstatic and knew I had arrived. I scoped out the springs and dipped my fingers in the warm water of the pool closest to the trail before embarking on the search for an ideal campsite. The campsite I found was excellent -- a few hundred feet from the hot springs, above the main trail, no widowmakers nearby, it was hard to ask for more. There was a heavy dusting of snow in the forest but the dense canopy cover allowed me to set my tent up on bare ground. After getting my campsite situated and hanging the bear line, I headed over to the hot springs. I won’t bother trying to describe in detail what it was like to ease into a steamy pool of water on a sunny winter afternoon in a lush mountain forest. Incredible is probably the most accurate word I could use. Perfect would also be suitable. The water temperature, the size of the pool, the frost clinging to everything within a few yards of the springs, the sound of the water as it flowed from pool to pool -- there was no opportunity for improvement. I floated around for just over an hour with half of a 3/4 length foam sleeping pad allowing me to perch on various rocks and logs in utmost comfort, and supporting my lower back as I floated in the middle of the pool. A few sips of bourbon and reading “To Build a Fire” by Jacking London for the dozenth time or so made the time fly by. Just as the day began to darken I exited the pool and cooked my Thanksgiving dinner of pasta, spinach, mushrooms, tuna and grated cheese. Not quite a turkey dinner, but not half bad by any means. Once dinner was cleaned up, I took a thermos of hot chocolate back to the hot springs for a starlit soak. Words fail at communicating the bliss of the experience, so I’ll quit while I’m ahead. I soaked for maybe two hours before getting out, putting on a fresh wool baselayer, and heading to the tent. I was supremely relaxed but not exactly tired, so I read a bit more before turning off the tiny lantern that lit my small tent. Perhaps it was the bourbon, or maybe it was my sheer giddiness at the way the trip was playing out, and I suppose it could’ve just been the cold weather, but I felt a special kinship with my sleeping bag as I zipped it up and tightened the draft collar. I mentally composed an ode to my down-filled friend to the tune of Neil Young’s “Long May You Run”, re-purposed as “Long May You Loft”, hopefully the backpackers out there will appreciate the sentiment and the Neil Young fans will forgive me: We’ve been through some nights together Chilly mornings and snow covered tents You’ve kept me warm in frigid weather Long may you loft I added a fleece pullover during the night, and a midweight set of wool bottoms in the early morning hours, but this was to be expected. My 15 degree bag was pushed a bit past its limit, which is why I’d brought my puffiest down jacket and thicker wool layers. When I exited the tent in the morning to retrieve the food bag it was about 8 degrees, according to the keyring thermometer I’d set on a branch near the tent. Not being in an hurry, I took the food bag back to the tent and climbed back into my sleeping bag, then sprawled out and made coffee and oatmeal just outside the tent. I had a liter bottle of water in my sleeping bag to keep it from freezing and another liter in a Platypus in a minor pool of the hot springs to keep it from freezing. I sipped coffee in the comfort of my sleeping bag, read some more Jack London, and made another round of coffee before finally leaving the tent and heading over the hot springs for a late morning soak. Starting the day with a cup of coffee and a soak in a hot spring in an idyllic setting while reading classic stories of adventure and peril in the Yukon is something I would highly recommend. Determined not to have a sedentary day, I decided to hike up the trail as far as I could to scout it out for a future trip. On the map, it seemed like a great loop hike could be put together. I ventured up the trail only a few hundred yards before it faded into fallen trees. I tried to push through in hopes the path would re-appear, but to no avail. It seemed to just fade out. I’m not trying to give myself too much credit, but I’ve followed some notoriously faint and/or rough trails in my time as a backpacker. Deep Creek Trail and North Fork Citico Creek Trail in the Joyce Kilmer-Slickrock Wilderness/Citico Creek Wilderness, a seldom-used mid-elevation path in the Chiricahua Mountains, and a decommissioned Forest Service trail to an unnamed lake in the Bitterroot Mountains immediately come to mind. But on this trail I wasn’t able to make much progress. Maybe it was the downfall and dense vegetation, maybe it was the snow, or maybe it was the fact that there was a hot spring waiting for me, but I turned back after only a half-hour or so of forward progress. I did wander down to the creek during this outing to admire the beauty of the partially frozen stream for a moments, which was time well spent. Once back in camp I had -- you guessed it -- another soak before enjoying a delicious snake of cheese, pita chips, fruit strips, and jerky, along with a warming cup of mint tea. Shortly after I finished my feeding frenzy, two other backpackers arrived. These dudes reminded me of myself and my friends, which is meant as a compliment. They were great company and oddly enough had lived in east Tennessee earlier in their lives, which is where I was born. So we had some common ground (pun intended) in that we had each spent a good bit of time in Great Smoky Mountains National Park. While I valued my solitude, my assumption that any folks who would spend a frigid Thanksgiving weekend at a backcountry would probably be pretty good people was proved correct. I enjoyed another soak before dinner while getting to know my neighbors. Thai peanut noodles with chili-lime jerky and fresh-squeezed lime juice as on the menu, and I enjoyed an aperitif of Kentucky bourbon while my stove did its work. With a full stomach, I headed back to the hot spring to enjoy another night of stargazing. Seeing shooting stars from a hot spring is a great way to end a day, and the conversation with my springmates was interesting but not overwhelming. We all seemed to know how to appreciate silence, which unfortunately doesn’t seem to be a universal value these days. Zipped into my sleeping bag, I got another great night’s sleep and awoke to a morning just as chilly as the one that had preceded it. A cup of coffee made packing up bearable, as did the promise of one last soak before hitting the trail. I tried with my utmost to internalize the beauty around me as I slipped in for the last time. Steam rose and mixed with frigid air, depositing beautiful frost formations on rocks and logs; and on the living carpet of moss that grew from log to rock to ground and back. An impossibly beautiufl scene and one that was nearly impossible to leave. Nevertheless, after a final soak I headed down the trail with a feeling of rejuvenation and gratitude. As accommodating as the hot spring had been, the crossing of Boulder Creek was the exact opposite. I took a different route than the one that I had used to cross a on my trip over and it was a slight improvement in both safety and convenience. Aside from the fact that I was moving further from the hot spring and my time in the woods was winding down, it was a great hike out. The slight downhill grade made for efficient hiking and the light pack (owing to food and fuel consumption) was noticed and appreciated. I made it back to the trailhead in the middle of a sunny afternoon. I changed into fresh clothes and made a cup of coffee for the road before hopping in my vehicle and beginning the gorgeous drive home. Despite radiating satisfaction on the return journey, I was just a bit disappointed to know that baths at home just wouldn’t feel the same after this trip.4 points
-
Unique among the seasons, winter wields the power to make many hiking destinations inaccessible. Roads are gated due to snow, mountain passes become snowbound and hazardous, and specific four-season gear is required in many regions for those venturing out in the winter months. Human-powered recreation is mostly left to snowshoers, skiers, snowboarders, and winter is also a good time to focus on cleaning gear, summer trip planning, fitness routines, racking up vacation time, and other hobbies. Getting away to a warmer locale for a few days or a week also doesn’t hurt if you’re able to accommodate the expense of time and money. In winter, places inherently seem to become more remote. The Wilderness of Winter Winter also has the singular ability to bring a feeling of wilderness and raw nature to places that feel mundane, even boring, in other seasons. Many of the bumpy and potholed forest roads flanked by endless lodgepole pines that are merely tolerated on drives to the trailhead in the summer become the proverbial “winter wonderland” with the addition of a few feet of snow. Putting on the cross-country skis and heading up one of these roads for a few miles to a scenic overlook that merited only a glance out the window before driving further a few months before becomes an expedition to a breathtaking picnic spot. A cabin that you could drive to in June is transformed into a rustic outpost where you can sit in quintessential tranquility and watch snow fall while a woodstove heats the tiny structure. Favorite trails suddenly take on an Arctic charm that highlights the rock and water features, especially when the water turns to ice. Animal tracks left in the snow can be examined with a clarity rarely provided in typical dirt patches on the trail. The play of light and reflections of the sun off the snow make for near-mystical conditions. If you have the gear and experience to safely and comfortably do overnight trips in the winter months, the stargazing is incredible. The skies are can be exceedingly clear and the stars come out much earlier compared to the summer months. As long as you have the gear to stay comfortable in periods of inactivity in cold conditions, you can fit in some amazing stargazing between dinner and a reasonable bedtime. If you’re staying in a cabin or other structure, such as a lookout, you can head back inside to warm up, make some tea or hot chocolate, and head back out with your beverage in an insulated water bottle if you've brought one along. The sky will be darker, the stars shining brighter, and you’ll be warmer. This back-and-forth can go on as long as your eyes stay open and the rewards always seem to be worth pushing through the sleepiness. If you’re lucky enough to live in a region with natural hot springs, visiting these in the winter can be a luxury almost impossible to describe. Sitting in jacuzzi-warm water, rich with minerals, and watching a frigid river run beneath snow-draped trees is a surefire way to put a smile on your face. The juxtaposition between the harsh and benevolent characteristics of nature are visibly, and physically, apparent. Hot springs that would be crowded in the shoulder-season months due to their proximity roads and parking areas become much less visited. An easy stroll in the summer suddenly becomes a 1/4 mile epic in winter, requiring snowshoes and proper clothing to be comfortable in frigid temperatures until you’re able to immerse yourself in the water. As expected, however, the reward feels much richer and well-deserved. For hikers who live in a region absent of the geothermal phenomenons that are required for hot springs but with sustained subfreezing temperatures, winter often presents the opportunity to see frozen waterfalls. Visiting a gushing waterfall in May and then returning in January to see it frozen from top to bottom provides a sublime comparison. In regions with dense ridgetop deciduous forests, such as many Eastern forests, the views in winter are much grander than in summer. Trails that have the “green tunnel” effect suddenly become much more open and the shadows and shapes created by the bare tree limbs become a spectacle in and of themselves. Certain “life list” destinations are at their most hospitable and enjoyable in the winter months. Big Bend National Park, Everglades National Park and Dry Tortugas National Park come to mind in this regards. Backpacking on Cumberland Island National Seashore in December is a particular treat – the crowds are low, the weather is mild, and the citrus trees are ripe. There’s something beautiful about getting to a campsite, setting down the pack, and picking an orange or grapefruit to enjoy with your oatmeal the next morning. Final Thoughts While the coming of spring is an occasion for celebration, especially for those of us who reside in the northerly latitudes, winter has its merits. It offers a chance for skills to be honed, inimitable adventures to be had – such as moonlit cross-country skiing, familiar places to be experienced in a different atmosphere. If you weren’t able to appreciate the opportunities for solitude this past season, you’ll have a summer full of hiking to look forward to and plenty of time to plan for when the snow flies again. For a detailed article on the "how to" of experiencing the outdoors in winter with many tips along the way, check out this Issue 26 article courtesy of @PaulMags.3 points
-
There are certain trails which, when hiked in certain seasons, can be so blissfully pleasant as to seem almost otherworldly. Each step is a pleasure. Every view is breathtaking. The scents of the forest are almost intoxicating. Chirping birds, chattering squirrels and rushing creeks create a soundtrack that is almost orchestral. Spending unhurried time in nature seems to be one of the most refreshing things humans can do for themselves and one of the few activities which consistently pays out rewards greater than the time and effort entered. With an eye towards those indescribable and abstract rewards, I headed to a favorite trail in the Bitterroot Mountains for a quick overnight trip. Dramatic scenery in the Bitterroots Spring Backpacking in the Bitterroot Mountains of Montana Multiple waterfalls, a distant natural arch, innumerable eye-catching rock formations, dramatic cliffs, and a charming campsite beside a cascade conveniently located at the edge of the snowline made the first five miles a fantastic early season hike that left little to be desired. Since I knew hiking any further than the campsite would involve treacherous and unpleasant postholing (which I’d had enough of on a prior trip to the Welcome Creek Wilderness), I walked with a complete absence of haste and fished at two appealing pools without success. These breaks served as a nice refresher in tying and untying knots and generally reassuring myself that I could still manage to get a fly onto the water more often than in the branches of riparian trees and shrubs (although that ratio could stand some improvement). Before packing up after my second attempt at fishing, I paused to appreciate the sound and movement around me. The creek roared through the rugged canyon bottom and reverberated off the cliffs that jutted out of the north slope; birdsong filled the air; the forest seemed to hum with the energy of spring. The sun was warm on my face, yet a chilly wind blew down the canyon from the higher elevations where it was for all intents and purposes still winter. I strolled across talus slopes, relishing the complete exposure to the sun, and through dense coniferous forest that diffused the light into a soothing illuminative force that emanated from nowhere in particular. I crossed several small seasonal channels that emanated an urgent verdancy, as if they knew they would dry up once the snow melted and the relentless summer sun beat down. Some sections of the trail were still covered with firm snow that made for easy hiking, but for the most part I was walking on dirt. This allowed me to make good time and even with the breaks for fishing I found myself at the first large waterfall on Blodgett Creek. I’d camped near this waterfall, which blasts through a narrow chasm, twice before but had decided to push up to a second waterfall that cascaded rather than plunged and camp there instead. I arrived at my destination just as the afternoon began its long downhill stretch to dusk and busied myself with the mundane yet joyful chores of setting up camp and establishing a home for the night. Given the nonthreatening forecast – negligible chance of precipitation, highs in the low 60s, lows in the upper 20s – I opted to bring a tarp and bivy sack shelter system with me on this trip. I usually relegate this system to my bikepacking trips, but figured I’d take it along and enjoy a lighter load. As I struggled to achieve appropriate tension in the ridgeline of the tarp and realized I would need a jackhammer to get stakes in the rocky ground, any satisfaction in weight savings had shifted to frustration. Finally, 15 minutes longer and a dozen more curse words than it would have taken me to set my solo tent up, I had managed to cobble together a reasonable excuse for a shelter using rocks to anchor out the guy lines. Needless to say, I was reminded of exactly why I had exited the tarp phase I briefly entered a few years back when experimenting with ultralight backpacking. When a piece of gear takes twice as long to erect and seems to require a background in trigonometry and structural engineering, offers two-thirds the protection, with its primary redeeming factor being that it weighs half as much (but causes three times the headaches), I struggle to think of it as a superior piece of equipment. After my battle with the tarp was complete, I gathered water for the night – a task in which my chances of immediate success were fairly high. Filling up my bottles and water bladder beside the cascade was exhilarating. Spray from the rushing stream misted up and shifting winds occasionally blew it across my face. The cascade produced a cacophony that was an audible equivalent of the myriad and enchanting drops, rapids and sluices that were so visually enchanting. Such unanticipated moments of immersion and bliss were perfect reminders of backpacking’s inimitable appeal. An abundance of dead and downed wood, a readymade fire ring, and the slight chill in the air made not having a fire seem almost sacrilegious, so I set about gathering and sorting various limbs and branches. In only a few minutes the necessary piles of kindling and wood of increasingly larger diameters was assembled and, after a brief snack, felt like I could dedicate much of the rest of the evening to leisurely exploring around camp, reading, and casually soaking up the atmosphere. These activities, with a significant amount of time devoted to photographing the landscape, occupied me until my stomach compelled me to light the stove and make a simple but filling dinner. With a full stomach and a light heart, I struck a match and lit the fire just as the sun began to fall behind the mountains at the head of the canyon. Once the fire was stable, I brewed up some tea to enjoy while I read “Leaves of Grass” by Walt Whitman. I felt a bit guilty taking the vintage (1900) edition of this book of poetry with me, but poems such as “By the Bivouac’s Fitful Flame” made me feel like the book was more at home out in the woods than on a bookshelf and that it was perhaps the most perfect companion for this particular trip. Flames, poetry, and the pleasant feeling of bare feet warmed by coals under a starry sky led me to delay retiring to my sleeping bag until it became more work to keep my eyes open than to give in and prepare camp for the night and walk over to the tarp. I slept adequately but intermittently, grateful for the background noise of the cascade which quickly lulled me back to sleep when I found myself awake. Opting to enjoy coffee from my sleeping bag, I took my time and let the sun warm the canyon before doing a quick exploratory hike downstream to check for additional cascades. I didn’t have to go far before running into an impressive section of the creek where water slid down sheer rock after leaving the turbulent path created by a jumble of boulders and then continued its downward path in another section of rocks of all shapes and sizes. Returning to camp but reluctant to finish packing and leave, I postponed my departure by making a cup of tea to sip while contemplating my surroundings. I knew the longer I stayed the harder it would be to leave, so I forced myself to push through the bittersweet inevitability of leaving such a beautiful place and headed down the trail. The Hike Out After a quick downhill mile, I paused by a pool in the stream created by a logjam and carefully scouted for trout. Sure enough, there were several swimming in the depths of the pool but they were incredibly skittish and none headed for the surface to feast on the few insects that buzzed through the air and occasionally landed on the water. I tried my luck anyways and set up my Tenkara fly rod and line, which is a process so simple and easy that it makes me think I must be forgetting something. Despite my best efforts, the fish were decidedly uninterested in what I was offering and several passersby had kindly commented that it was indeed rather early in the season to be fishing, but wished me luck. As I contemplated admitting defeat and easing down the trail, the unmistakable sound and telltale circle of a fish snatching a fly off the surface at the upstream end of the pool caught my attention. With renewed determination and enthusiasm, I slowly moved toward where the action was and scouted the waters for a few minutes before tossing my fly towards a trout I spotted at the head of the pool. The first few casts didn’t catch its eye, but one landed at the perfect spot on the current and the trout slowly rose as the fly drifted through the pool. Suddenly, that most beautiful burst of water – a trout snatching a dry fly – appeared and the fish was on the line. A quick landing and release and I continued upstream, where I quickly snagged my fly on a log jam, nearly fell in the frigid water trying to get the fly loose, then broke the tippet. I decided to end on the high note of the catch and not the low note of the snapped line and headed down the trail. I tried to be a discerning angler, but it wasn’t long before I paused to fish another pool. Several trout were rising and I landed one quickly before entering into a long stretch of no action. So it goes. I suppose fishing is like hiking in certain ways – it’s not always about the destination (the catch), the journey (waving around a fishing pole in a beautiful place) is sometimes the most important aspect. With the high country still snowbound, and likely to remain so until mid-summer, trips like this one provide a great opportunity to stretch the legs and enjoy the shorter journeys and smaller fish, to admire the mountain scenery from the valley floor a bit longer, and to simply enjoy being alive and outside. Information You can find our full guide on hiking and backpacking in the Selway-Bitterroot Wilderness here in Issue 41. Like most mountainous destinations in the northern Rockies, the Bitterroots don't typically open up for snow-free hiking until June or later, with this window typically lasting until September. National Geographic offers their Selway-Bitterroot Wilderness map, and the Delorme Montana Atlas can be useful for getting to and from trailheads, as well as for planning trips to other Montana hiking and backpacking destinations. For a guidebook, refer to Hiking the Selway-Bitterroot Wilderness.3 points
-
Recent books and movies have inspired countless hikers and potential hikers to dream about thru-hiking one of the “big three” of America’s long trails: The Appalachian Trail, Pacific Crest Trail, or the Continental Divide Trail. However, most people that attempt the feat drop off the trail before completion. A six-month commitment to a hike can become just too difficult. Countless others don’t even try; it’s just too much time away from family and the lives they’ve built. Completing all three trails, the “Triple Crown of Hiking,” is beyond even contemplating. Other options exist though. There are long trails that, while still providing life changing experiences, can be completed in weeks rather than months. In fact, there’s even a “Triple Crown” that can not only be contemplated, it can be accomplished. That’s right, there’s a junior version of hiking’s “Triple Crown.” Mine began as a bucket list hike. As a guy in his 50’s with titanium in one foot, I didn’t even entertain the thought of the AT, PCT, or CDT. I was looking for a significant adventure though and settled on trying the Colorado Trail. The 486 mile CT shares nearly half of its distance with the Continental Divide Trail and travels through some of the most beautiful scenery of the Rockies. It was a tremendous, month-long experience; everything I had hoped for. After that trail, I was hooked on thru-hiking, just not the kind that requires six months at a time. In the last year I also completed both the iconic John Muir Trail, and the trail many consider to be the inspiration for the AT, the Long Trail. For those with weeks, not months, available to hike; I recommend them highly. But which trail is the best? It all depends on what you are looking for. The Long Trail The Long Trail is 273 miles of classic eastern mountains. Much of the time is spent meandering through oaks and maples. Because the trail runs the very spine of Vermont’s Green Mountains, there are a surprising number of big views. Besides the bare peaks of Camel's Hump and Mt. Mansfield, several other mountains crossed are ski resorts in the winter. The cleared ski slopes reveal more scenery than typically found on other eastern mountains. Quite often the views also include a beautiful small town nestled down in a valley. One such spot is Stratton Mountain. It was there that Benton McKaye conceived of the idea of the Appalachian Trail. The southern 100 miles or so of the trail are perfect if you are looking for an AT type experience. In fact, for that stretch the trail is shared with the AT. There are numerous shelters, plenty of company and nearby resupply. Once north of the split, the trail is significantly more challenging. The crowds disappear and the hiking gets much more rugged. There were many spots where I found myself climbing ladders or metal rungs drilled into rock walls. There were other spots where I wished there were ladders. More than once I looked at the trail in front of me and exclaimed, “You have got to be kidding me!” Oh, and the famous “Vermud” is a real thing. If you’re looking for a new level of challenge, the Long Trail is for you. The Colorado Trail The Colorado Trail is quintessential big mountain hiking. Rather than follow one chain of mountains, the CT crosses eight named mountain ranges, each with its own look. The hike varies between open coniferous forests, aspen groves, high mesas, and rugged alpine passes with views of mountaintops that seem to extend forever. In some drier areas, there are even cacti. While the trail averages 10,000 feet in elevation, the object of the trail is not to climb the peaks, but travel around them. Peak bagging is possible through side trips, but not on the CT itself. Initial construction was completed in 1987, making it by far the newest trail. Beyond self-issued permits at some of the wilderness areas, no paperwork is required to hike the CT. Winding from just south of Denver, Colorado to Durango in the southwest portion of the state, the CT is mostly single track without significant mileage on Forest Service roads. There is one (6 mile) section of road walking. Besides multiple mountain ranges the trail winds through six wilderness areas and some of the most beautiful scenery in the Rocky Mountains. The CT shares approximately 235 Miles with the Continental Divide Trail. The trail itself is very well constructed and appears to be well maintained. A tent is a necessity as support structures such as shelters are noticeably absent. In my mind a hammock is not really an option due to the trail spending extended stretches above tree line. Altitude is a significant consideration on the trail. With the average elevation over 10,000 feet, snow can remain well into the summer months. Thunderstorms at that height are a real danger. Hikers on the CT need to be self-sufficient. In the more remote sections there are few other hikers and convenient resupplies can be far apart. I typically hiked 70-100+ miles between town stops. Wildlife is prevalent on the trail and I saw quite a bit, from hummingbirds, chipmunks, and pika up to big mammals including deer, moose, bighorn sheep, and elk. Marmots were very numerous at higher elevations. There are also black bear near the trail, though I did not see any. The John Muir Trail The JMT should be on every hiker’s bucket list. It is 210 miles of spectacular. The JMT shares 170 miles with the Pacific Crest Trail and by most accounts is the most scenic section of the PCT. Running from Yosemite National Park to Kings Canyon National Park, the trail travels through the Sierra Nevada Mountains to the top of Mt. Whitney, the highest peak in the continental United States. Known for their beauty, the Sierra were called “The Range of Light” by John Muir. Beyond jaw dropping views of places like Half Dome, Cathedral Peak, Evolution Valley, and the high passes, the JMT is about water. There are beautiful alpine lakes and countless clear streams. Even hiking during the 2015 drought, enough melting snow was left to fill the spectacular rapids and waterfalls that travel down the mountains’ steep slopes. Much of the trail appeared very dry, but water was never an issue. There is only one mountaintop view, but it’s a doozy. At 14,505 feet, the summit of Mt. Whitney is the official endpoint of the JMT. On a clear day, the view goes on seemingly forever. Potential wildlife sightings on and near the trail were second to none as well. A good portion of the hike is within National Parks after all. All the wildlife normally thought of in a mountain wilderness lives near the JMT. Deer were thick through the lower elevations and seemingly oblivious to hikers. What really stood out during my hike was the close encounters with predators. I happened upon coyote and even a bobcat while on the trip. The multiple sightings of bear left no doubt as to why food canisters are required. Resupplies get tougher as you travel from north to south. The last relatively convenient resupply option is at Muir Trail Ranch, 110 miles into your 220-mile hike. (Yes, I know the trail is 210 miles, but you still have to get off Mt. Whitney.) Cramming enough food into your bear canister to take you the rest of the way can be a challenge, to say the least. Like the CT, the JMT has high elevations and big climbs, but both are well constructed with switchbacks when needed. Again, like the CT, you’ll need to rely on your own shelter. Perhaps the biggest challenge with the JMT is getting a permit. If you want to start at Happy Isles in Yosemite, plan on faxing in an application 24 weeks before your planned start date. By the end of the day, you will find out if you secured a permit. You probably did not. Per the National Park Service website, over 97% of all applications are denied. Prepare to repeat the process the next day with a new starting date and start location options. One hiker I met on the trail had been denied 22 times before she received a permit to start at Happy Isles Trailhead. Now I fully understand the National Park Service’s position. They have a duty to protect the wilderness from overuse and want to provide a true wilderness experience for those that do receive a permit. I certainly did not want to hike the JMT like I was in a conga line or a parade. Based on my experience, allowing 45 people daily to travel over the JMT’s first pass seemed like a reasonable number. While I saw others at times, it was not constant and I was always able to find a good spot to camp. None of that makes getting the permit any easier, however. You’ll need to plan ahead, yet be very flexible. In my case, after being turned down a few times, I changed my plan. I was able to secure a permit starting from Tuolumne Meadows, 20 miles down the trail. However, I also arrived at the park a couple days early and day hiked the section I would have otherwise missed. Yes 20 miles is a long day hike, but using park bus service and walking it backwards, it was doable. Was it perfect? No, but it was the only option to walk the entire trail within my timeframe. So, if the logistics of a 2,000 mile hike are impossible for you in the near future, don’t fret. There are viable options to still be a thru-hiker. Pick whichever one of the shorter options of America’s three foremost cross-country trails that sounds best to you. Perhaps you’ll get the bug and eventually hike the Triple Crown; just the junior version. Need to Know Information No permits are required to hike the Long Trail though some camp areas and shelters have a $5/night fee. More information is available at the Green Mountain Club. Other than free, self-issued permits at some wilderness areas, no permits are required to hike the Colorado Trail. More information is available at the Colorado Trail Foundation. A permit is required to hike the John Muir Trail. The cost is $5 for the permit, plus $5 for each person in the group. In addition, a bear canister is required on much of the trail. For those starting from the northern (Yosemite National Park) terminus, information on permits and the trail is available on the Yosemite National Park page. Best Time to Go The hiking season for both the CT and JMT is generally July through September. Early season hikers enjoy more wildflowers, stream flows and mosquitoes. At the highest elevations, snow can last well into the summer, and return again early in the fall. Parts of the Long Trail do not open until Memorial Day Weekend. The “mud season” returns by late October. September would be my choice as the trails tend to be at their driest, bugs mostly gone and the AT thru-hiker wave has passed. Early-mid October brings the added draw of tremendous fall color. Getting There The Colorado Trail Eastern/Northern terminus is located at 11300 Waterton Road, Littleton, CO 80125. From Denver, take I-25 South to C-470 West to CO Hwy 121 South. After 4.5 miles turn left onto Waterton Rd. Most hikers attempt to start the John Muir Trail at the Happy Isles Trailhead located at the eastern end of Yosemite Valley inside Yosemite National Park. There are numerous options for both driving and public transportation to and throughout the park. The southern terminus of the Long Trail is located on the Appalachian Trail at the Vermont/Massachusetts border. The trail can be accessed via the AT by hiking north from the crossing of Mass Rt 2 between Williamstown and North Adams, MA. Another option is the hike the Pine Cobble Trail from Pine Cobble Rd in Williamstown to the AT just south of the Vermont state line. Maps There are highly useful FarOut phone apps for all three trails. The Green Mountain Club produces a map of the LT. The Colorado Trail Foundation produces a map and a databook for the CT and many Trails Illustrated Maps cover the route. For the JMT I used the John Muir Trail Pocket Atlas by Blackwoods Press. The JMT Map Set from Tom Harrison Maps is another option. Books The Colorado Trail Guidebook by the Colorado Trail Foundation. Long Trail Guide by the Green Mountain Club. John Muir Trail: The Essential Guide to Hiking America’s Most Famous Trail by Elizabeth Wenk. Backpacking’s Triple Crown: The Junior Version by the author Jim Rahtz.3 points
-
While the potential exists to makes one's backcountry cooking setup nearly as complex as the average home kitchen, albeit hopefully a bit more miniaturized and lighter, in most cases the average lightweight backpacker only needs to boil water for freeze-dried dinners, freezer bag style cooking, to heat and hydrate a basic meal within the pot, or to heat water for things like coffee and tea. For these backpackers – like myself – the Evernew Ultralight Titanium Series pots have been a fairly popular option on the trail and have been my go-to choice for many trips over more than the past decade. The Evernew ultralight titanium pots have offered me many years of backcountry service. Evernew Ultralight 900 and 1300ml Titanium Pots These 2 pots are from the Evernew's "All Purpose" lineup, which also includes a 600ml version (ECA251) not tested here. With a listed weight of just 4.6 ounces and 4.1 ounces for the 1300ml (model ECA253 – measured weight: 4.9 ounces) and the smaller 900ml (model ECA252 – measured weight: 3.85 ounces) options at my disposal, respectively, these Evernew pots are really quite tough despite being so light. I've downright abused the 1.3 liter, including dry baking (not suggested), cooking in campfires, melting lots of snow for a group, and it’s even suffered a few impacts in the outside pocket of my pack from dropping it off ledges while traversing class 3 terrain. These pots are more short and squat than tall and thin, and as such catch more heat, heating faster and saving a bit of fuel and are more stable on top of a stove. On the downside, the shape doesn't really lend itself to an effective or satisfying combo for an all in one pot / mug solution (such as something like the Snow Peak 700), although it would work if you're not too particular. The lids fit securely, and don’t seem to require constant re-bending of the pot every time you unpack it in an attempt to get things to line up like some other solutions I’ve used. At times I’ve used a large rubber band with a loop to loop to connection on the lid handle – this allows one to then wrap the rubber band all the way around the pot and lid for even more security in the pack (for example when trying to store too many things inside), but these days I don’t bother and store the pot in the outside mesh pocket of my ULA Circuit also helps to keep everything in place. The Evernew Ultralight Series is a great choice for a variety of average lightweight backpacking conditions and applications – although the pizza in the upper left was baked in the 1.3 liter proving it possible, the thin walls may not be best for more in-depth and advanced cooking techniques. The handles (which fold for packing) along with the handle on the lid both feature heat insulating silicone material so you can take care of cooking without having to find that bandanna to use as a pot holder. A small pour spout is integrated to minimize spills and to ease water transfer, and measurement graduations can be found on the sides. Evernew also offers the non-stick versions of these as well, but in my experience it's not needed, adds a little weight, and the coating requires care both in your choice of utensils and in your cooking technique to keep from scratching it. 3 sizes are offered – a .6 liter, a .9 liter, and the largest 1.3 liter version. The .9 liter has been a perfect size for me for either solo cooking in the pot or for two when heating water and rehydrating freeze-dried or freezer bag style meals is all that's required. I will step up to the larger 1.3 liter version when cooking in the pot for two, baking experiments, or when melting snow for water in the winter. I've used these with alcohol stoves and mostly in that case with a Trail Designs Sidewinder Ti-Tri, but most recently I’m usually using them with a canister stove and usually the Soto WindMaster. With this stove, I’m also able to fit a small MSR 110 gram fuel canister in either size, and I’m able to fit a larger 220 gram Snow Peak fuel canister in the 1.3 liter upside down while still being able to close the lid. If you like to store your fuel canister inside your pot, turning the canister upside down may help to make things fit. Conclusion While the thin, scorch-possible walls of the Evernew pots might not be the best choice for the gourmet backcountry chefs among us or for your next morning huevos rancheros experiment on the trail, if you mostly need to heat and boil water, melt snow, or cook the occasional basic pasta meal or beans and rice in the pot like me (low heat and keep stirring!) the Evernew Ultralight Series of pots are hard to beat. Throw in a long handled spoon (the Toaks is my current choice) and optionally some type of mug for coffee (my pick: the Snow Peak 450 – single wall) and you're set. Although the Evernew Ultralight pots are a bit on the pricey side, they're also light, effective, and durable – always a great combination for the outdoors. The Evernew Ultralight pots can at times be hard to track down, but you can usually find them in all 3 sizes for around $50-$70 depending on size here at Amazon.com.3 points
-
Chris, Randy and I sat at a local brewery, a map of Olympic National Park spread across the table. We had climbed in the Olympics for decades, but now we were attempting something different – a thru hike from one side of the park to another. You might have thought planning to cross using established routes would be simple, but it was proving anything but. “Even the freaking rain forest is on fire.” Chris traced a route with his finger. The Pacific Northwest was suffering through one of its hottest summers on record, and our choices were dwindling. Park rangers had nixed the north-south high route, telling us the Elwha Snow Finger – the path leading from the mountains to the central river valley – had disappeared with climate change. Descent would require a rope and rack of climbing gear. As Chris noted, the western exits were threatened by the Paradise Fire, burning for months in the upper canopy of the Queets Rainforest. After a month of planning we decided to come in from the east, up the Dosewallips River Trail, over 5800-foot Hayden Pass, and then out to the north, along the Elwha River. Even this route reflected the consequences of a changing climate and aging park infrastructure. We’d be out for six days and travel 60 miles, but 11 miles of that total would be on what were once access roads. A 310-foot section of the Dosewallips River Road had washed out in a flood in 2002, and cost, competing views of wilderness, and the likelihood the river would continue running higher essentially meant the road – the traditional eastern approach to the park – would never be rebuilt. We would end our trip the same way. On exiting the trail system at Whiskey Bend, we needed to trudge six miles along a road that was frequently blocked by flooding and was crumbling away one chunk of asphalt at a time. Our Hike Across Olympic National Park The trip began, then, with our staggering along the Dosewallips Road. The temperature topped 90 degrees. The steep rise to the abandoned ranger station angled us into the sun’s glare, bleaching the road bed white and burning the outline of my pack along my shoulder blades. Drenched with sweat, we dropped our packs at the base of a towering cedar. I sucked in a breath and looked at what remained of the ranger station and campground. The place felt haunted. The river’s white noise might have blended with voices, as families came to picnic beside the sparkling water. Now plywood covered the windows and doors of the park service buildings. Modesty at the toilet was provided by a shower curtain hung where the door had once been. Waist-high grass swayed, overgrowing the picnic tables, and the informational signs – “Dosewallips Trailhead/Mountain Wilderness” – and a host of others had been blown over, the plastic facings shattered and their bases smothered in weeds. On the trail at last, we fell into a familiar line: Chris leading, Randy next, and me anchoring. Our goal was camp on Deception Creek, 8 miles and 1500 vertical feet away. Our time on the sun-drenched road had wasted us. Even sheltered under the cedars and firs, I couldn’t catch a full breath in the heat. We dropped onto the mossy carpet beside the trail at ever-shortening intervals. At each stop we’d gulp water and then guiltily check our bottles, evaluating whether what remained in them would last till camp. Finally, mercifully, a bear wire appeared, tracing a line from a fir’s branches to the ground. The camp was just below the trail, a big dusty circle with the creek trickling quietly along one side and the river giving a full-throated roar on the other. I dragged myself down the path and walked out beside the river. The Dosewallips cascaded by in blue-white arcs smooth as Chihuly glass. We had 13 miles behind us and 47 left to go. “These long hikes, you get faster each day,” I said over dinner. Randy, ever the cynic, caught Chris’ eye and bobbed his head my way. “Does he ever stop lying?” “Well, the weather is supposed to break soon,” I replied, trying to fight the leaden mood exhaustion brought on. But the next morning supported Randy’s negative world view. The trail climbed the valley, popping out of forest and into meadows of head-high grass and Russian thistles, the plants holding heat like a sauna and disguising chuckholes deep as tiger traps. I remembered the first book I’d ever read about the Olympics – a 1970 edition of the Olympic Mountain Trail Guide by Robert L. Wood – and thought how this day contrasted with his telling. Mt. Fromme, described as “crowned with snow cornices”, now shimmered at the valley’s head, a series of naked cliffs that seemed to float, detached from the earth. Near tree line, Dose Meadows opened before us, acres of grass and lupine burning with light. At Woods’ writing, the meadow had teemed with wildlife, marmots, deer, and bears among throngs of backpackers, but we hadn’t glimpsed an animal, human or otherwise, in a day and a half, the three of us alone on the once-popular trail. A boot path led around a low dirt hill to another gorgeous site on the Dosewallips, the river here placid and shallow. Once the tent was up, Chris and I hastily repacked for our side trip up Lost Peak. We might be thru-hiking, but peaks rose all around us, and the climbing bug couldn’t be easily shaken. “You sure you’re not coming?” I asked. Randy stood beside me with a book under one arm. “Swear to god, man, just two miles up. No farther than that.” But Randy snapped his book open, and the two of us headed up the Lost Pass Trail, so primitive and steep we had to kick our boot edges in to hold the slope. We reminisced along the way. One goal of this trip was to slow life down and refocus. “I feel like the last twelve years went by like a dream, Doug,” Chris said. “Like I lost them. Where’d they go?” Once, we climbed three weekends a month, but we all settled down and had kids, and while their young lives flew by, our trips to the mountains had become rare and manic in turn. Harsh alpine country surrounded us at Lost Pass. We headed toward a rounded dome to the east, kicking over talus and through krumholz. The mountain was parched. Heather snapped as we pushed through, and every broadleaf alpine plant was burned a brittle red. Lost Peak was a rubble pile about 100 feet higher than the dome, and we scrambled the boulders to the top. We looked back the way we’d come. The river’s canyon wound away, slopes darkening with firs until everything vanished in the haze. Randy was still reading when we returned, reclining against a log in the meadows and bathed in sunset light. The scene was blissful, and, next morning, the universe picked that same joyous tune. High clouds rolled in and the heat wave broke. For day three we’d maintain our basecamp, go light to Hayden Pass, and then follow a climber’s trail to Sentinel Peak. The river breathed its last beneath a final bridge, just a sheen of water trickling down rock steps. We hiked through tundra and followed the looping switchbacks to the pass, just a sharp notch in the ridge. A strong trail south wound up Sentinel, crossing talus basins and squeezing through clumps of alpine firs. Views opened on the rock slabs just below the summit – far off, the smoke plume from the Paradise fire and, nearer, clouds building behind Mount Anderson, a tortuous ridge-run away, its twin summits separated by a glacier and a rock pillar thrust skyward like a knife blade. We settled back in camp early. I’d planned on an afternoon nap, but we shoveled down snacks and chattered away, and I couldn’t keep my eyes closed, afraid I’d miss the next story though I’d heard each one a dozen times. That evening, a buck stepped from the shadows across the river, the first animal we’d seen in four days out. Heedless of us, he lowered his head to drink, his neck and shoulder muscles rippling. He picked his way soundlessly through the brush, glowing in front of that dark forest like Zeus come to earth in animal form. The next morning we hiked to the pass again and took the Hayes River Trail down, coasting nine miles to the banks of the Elwha. The views of Mount Anderson’s intimidating glaciers disappeared. We navigated a trail washout, and shortly after that entered a gentler world. Hikers appeared in clusters. The forest rose and moss painted earth and blow downs a delicate green, every image softened as though viewed through a gauze-covered lens. On the porch of the Hayes River Patrol Cabin we took a break before strolling to yet another perfect river camp. Compared to the Dosewallips, the Elwha was mellow, its water clear and the gravel-lined bottom symmetrical as though a pool boy had taken a rake to it. Our final two days of hiking had a dreamlike quality to them after the battering we’d taken at the outset. On day four, the valley broadened as we passed the Elkhorn Guard Station, deciduous trees draped with moss in a scene out of the Mississippi bayou. After one last camp, on the Lillian River above the Elwha, we passed increasing numbers of hikers and reminders of the human history in this valley: the weathered cabin grandiosely named “The Elk Lick Lodge” and the equally-dilapidated Cougar Mike’s Cabin a couple of miles further up the trail. Olympic National Park offers stunning forest hiking interspersed with scenic meadows and mountain views. The End of the Trail Half an hour past Cougar Mike’s came trail’s end at Whiskey Bend. We swung around the road damage and hiked the pavement the final six miles to one last barrier, the gate closing the road to traffic. There we encountered a scene of intentional destruction, all in service of this beautiful country we’d just traversed. I dropped my pack and followed my friends onto an overlook platform. Across the river, a matching platform was filling with tourists exiting a bus, but on our side we stood alone. A century ago, the Glines Canyon Spillway had been erected to dam the Elwha at a cleft between rock walls. Now the dam was gone, removed in 2014 to restore the river and allow a vanished ecosystem to be reborn. In all honesty, it didn’t look like much – the spillway was just two weathered cement walls caked with moss, old metal channels hanging loose above the rushing water. Back in the direction we’d come, manmade Lake Mills had drained. The ground it once covered looked like a construction site, braided channels flowing through a mudflat and patches of scrub. But the point of it, I told myself, was what this scene symbolized. With the park’s roads crumbling, the high country parched and the forest on fire, at least this attempt was being made to return one river valley to its pristine state in a way everyone could enjoy, whether or not they chose to hike the whole darned park to get there. Along the trail in Olympic National Park Need to Know Information As the park service says, “Wilderness Camping permits are required for all overnight stays in Olympic National Park wilderness (backcountry) year-round.” All of the areas on this trip were considered “non-quota”, which makes getting a permit easier, but the process is still fairly complicated and appears to be changing from an in-person or phone in to an online system. Best recommendations are to check out the wilderness sections of the park website, call the park at (360) 565-3130, or stop into a wilderness information center at Hoodsport or Port Angeles. One possible complication is that the Hayden Pass Trail was damaged (fire again) in 2016, and as of 2019 the NPS doesn’t recommend it. If it is not reopened, you might consider taking the primitive Lost Pass Trail north and exiting at Hurricane Ridge. Best Time to Go Obviously, the weather has been warming, but from the end of July through September, weather in the Pacific Northwest remains as close to perfect as you can imagine. While it’s always a necessity to pack rain gear, days are long and nights are temperate. Getting There The Dosewallips River Road leads west off Highway 101, just north of the tiny town of Brinnon, Washington. If you’re coming from the Seattle area, the coolest way to make the trip is via the Edmonds/Kingston ferry (reserve your spot through the Washington State Ferry system), and then take Highway 104 till it ends at Highway 101, at which point you head south toward Brinnon. Maps and Books Olympic Mountain Trail Guide by Robert L. Wood is the book I still use for general park info since the author knew every trail well. The book has been out for decades and was recently updated in 2020. If the idea of bagging a few peaks along the way appeals to you, be aware that the Climber’s Guide to the Olympic Mountains is known to have some interesting route descriptions for obscure peaks. The guide lists both Lost Peak and Mount Fromme as Class 1, trail all the way to the top, excursions. Lost was a thrash that became a light scramble at the summit; Fromme appears to be a Class 2 that begins with a steep unpleasant stomp through krumholz. Most of the other allegedly 1.1 climbs in the Dose Meadows area are probably of a similarly mixed character. The book does give an overview of all of the approach trail systems, so it has its uses. There’s also a newer Falcon Guide, Hiking Olympic National Park by Erik Molvar. For navigation, the waterproof and tearproof National Geographic Trails Illustrated Olympic National Park Map is suggested.3 points
-
Wolves, Red Dogs, Grizzlies, & Outlaws A tiny “red dog” – a fuzzy, reddish bison calf – was all but glued to its mother’s side as she fought off a half dozen wolves near Yellowstone’s Slough Creek. The mother had strayed from the herd, and wolves were attacking from all sides in an attempt to separate her from her baby. The stiff-legged little calf wheeled and turned with its mother as best it could, but the outcome seemed inevitable. The standoff was visible to the naked eye, about two hundred yards off Route 212 on the park’s northern perimeter – an area sometimes called “North America’s Serengeti.” Two or three wolf-watchers had set up spotting telescopes at the turn-off to Slough Creek, and they invited my husband, John, and me to take a look. The scene was even more dramatic through a telescope. The calf would surely be killed and consumed, and probably soon by the look of things. It turned out that the story’s outcome was anything but simple. And, in the end, the fate of the young bison was just one piece of a web of complex wildlife relationships that we encountered that day. John and I are seasonal volunteers in Yellowstone, and we had decided to spend an October morning hiking a roughly five mile loop starting and ending at Slough Creek Campground. The small campground is located two miles down an unpaved road from Route 212, 25.8 miles east of Mammoth Hot Springs. The wolves that surrounded the bison mother and baby belonged to the Junction Buttes, a pack that formed in the past few years and now claims this area as part of its territory. Wolves follow their prey; in Yellowstone, this most often means elk, but there can also be other targets such as bison calves, or even adult bison for certain packs. Young wolves practice the skills they will need to successfully hunt. I recently watched four Junction Butte pups on a hill above Slough Creek, playing with elk antlers by tossing them in the air, tugging, and fighting over them. It was play all right, but it served as important skill-building and social bonding for these up-and-coming apex predators. In addition to wolves and bison, the Slough Creek area is known for grizzly bears. Hikers in Yellowstone should check in advance for any recent warnings about grizzly activity or trail closures. It’s important to never hike alone, make a lot of noise, and have bear spray readily available and know how to use it. The Hike Arriving at the Slough Creek Campground, John and I walked to the second creek-side campsite, and began the loop hike by sloshing across the creek – which varies seasonally from ankle to shin deep. Picking up easy-to-spot Buffalo Fork Trail on the far side of the crossing, we passed through a classic alpine meadow, then ascended several hundred feet on the rocky, narrow path. We were both hyper-alert due to the possibility of grizzlies, particularly because it was autumn and Yellowstone’s bears are ravenously hungry as they pack on weight for hibernation. Biologists believe that the park’s grizzlies have learned to follow wolves and attempt, often successfully, to feed at their kills. A bear at a carcass is frequently not the animal that made the kill, but rather an opportunistic scavenger. On the day that I watched the four Junction Butte pups at play, I was told that I had just missed a large grizzly that appeared about a hundred yards from the wolf pack. Perhaps the bear was following the pack, or was at least keeping track of its location. As John and I hiked, we spotted bison, and here and there, mature, solo males that spend much of the year away from the herd. A nineteenth century writer called these cantankerous bulls “outlaws,” and gave some safety advice that’s still accurate today. Bison have difficulty seeing straight ahead, so stand to the side to make sure that the animal sees you. Keep your distance (the park requires a minimum of 25 yards), and be prepared to make detours. And remember, a raised, rigid tail signals that its owner is agitated. At 1.7 miles from the campground, an open view to the right (east) encompasses an expanse of grassy hillside descending to a very large meadow marked by a distinctive rock “island” and Slough Creek’s meandering channels. On the far side of the meadow is a patrol cabin and the clearly visible Slough Creek Trail, which is an old wagon road. Braided routes lead down to the meadow and trail, but ankle to knee-deep or higher creek crossings are required depending on the season. Be sure to stay on an established boot or game trail to avoid doing damage to the habitat. While descending the hillside and crossing the meadow, we gave several outlaw bison a wide berth and also kept our distance from a fresh-looking bone pile. Wildlife experts stress the importance of staying far away from any carcass or fresh bone pile to avoid having a dangerous encounter with a grizzly or disrupting the activities of wolves and other creatures. It was easy to see why ungulates congregate in these lush grasslands, why their predators follow them here, and why other animal species thrive in this environment. I spotted a beaver lodge close to Slough Creek Trail, and began to understand that beavers must have played a major part in producing the wildlife-rich setting. On the bank of what appeared to be a beaver-created pool, a family of otters had left evidence of their approval of the setting. They had worn a deep, slippery slide in the mud; it was a good eight feet long and dropped straight into the pool of standing water. Reaching Slough Creek Trail, a left (north) turn leads away from Slough Creek Campground, past the patrol cabin toward Silver Tip Ranch, a private lodge just north of the national park boundary. The lodge is permitted to transport supplies and visitors on the trail using horses and wagons. To complete our loop and return to the campground, we turned right (south), and hiked through rocky, forested terrain to reach the trailhead and large wooden sign where you would normally begin a walk on the Slough Creek Trail. The distance from the patrol cabin to this trailhead is 1.8 miles. From the Slough Creek Trailhead, John and I walked the remaining half mile to the campground and our vehicle. As we drove back to Route 212, the drama of the little red dog and its mother was on my mind, and we stopped at the highway turnoff to see if we could learn what happened. One of the morning’s “wolfers” was there, and she filled us in. The news was startling. When last seen, the bison calf was still alive. After John and I left that morning, the wolves continued their coordinated –and seemingly unstoppable – attack for a time. Then, for unknown reasons, they backed off and vanished from the scene. Maybe these wolves were young pack members practicing the hunt, learning how to “test” vulnerable prey and other skills. Or it could be that they tired of the standoff and the threat of injury by the mother. Perhaps these intelligent predators determined that the youngster could most likely be killed later. During Yellowstone’s harsh winter months, wolves grow hungrier, and many of their prey gradually weaken and are less able to fight off predators. This calf was the youngest I’d ever seen at this time of year, born dangerously close to the arrival of harsh weather. Most calves arrive at the end of April or during May, a time that offers the best chance for their survival and for the survival of the herd itself. I assume that the red dog’s late birth was a simple accident of nature. I asked a naturalist friend what chance it had of surviving the winter – “Hardly any,” he answered. On the other hand, the little guy had already defied the odds and made it through the day. Yellowstone National Park offers scenic views and ample fishing opportunities for those so inclined. Need to Know Information There are no peaks to bag or brag-worthy river fords on this route. But what could be better than a beautiful, reasonably short Yellowstone loop hike with the possibility of spotting a variety of wildlife? No crowds. No hard-to-get-to trailhead. And, with enough caution, this would make a great family adventure with kids who are experienced hikers. Bring bear spray, separate shoes for water crossings if you don’t want to hike in wet boots, and a good map and compass. Basic route finding skills are helpful. You can also hike the loop in reverse from the direction that I describe, but this could make route-finding in the loop’s middle section more difficult. Instead of the loop hike, you have the option of an easy in-and-out walk of any distance (with no water crossings) by starting at the Slough Creek Trailhead described above. Check the Yellowstone National Park website for complete information concerning roads, campgrounds, wildlife, and park alerts. Best Time to Go & Getting There Slough Creek Campground is located two miles down an unpaved road from Route 212, 25.8 miles east of Mammoth Hot Springs.The two mile-road from the Route 212 turnoff to the loop trail is open from late spring until early November. During this roughly five-month period, the loop can be completed unless the water level is high. Fall is probably the best choice because the stream crossings offer lower water levels, but again, be extra alert for grizzlies. If you’re interested in camping, Slough Creek Campground is open for camping from mid-June until early October on a first come-first served basis. The campground was threatened but not destroyed by fire in 2016. Maps and Books Yellowstone National Park, Trails Illustrated Map. The Hiking in Yellowstone and Best Easy Day Hikes in Yellowstone Falcon Guides are also available.3 points
-
“Looks like you’re going in circles” is a way to tell someone that they're wasting their time. Talking in circles generally isn’t a compliment either. However, walking in a circle can be a good thing for backpackers, provided they’re walking around something interesting. Think about it. Logistics become pretty easy. No ride back to the start is required. In the case of the Tahoe Rim Trail (TRT), walking in a circle is a great experience. From high above, this spot on the Tahoe Rim Trail offered a great view of the lake and surrounding mountains. About the Tahoe Rim Trail As you may have guessed from the trail’s name, the TRT involves walking around Lake Tahoe. The largest alpine lake in North America, Tahoe is 22 miles long and 12 miles wide, sitting on the border of California and Nevada and nestled against the Sierra Nevada. The trail itself is approximately 170 miles, so there is more to it than just keeping the lake to your right. In fact, much of the route is in National Forest with other parks and wilderness areas thrown in for good measure. Quite often, the lake itself is out of sight. The TRT is a great choice for the first-time distance hiker; or anyone that wants a beautiful hike with a minimum of logistical issues to deal with. If you’ve left your car at the start, it should be handy when you finish. As far as resupply, stops in South Lake Tahoe and Tahoe City are well spaced and convenient to the trail. If you’re flying to the trail, shuttles are established to either town from the Reno airport. Summer and early fall feature consistently dry weather. A permit is required for the Desolation Wilderness, but there are no quotas for thru-hikers. Plus, it can be had with a phone call and $5 or $10, depending upon your hiking speed. You’ll also need a California Campfire Permit. That one is free for passing an internet quiz. The TRT winding its way in between boulders and through the forest My Hike on the Tahoe Rim For my spin around the lake I flew into Reno early last September and caught a shuttle to Tahoe City, which was to be my starting point. After checking into a local hotel, my first stop was Alpenglow outdoor store, right down the street. There I got a fuel canister, friendly service, and a big load of concern. The guy at the counter said he heard the trail was dry for 50 miles past Watson Lake (my first night stop). Crap! Fifty miles is a helluva long way to carry water. That much weight in my pack would be a backbreaker for me (as I mentioned, long sections of the TRT are nowhere near Lake Tahoe. It’s not like I would be able to dip a cup in the lake whenever I got thirsty). I made a phone call to the Tahoe Rim Trail Association and the helpful folks there confirmed that their website was correct; the trail was dry, but not that dry. Despite the ongoing drought there would be water where I was planning on it with the longest dry stretch around 13 miles. Whew. It was definitely time to head to the Tahoe Mountain Brewing Company to settle my nerves. In the morning it was a short walk through town to the trail. It immediately started climbing from the 6,225 foot elevation of the lake, but nothing terribly steep. Soon I was already getting occasional views of Lake Tahoe as the trail bounced between 7,000 and 8,000 feet for the first 20+ miles. This, and all sections of the trail, was well marked and fairly easy to follow. For planning water and camp stops I carried the Blackwoods Press Pocket Atlas of the trail and also downloaded FarOut's TRT Guide onto my phone. Though not an exact match, they were close in terms of mileage. Once the Mt. Rose Wilderness Area was reached, the next 7 miles was a climb through open terrain to reach the summit of Relay Peak. At 10,330 feet, the peak is the highest point on the trail with some great nearby views of the lake. Another area highlight across the north shore was Galena Falls, a 60 foot cascade that was still flowing well in spite of the drought. The spot is popular with day hikers and was busy as I passed through. Traveling down the east side of Lake Tahoe was scenic and relatively easy with no major climbs or drops, but water was definitely a concern. Side hikes to water hydrants added to the mileage. I had access to water each day, but there were dry camps. After 80 miles and five days of hiking I reached South Lake Tahoe. The town can be accessed by walking a couple miles down a steep road or catching a $2 bus located at a stop a short side hike off the TRT. Take the bus. South Tahoe is a great town to resupply with hotels at any price point, Sports LTD for fuel and other equipment, a grocery and plenty of restaurants. And, they are all within easy walking distance of the transit center. There’s even casinos across the street in Stateline, Nevada if you’re so inclined. I stayed at the Lake Tahoe Resort Hotel. It was a tad pricey for a hiker stop, but very nice. In addition, it was next door to the transit center, had a laundry on site, held a resupply box for me and had a $2 happy hour. Hard to beat. With rain scheduled for the next day I took a zero. It rained for 15 minutes and was cloudy much of the day. It would have been a great day to hike, but my legs weren’t complaining about the day off. It turned out that my zero day had the only significant cloud cover of the entire trip. Bring sunscreen. After catching the first bus of the morning it was back to the trail. Although I was at the southern end of the lake, I continued walking south. This is where the TRT picked up some mileage by continuing past the lake for another 25 miles or so. Through the area, the views were not the lake but mountains, impressively still holding snow in mid-September. From there on out, lakes and snowmelt streams were abundant enough that running dry was no longer a concern. At mile 109, the trail turned back north, and also joined with the Pacific Crest Trail (PCT). The two trails shared the tread for the next 50 miles. I met a few southbound PCT hikers on that stretch; all noticeably faster and younger than myself. Mile 121 provides another opportunity to resupply and get ice cream at Echo Lake, if you arrive before Labor Day. All I could do was stare through the window before shuffling on into the Desolation Wilderness. Here was the section that required the permit and it was worth the price of admission. The mountains and valleys had been scoured by glaciers that emptied the area of topsoil. The most dramatic spot was Aloha Lake surrounded by stark granite shorelines and snowy surrounding mountains. The great views continued as I headed north. Several beautiful lakes beckoned me to slow down, but I kept moving. There was more great scenery ahead. I did take a long break at Dicks Pass where I dined with marmots. At 9,400 feet, there were remarkable views in every direction. Shortly after Desolation Wilderness, there’s Granite Chief Wilderness with tremendous views of its own including Twin Peaks. It was near there that I made my last camp. It was a cool, clear night followed by a sunny day; the same weather I had on every day of the trip. The main difference was the start of fall color as I began the final drop into Tahoe City, where I had begun hiking eleven days and 170 miles before. At that point I was only a half mile from my hotel which was holding a change of clothes for me from my earlier stay. In the morning, a shuttle arrived right in front to carry me back to the Reno Airport. Logistically, this was one of the easiest hikes ever; just go in a circle. However, with a trail and scenery that rivaled any I’ve seen, it was no waste of time. A dramatic view along the Tahoe Rim Trail Need to Know Information A great source of information to start planning is the trail’s support organization website. Two permits are required to hike the entire trail. A California Campfire Permit can be had for free by passing a short test. This is required even to use a camp stove (campfires themselves are prohibited through most of the Tahoe Basin). A Desolation Wilderness Permit can be obtained at recreation.gov. However, there are quotas in place during the busy season. Thru-hikers can avoid any limit by calling the Forest Service directly at (530) 543-2694 no more than two weeks before the date they plan to enter the area. My permit for two nights cost $10. Best Time to Go Generally the trail is snow free from Mid-July to Mid-September. However, in large snowpack years, it would be a good idea to contact the Tahoe Rim Trail Association closer to your planned hike to get an idea of how the “melt” is progressing. Water and mosquitoes both become more scarce as the season progresses. Getting There From Reno, NV to Tahoe City take I-80 West to CA-89 South. From Reno to South Lake Tahoe take US-395 South to US-50 West. Both cities are served by regularly scheduled shuttles from the Reno airport. More information on shuttles is available here and here. Books Tahoe Rim Trail by Tim Hauseman is a complete guide and endorsed by the TRT Association. Maps Maps are available to download here. On the trail I carried the Tahoe Rim Trail Pocket Atlas by Blackwoods Press, and a National Geographic map is also available. In addition, I downloaded FarOut's TRT Guide onto my iPhone.3 points
-
Four days of water is around 28 pounds if you bring a gallon a day. I have done one backpacking trip in Big Bend near the Mules Ears. We went around New Years in early Jan. I went with 3 geologists, so we hiked from spring to spring using topo maps. We were never on a trail. The weather was great, near 70 during the day and freezing at night. Our rule was if we could not find the next spring at the end of a day we would back track to the last known water.3 points
-
Danner3 points
-
I like to carry a GPS when I hike or backpack. I usually carry an extra set of batteries for every 2 days I plan to be out. About 8 years ago I started out on a 70 mile loop trail. An hour after I started I checked the GPS and it had quit. Dead batteries. In the next 2 hours I used all the batteries I had and all were dead. I had picked batteries out of the wrong drawer. I was depending on the GPS because I knew I would probably lose the trail about half way. If I was totally lost the GPS would show nearby roads and wet areas. Fortunately paper topo maps and compass don't need batteries. It took 8 days to do a hike that should have taken 5 or 6 days. Now I always take extra batteries that are still in the package. I have forgotten a few things. Once I forgot my hiking poles - which are also my tent poles. I cut 2 saplings and carved to the right length. Another time I forgot my spoon. My evening meal is always soup. Carving a spoon is much harder that tent poles.3 points
-
Author here. As I said directly in the article "Obscurity, not secrecy." Tell about the great place. But perhaps not give the exact breadcrumbs.3 points
-
Can't sleep in the backwoods? Easy solution: join the Army or Marines, you'll learn to sleep anywhere and everywhere. OK, that may sound a little dramatic, but the science behind it is worth exploring. If you're able to, start by taking naps in less than ideal places. The couch, the floor, bathtub, you get the idea. It doesn't have to be long deep sleep at first, just a quick 20 minute nap to get your body used to falling asleep on harder surfaces. And don't just do this the week before your hike, do it on a regular basis. If if your body is used to only falling asleep in a pillow topped bed with 1000 thread count sheets, then you won't know how to get comfortable without them.3 points
-
Great reference for all outdoors people.3 points
-
Wow, can some of us make a day-hike into a really complicated affair. How about? .... Throw a loaf of bread and a pound of tea in an old sack and jump over the back fence. - John Muir3 points
-
I would suggest not thinking about useful vs necessary as the standard for considering a purchase, but rather risk vs. reward or discomfort vs. comfort. This is basically the decision we make with all of our gear... tarp, tent, or hammock? Inflatable sleep pad or closed cell foam? Cook on a fire, carry a jetboil, or use a pepsi can stove? You get my point. When it comes to trek poles, I believe the reward and comfort factors are significant. In addition to all the features mentioned above, they provide a 3rd (or even 4th) point of contact with the ground, which provides added stability on down hills and slippery terrain. Not only is this safer, but it takes strain off the knees. I personally use 1 trek pole. I like the benefits discussed, and like the freedom of having a free hand.3 points
-
I have been overdue to post this report. I did this 4 day/3 night backpack for the fourth time over July 4 holiday weekend. It entails 28 miles and about 8000 feet of vertical gain and loss over 4 passes as you circumnavigate the Maroon Bells of Colorado's Elk Mountains (near Aspen). I led a trip for the Colorado Mountain Club (myself and 5 others), leaving Friday morning July 3 from the Denver area at 7am, and arriving at the trailhead at Maroon Lake at noon. We had planned to hike up to just below our first pass (west maroon)--about 6 miles and 2000 of vertical. However, we stopped about a mile short of that as the rain was a bit persistent that day: Saturnday (day two) found us up at 6am, on on the trail a bit after 7am--we had a beautiful day, with clear skies, snow capped peaks around us, and (with all the rain we have had in the past 60 days), Colorado was as green as she ever is this time of year: We ascended to west maroon pass, admired the views west into purity basin, then descended into the basin, back up to our second pass of the trip--frigid air pass. All four passes on this loop are approximately 12,500 in elevation. Snow was present on all the passes, but it was easy to avoid or deal with the terrain. After lunch and some hang time at frigid air pass, we descended into fravert basin and then another 3-4 miles to our camp for the night. We arrived about 3pm. I like to do this trip over 4 days so that each day allows for an early arrival to camp, and time to chill, relax and enjoy the scenary (after our chores are done, of course!). We had a bit of rain shortly after setting up camp, but nothing like day 1. A good sized buck mule deer decided to stop by and check us out after dinner, but his visit was very brief, and my camera wasn't quite handy enough. Sunday (day 3) found us on the trail around 7:30am. This was our hardest day, with a steep climb out of fravert basin up to trail rider pass. We did have a treat to start the day--views of a 300 foot waterfall (King falls). After a bit of a climb, there is a beautiful alpine meadow with views to the backside of the maroon bells, and a small lake--one of my favorite parts of the trip. We ran into some rangers doing trail work as we were sweating our way up to trail rider. They informed us that most likely by next year bear boxes are going to be mandatory for the entire loop, rather than just the lower part of west maroon creek drainage as was the case this year (day one terrain). This doesn't excite me. In any event, trail rider was our lunch spot, and we again admired great views down into snowmass lake, and also of many of the surrounding elk mountains: hagerman peak, snowmass peak, snowmass mountain, maroon peak, north maroon peak--the list goes on! We then descended to snowmass lake to camp for the night, encountering the largest snowfields of the trip, but consolidated enough that it wasn't a problem. Arrived to camp early afternoon. Had heavy rain shortly after arriving, and had to resort to shelter in our tents until it let enough to allow for dinner. Rain, thunder, and lightning most of the night! Monday (day 4) up at our usual 6am, had the joy of packing up wet tents, but the rain had stopped, and held off all day to allow for an enjoyable hike up to our final pass (buckskin), and then a descent back to our trail junction near crater lake. There we rejoined the hordes of tourists, who generally will hike this far, and no further. Back to maroon lake, where we caught the bus back to aspen highlands (just outside of aspen, where we had had to park our vehicles). I saw more folks on the four pass loop this year than ever before--I suspect this is driving the forest services' decision on bear boxes. All in all, a great trip! Here's a link to all pictures, for those who are interested: https://picasaweb.google.com/102393818060897668441/4PassLoop072015 Enjoy!
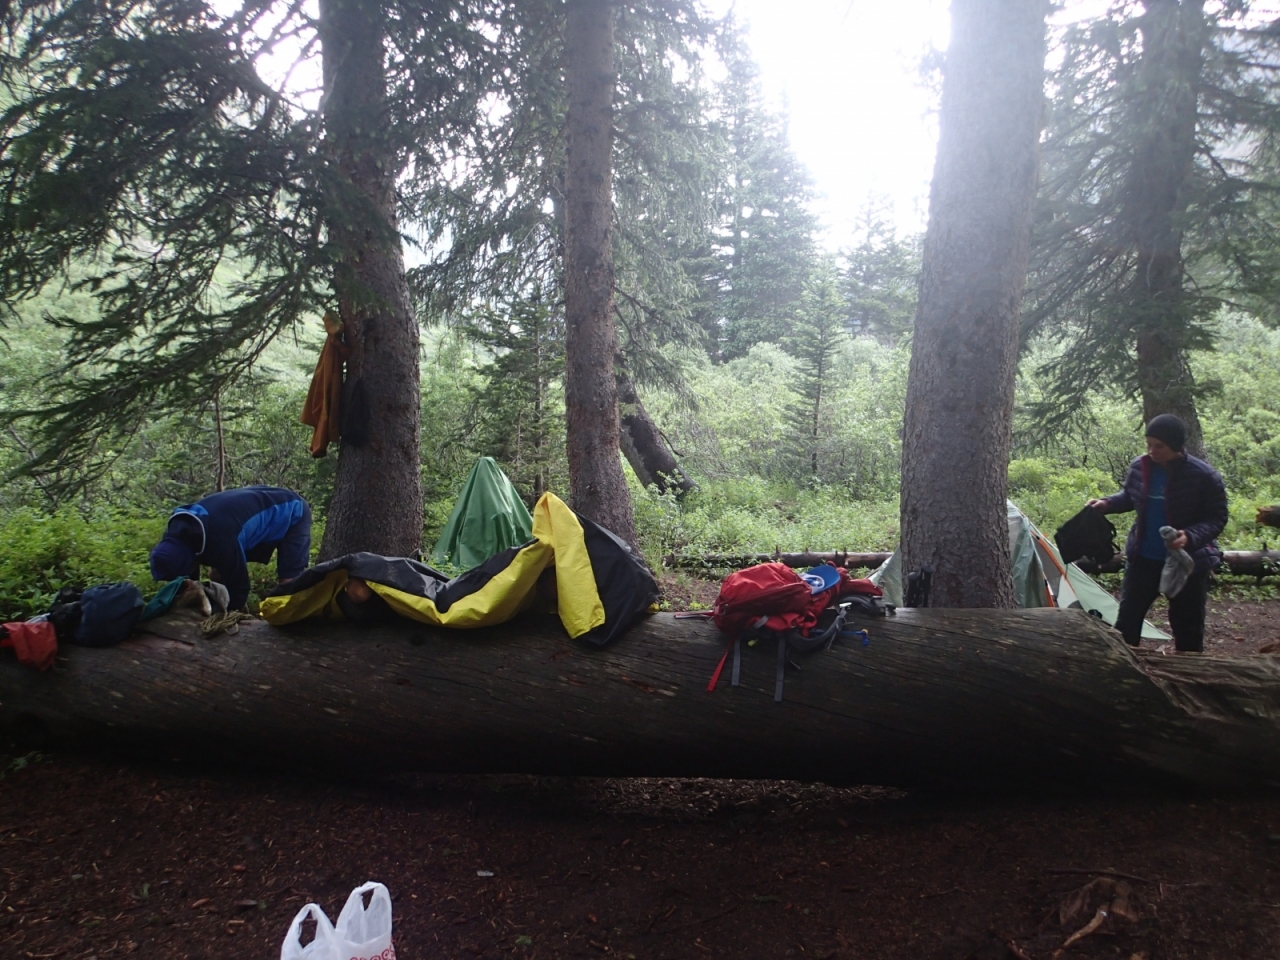
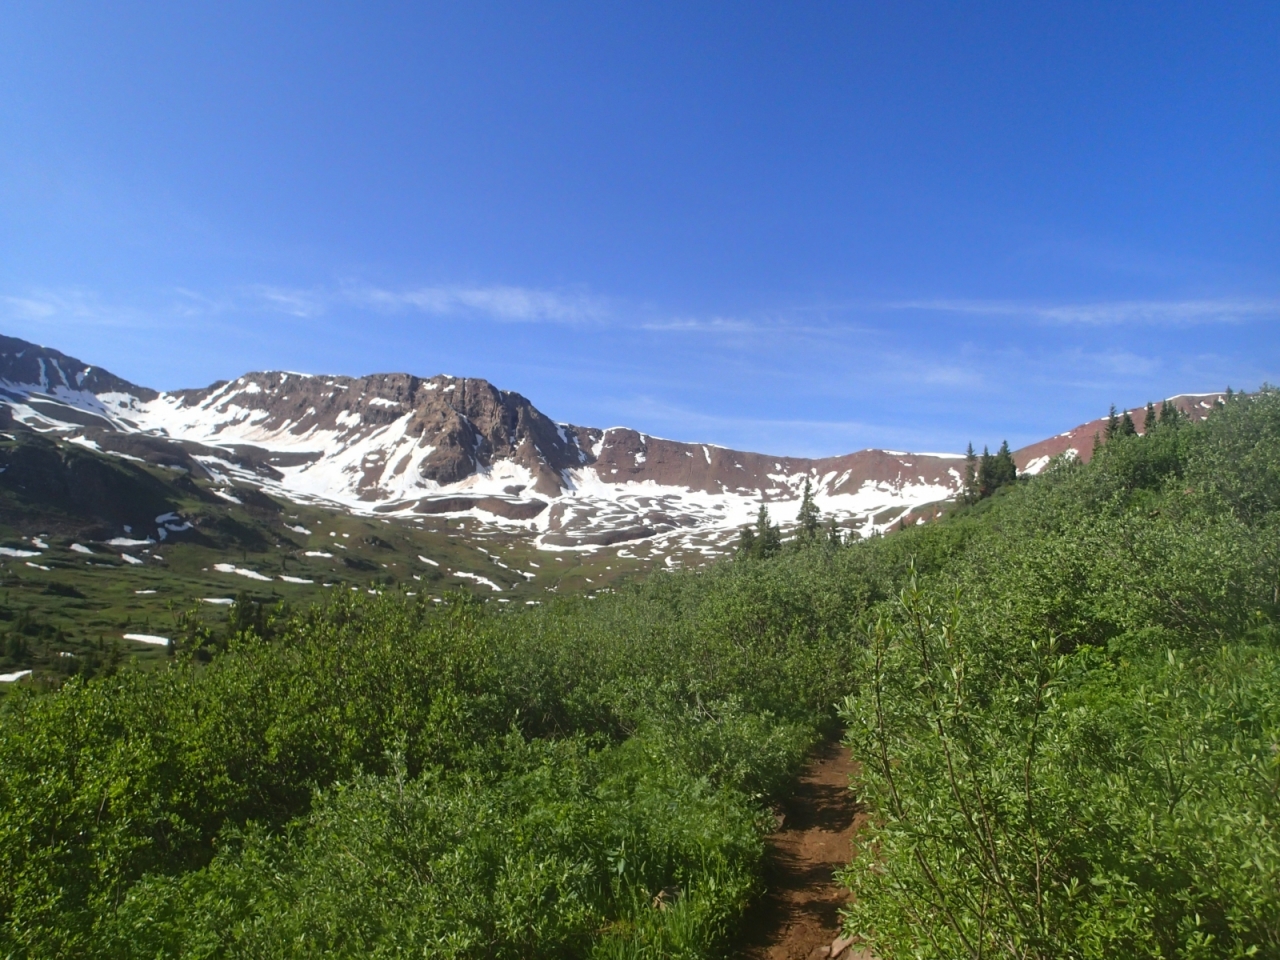
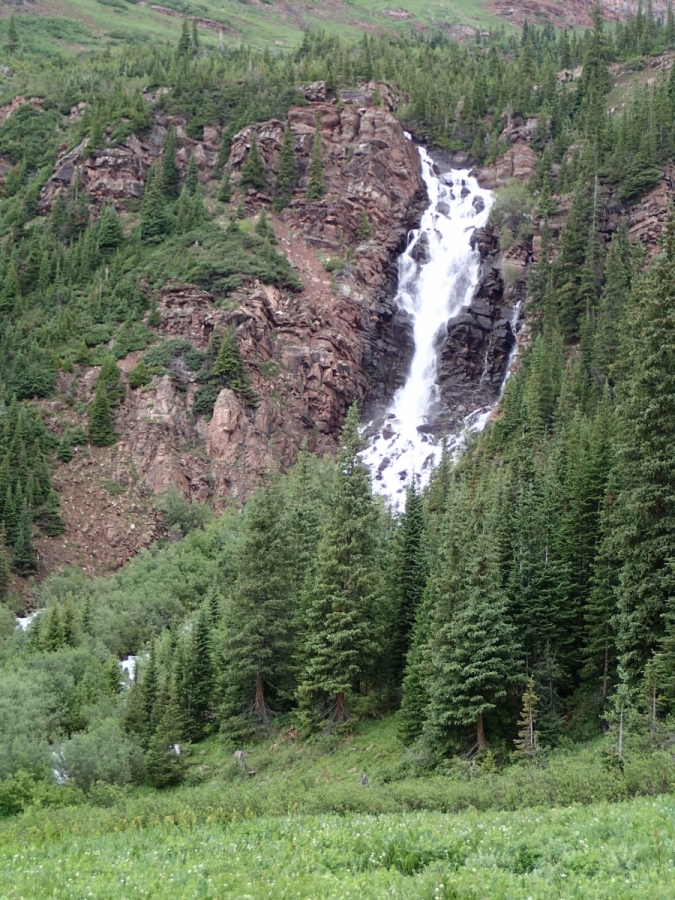
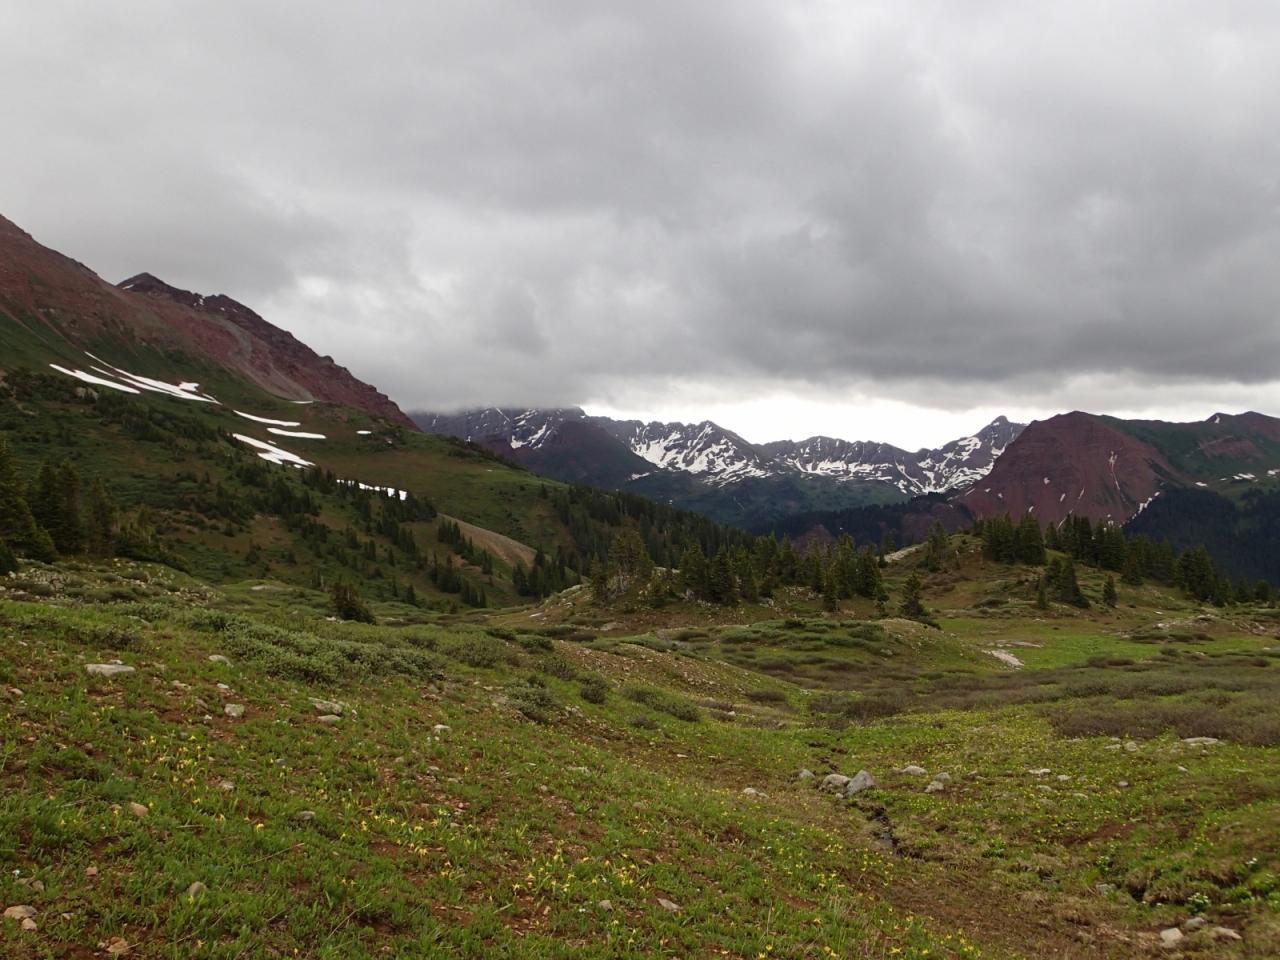
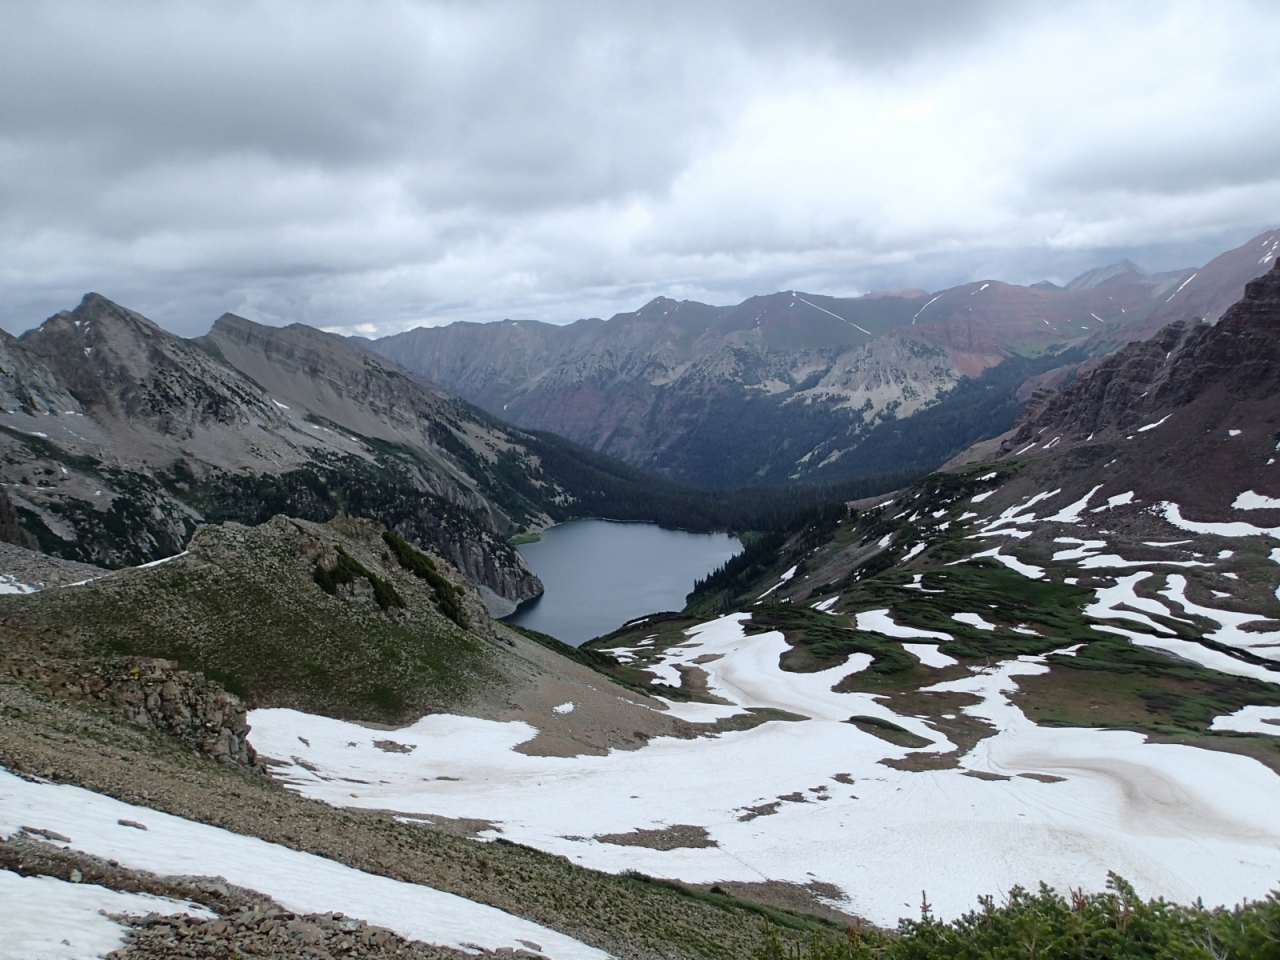
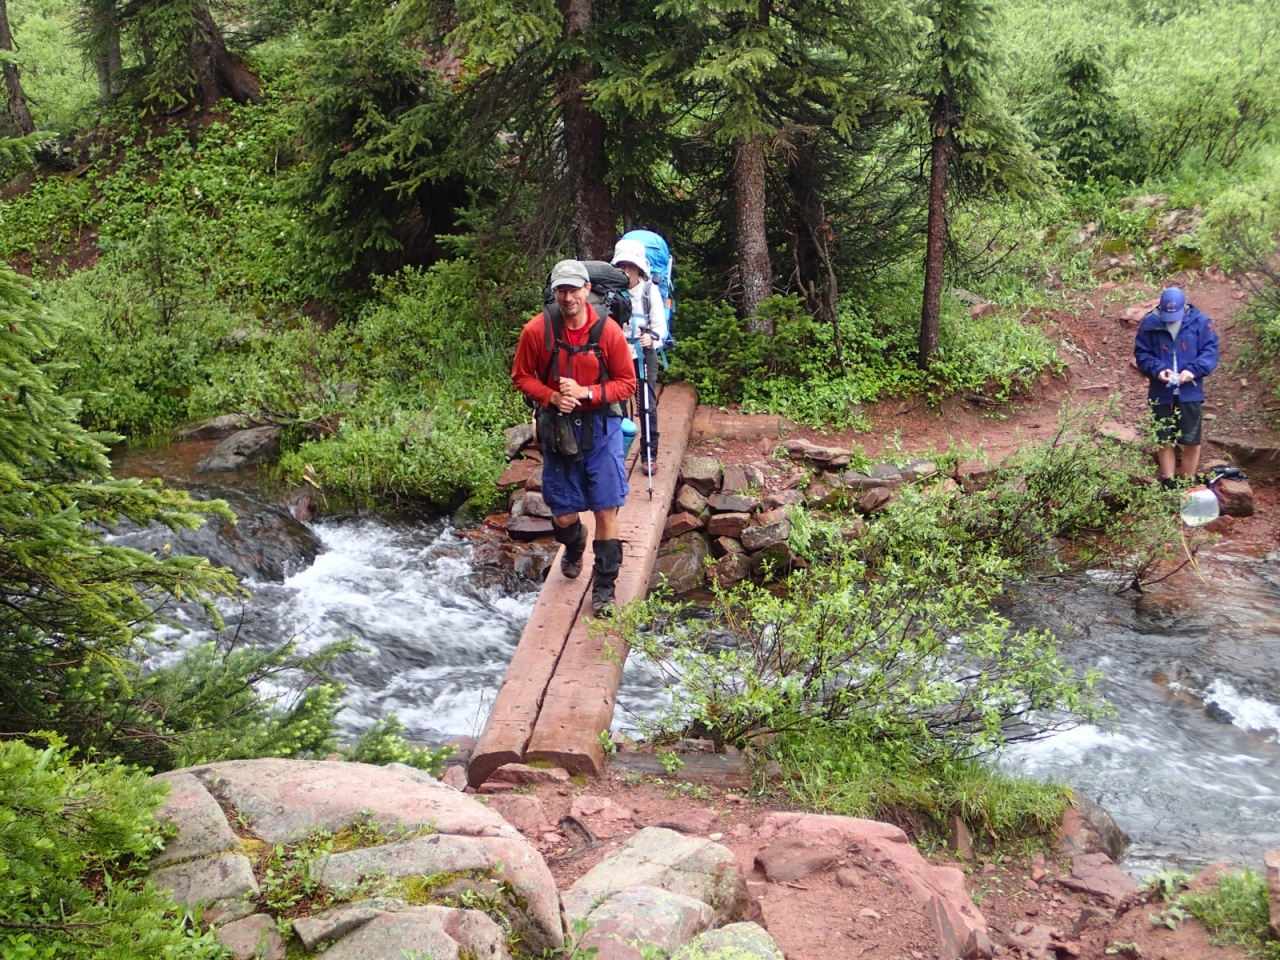
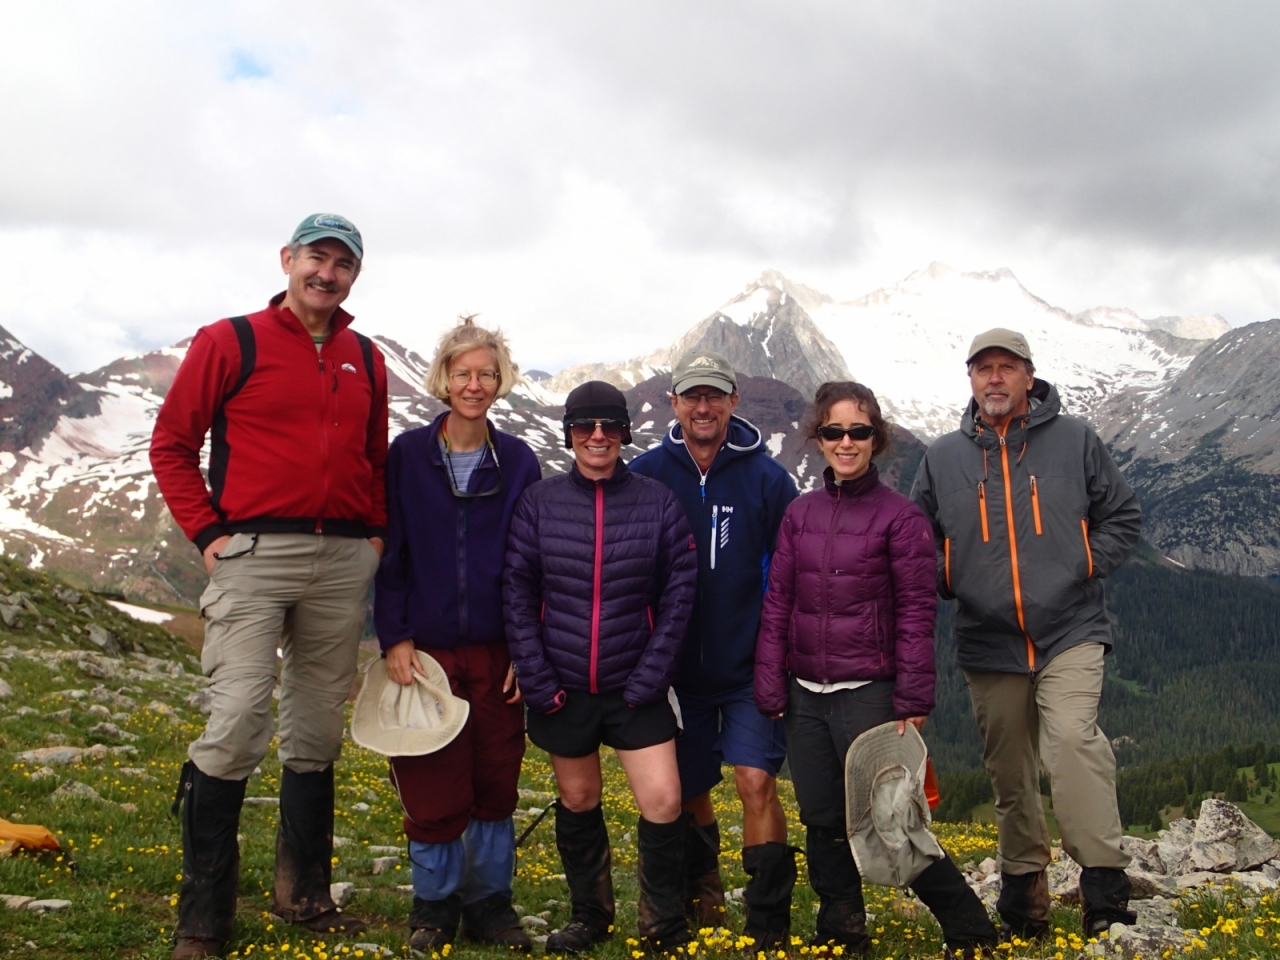 3 points


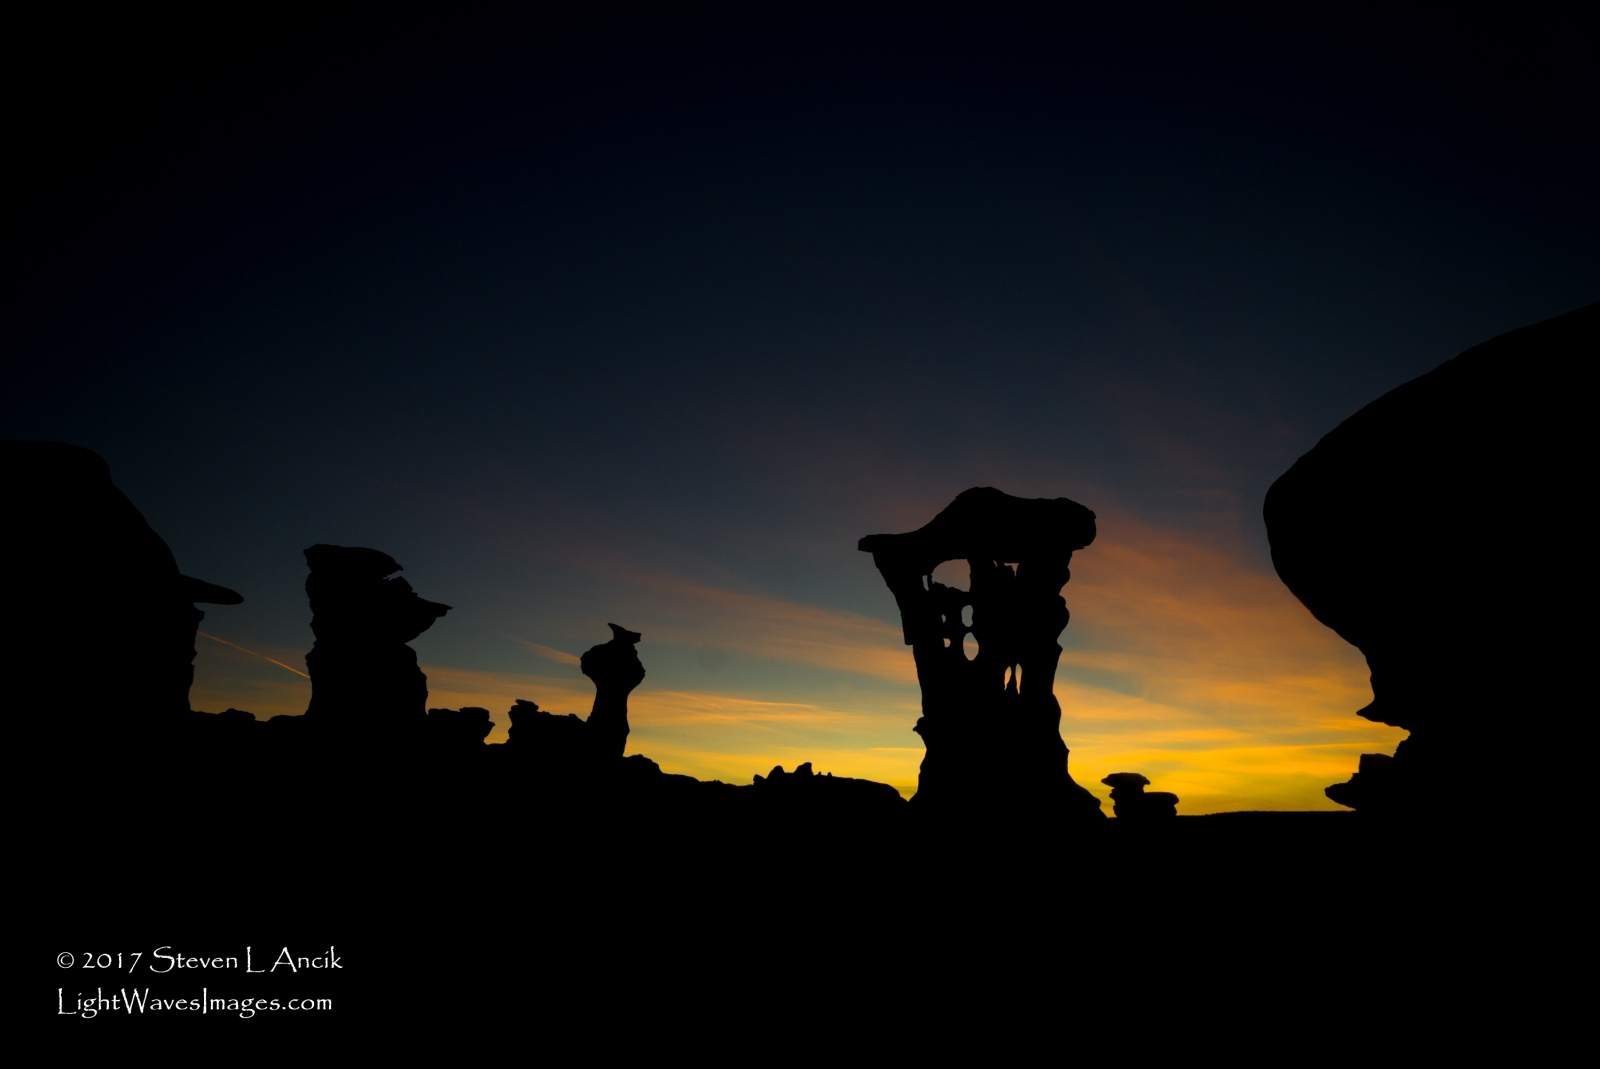
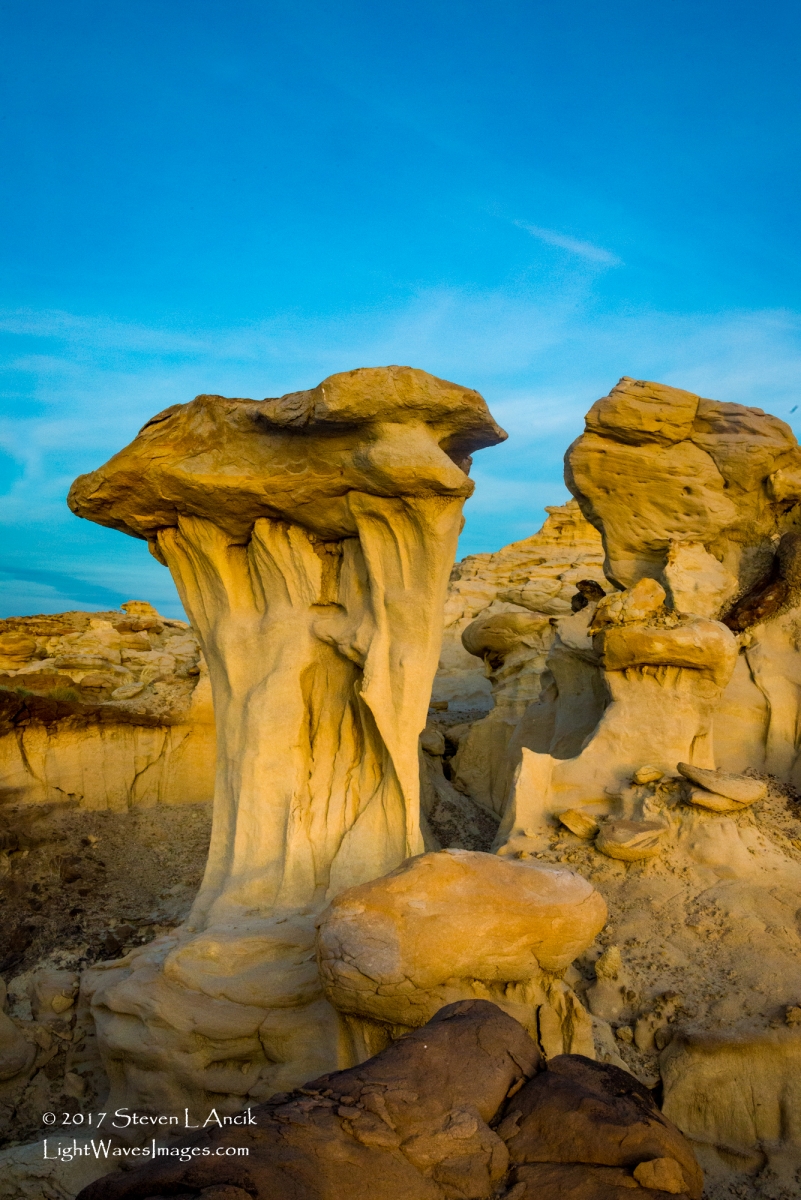
.thumb.jpg.98fd32503d3245c8fac64c0ee79819f6.jpg)