Top Posters

Popular Content
Showing content with the highest reputation since 04/01/2024 in Blog Entries
-
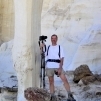
A spur of the moment side trip landed us in the Guadalupe Mountains National Park with easy access to the tallest point in Texas. Guadalupe Peak looms over the surrounding desert flatlands at a respectable 8,751 feet, accessible only after paying the price of a grueling 8.4 mile round-trip, 3000-foot elevation gain trail. This is truly a spectacular not-to-be-missed hike that comes with bragging rights for ascending the highest peak in Texas. Located in Guadalupe Mountains National Park, Guadalupe Peak offers a challenging hike with expansive, rewarding views. Hiking to the Summit of Guadalupe Peak There is nothing predictable about this trail; we hiked it in early April during unseasonably cool weather and were surprised with a wide range of weather conditions. Our hike started out sunny, with warm temperatures and calm winds that changed to light wind, cooler temperatures and even a few snow flurries as we ascended toward the peak. That being the said, it’s not unusual to start out in sweltering heat and arrive at the top needing some serious cold weather gear. We were lucky to have a break in the wind and clouds when we arrived at the top that allowed us to take time to enjoy the view of Texas and southern New Mexico to the north. This is a shoulder season hike, best hiked during the cooler months of the year. Peak seasons in the park are March through May and September through December when average high temperatures are less than 80 degrees. The trail is well maintained and a reasonable (but constant) grade. The steepest portion is in the first couple of miles. A few sheer drop offs are not for the faint of heart. However, the trail is wide with passing room along virtually the entire trail and the cliff side paths make for impressive photos. Many families make this hike with children. Sturdy hiking shoes or boots will make the mostly rock tread easier on your feet but are not required. We opted to use trekking poles, but most hikers went up fine without them (we like to use trekking poles so we can take in the scenery with less risk of stumbling). As you make your way up from the trailhead at roughly 5750’ to 8751’ elevation at the top you’ll notice the stark changes in your surroundings from the high desert to high elevation pinon tree forests. The progression offers a fascinating lesson on the adaptability of flora and fauna to these unique ecosystems. We didn’t see too much in the way of wildlife on the hike, except for a few lizards on the rocks and vultures and hawks flying overhead. An earlier start would likely provide a better chance to see some of the local animals (gray fox, skunks, porcupine, mule deer, snakes, etc.). Those that make the trek are rewarded with a 360-degree view for miles on end with mountain peaks rising from the surrounding Chihuahuan Desert. Guadalupe Mountains National Park is home to eight of the highest peaks in Texas including the impressive sheer limestone bluff, El Capitan, not to be confused with the similarly named and equally impressive rock formation in Yosemite National Park. There is no trail to the top of El Capitan, but the best view in the park is from atop Guadalupe Peak. Off in the distance, and barely visible are the 2,000-acre gypsum sand dunes on the west side of the park. The monument on Guadalupe Peak is a quirky pyramid that was put on the peak before it became a National Park and commemorates the transcontinental overland and air mail carriers. If you plan your trip during the spring, you’re likely to see spectacular blooms that may even include the rare Guadalupe Mountain violet! The hike starts out in the high desert and passes through high elevation pine forests. If you have an extra day, and don't mind carrying a backpack and extra water, you could camp overnight at the backcountry campsite one mile from the summit and enjoy star gazing before summiting the next morning and possibly catching sunrise from the peak. Guadalupe Mountains is sometimes described as the least visited national park, but it’s one not to be missed in our book. Need to Know Information The National Park Service advises carrying one gallon of water per day and turning back when half your water is gone. There are no water sources on this trail. No-fee backcountry wilderness permits are available at the visitor’s center up to one day in advance. The campground with five tent sites is one mile below the peak. All toilet paper and solid waste is required to be removed in a commercial toilet bag (Wag-Bag or the Restop 2, etc). One bag per person, per day is required for backpackers and you may be asked to show proof you have the required bags before obtaining your permit. Guadalupe Mountains is in the Mountain time zone although your smart phones and other devices may try to convince you otherwise since the nearest towers transmit from the Central time zone. The sparsely populated area makes Guadalupe an ideal location for dark sky viewing. Getting There Guadalupe Mountains National Park is located in west Texas about 2 hours east of El Paso. The trailhead parking lot holds only a few cars and fills up quickly even on weekdays. There is additional parking at the visitor center and the well maintained trail to the trailhead adds a bonus mile to your hike. A quick stop at the Pine Springs Visitor Center is highly recommended for the latest forecast and sage advice. If you are planning an overnight excursion you must get a backcountry permit here. Pine Springs Campground is located at the trailhead with 13 RV sites and 20 tent sites. These must be reserved in advance and the campground is often full. Chosa Primitive Camping Area, a much larger campground managed by the BLM is 29 miles to the northeast on the road to Carlsbad Caverns National Park. It is suitable for both tents and RVs. Chosa is a dispersed, dry camping free area with no facilities. Best Time to Go The best time to hike would be spring and fall to avoid possible extreme summer heat. Start early in the day. Maps & Books The park is covered in the National Geographic Trails Illustrated Guadalupe Mountains National Park map. In addition, the Delorme Texas Atlas can help with getting to and from this and other destinations in the state. In regards to guidebooks, see Hiking Carlsbad Caverns & Guadalupe Mountains National Parks as well as Best Easy Day Hikes Carlsbad Caverns and Guadalupe Mountains National Parks.2 points
-
Last fall, my sister, Melissa, and I visited Big Bend National Park in west Texas (see TrailGroove #56). As we left, we decided that we needed to return in the spring – unfinished business! One of the main reasons was to hike the Mariscal Canyon Rim Trail, which we didn’t hike last trip as the temperature was going to be too high. While our previous trip (detailed here) involved more extensive hiking and some backpacking, during our latest trip, we hiked several shorter hikes and drove, in her 4Runner, nearly every dirt backcountry road in the park, seeing the place as few visitors do. The highlight for us was the hike to the rim of Mariscal Canyon. Hiking Mariscal Rim in Big Bend There are three great canyons in Big Bend National Park. Farthest west is Santa Elena Canyon, and farthest east is Boquillas Canyon. Both of these canyons are accessible on paved roads that lead to relatively short hikes (about a mile each, one way). Along the middle of the southern edge of the park, forming the “big bend” is Mariscal Canyon. Mariscal is visited by far fewer hikers because to get to the trailhead you must have a high clearance (preferably 4WD) vehicle. It is about 30 miles from paved roads to the trailhead via River Road and Talley Road. We arrived at backcountry campsite Talley #3 before dinner. The campsite is on the edge of the Rio Grande and has some shade from low trees. After dinner that night, we heard rustling and crunching in the woods. We weren’t sure what it was (Bear? Horse? Cow? Bigfoot?). It was just a cow. We heard some frogs during the evening and night (maybe Rio Grande leopard frogs) and watched and tried to identify the bats flying overhead. We didn’t have a lot of luck with identification, since they were out at dusk, and they all look similar when flying (at least to us). We had a quiet night; there wasn’t anybody around, and it was fairly warm. In the morning, we got up around 6:30, had a quick breakfast, and broke camp. We drove the short distance to the parking area for the Mariscal Rim Trail, parked, and began our hike by 7:30, intent on beating the heat of the day (highs were predicted to be in the low 90s). Most of the first couple miles of the hike was fairly easy, flat with some minor ups and downs. Because of our early start, the trail was shaded by Mariscal Mountain to our east. The next part of the hike turns steeper as it approaches the mountain. For about a half mile, it is quite steep in places as it zig-zags higher and higher. Without cairns it would be very difficult to follow. Trekking poles helped too! Along the hike, we spotted a hard-to-find living rock cactus and also found what we decided (and later confirmed) was the rare silverspine cholla, which is found nowhere else in the world except on and around Mariscal Mountain. There weren’t any cacti in bloom this trip (too early in the year), but we did spot a dog cholla which was full of buds, nearly ready to bloom (but didn’t reward us with the bloom on the way down). Once we arrived at the top, the canyon was just off to the south. At this point it is about 1,600 feet to the river below, and those cliffs are a sheer drop! We eased our way over to near the edge for photos. While up there, Melissa spotted some sheep in the distance which we thought were rare desert bighorn sheep but as it turned out, they were Barbary sheep (which are apparently invasive and are taking over the bighorn territory). Another Big Bend Trip in the Books Hiking back down the steep section was a bit treacherous at times, but we both made it with only a couple of minor slips. We got back to the car at noon, beating the worst of the heat. The hike was seven miles round-trip, with about 1,220 feet of elevation change. It took us 4.5 hours to complete the hike, with numerous photo stops and a long break up top. After we had some lunch, we drove back to River Road and continued to its east end at the paved highway. A sheer drop to the Rio Grande River in Big Bend National Park. With over 1,200 square miles, over 150 miles of trails, and environments ranging from desert to grassland to mountains, Big Bend National Park is a spectacular place to spend a day, a week, a month, or return to repeatedly. Hikes ranging from short and easy to multi-day and difficult await a hiker or backpacker in this, one of America’s great national parks. Need to Know Information Four developed campgrounds exist in Big Bend, with reservations required for each campground. More information on camping can be found here. The park has 5 visitor centers and no permits are needed for hiking in Big Bend, but permits are needed for backcountry camping. It is critical that you take enough water on any backcountry excursion in the park – plan ahead. A gallon per person per day is generally suggested. Getting There Big Bend National Park is remote – 8 hours from Dallas and 5 hours from El Paso with the closest airports being Midland/Odessa and El Paso. To get to the Mariscal Rim trailhead, drive on River Road (over 25 miles from either end, a high-clearance vehicle – 4WD preferable – is needed) to Talley Road, then south about 5 miles to a parking area on the left. When we were there, no sign was at the trailhead, but it's a large parking area just past Talley #2 campsite. No permit is required. Best Time to Go Peak season is November through April with spring break being especially busy. Summer can be brutally hot and it can be quite hot in late spring and early fall as well. Campground reservations are required but can be made up to 6 months in advance. Maps and Books For a map we utilized Trails Illustrated Big Bend National Park 225. Take a look at Hiking Big Bend National Park for a guidebook and Nature Watch Big Bend is also a valuable resource.1 point
-
Zion National Park is one of my favorite national parks, and for good reason: there are amazing views, beautiful cliffs and streams, abundant photography opportunities, and wonderful hikes. The park has several well-known popular hikes – The Subway, Zion Narrows, and Angel’s Landing for example – but there are some other shorter or lesser known hikes that are also well worth your while. I have made a couple of short visits as part of my mountain biking and hiking trips over the past two years, and these two hikes stand out as favorites. Both are relatively short and have breathtaking views. Looking out from the alcove along the Canyon Overlook Trail in Zion National Park Canyon Overlook Trail A very short hike, by most hiker’s standards, Canyon Overlook Trail is just a half-mile long well-maintained route. It is quite popular, so solitude is not usually part of the experience here. The trail starts off with a climb up rock steps leading past a “bonsai” tree and along a cliff edge high above the Pine Creek Slot Canyon. The trail has handrails in places to protect sightseeing tourists from falling to their doom while gazing at the amazing scenery. The main rock that forms the massive cliffs of the park is of early Jurassic age (about 180 million years old) Navajo sandstone, a formation that was laid down in a vast sand dune field covering much of what we now call the Colorado Plateau. The sand is cross-bedded, showing the layers of the dunes as they shifted and blew across the area. With this thick formation now exposed to wind, water, and freeze-thaw cycles, the rock has been eroded into fantastic shapes, exposing the layers and colors. Along the hike to the canyon overlook there is a section of the trail which passes under an overhanging rock that forms a small cave-like alcove, plus hanging gardens with plants growing on the vertical rock faces and a bridge suspended above the canyon. Arriving at the end, the views open up and you are treated to a view toward the west, where you can see the massive (over 2,000 foot high) orange, pink, and cream-colored cliff walls of the main Zion Canyon. Visible from the overlook are peaks with names such as Bridge Mountain, The West Temple, Towers of the Virgin, Altar of Sacrifice, The Streaked Wall, and The Sentinel. It took my group of four mountain bikers about an hour to complete the hike (on foot) while taking plenty of photos. The Canyon Overlook (left) and Many Pools (right) hikes in Zion offer stunning scenery and relatively easy hiking. Many Pools Another short, but lesser-known hike on the east side of Zion National Park is along a canyon known unofficially as “Many Pools.” This hike is not along established trails, but instead follows a fairly wide drainage that rises to the north. On my visit, we hiked just under a mile up the canyon and gained about 600 feet of elevation by the upper end. We could have continued further, but we were running out of time for this day. Views from all along this canyon are spectacular in every direction. On the hike, you pass several of the pools or potholes, which are places where the flowing water has eroded the Navajo sandstone and formed low areas where water collects. We saw several of these pools filled with water, and some that were dried up when we were there in May of 2022. There were even a few tadpoles in a couple of the pools. To the sides of the wash, there are interesting hoodoo formations, as well as areas with several different colors of rock and lots of cross-bedding. Hiking is mostly easy, with only a few areas where you will need to bushwhack through low shrubs and trees and a couple steeper places that are easily climbed over or around. This is an excellent hike in east Zion, and took my group less than two hours to finish. It’s an excellent spot that is less busy than many other trails in Zion, and affords you with stellar views of the eastern part of the park. Looking south from the upper part of the canyon (Many Pools). Final Thoughts There are many other hikes in Zion, but these two are fairly easy and show you a good example of the geology and scenery of the eastern part of the park. Utah offers countless hiking opportunities and one can spend many years exploring the various corners of the state. As far as views go, in my opinion, you can’t beat Zion National Park, and the two hikes mentioned here are an excellent introduction to the views and experience the park has to offer. Need to Know Information No permit is required for these hikes. There are certain other hikes in the park which DO require permits. The park has an entry fee of $35 for private vehicles, or you can purchase an annual national park pass for $80. For more hiking and backpacking ideas in Zion, see our TrailFinder Page with links to all of our previous TrailGroove Zion articles and find even more by searching for Zion here. Getting There Parking for the Canyon Overlook Trailhead is just east of the eastern end of Zion-Mount Carmel Tunnel. Parking is limited to two small parking areas and a few roadside spots, but we had to wait only a few minutes (we were there around 8:00 am on May 1st) for a hiker to return from their hike and vacate their parking spot. During busy times of the day, it may be necessary to return several times to get a space. For Many Pools, parking is at a small parking area less than one mile to the east of the eastern tunnel along Zion-Mount Carmel Highway on the eastern side of the park. There is an outhouse at this parking lot. From the parking lot, walk east along the road (be careful as the shoulders are very narrow) for about 500 feet, then cross to the western side of the road. From there, you will descend into the lower end of Many Pools Canyon. The hike continues to the north up the drainage. Best Time to Go For the Canyon Overlook Trail, morning is best for photography, as the view is to the west and the canyon walls will be well-lit during the morning. Sunset may be another good time if clouds are just right, but the canyon will be in shadow then. Any time of day would be good for photography at Many Pools, as the views from Many Pools Canyon are mainly to the south. The hike would be most interesting after there has been sufficient rain to fill the potholes, but it would be a good hike at any time of the year. In summer, try to avoid the hottest part of the day, as it is quite exposed to the sun. Maps and Books The National Geographic Trails Illustrated Zion National Park map is a great general map of the park. Canyon Overlook Trail is shown on the map, but Many Pools is not. Trails Illustrated also offers a Zion Day Hikes map and the Utah Delorme Atlas can be helpful for getting to and from trailheads and exploring the rest of the state. For a guidebook on the area, see Best Easy Day Hikes, Zion and Bryce Canyon National Parks as well as Hiking Zion and Bryce Canyon.1 point
-
The Grand Canyon captivates many of those who penetrate its depths, and I am one of them. Living nearly a thousand miles from the South Rim means I visit the canyon, at most, once or twice a year, so I try to make each visit count. In April of 2024, I completed my fourth hike to the canyon floor. Each of my hikes has been very different. When it comes to hiking in the Grand Canyon, those looking for expansive views and rugged terrain won't be disappointed. Backpacking the Grand Canyon The first was a backpacking trip on the Hermit Trail, a difficult descent into one of the most magical places I have ever experienced, camping on Hermit Creek and walking spellbound through the narrows to the Colorado River. It’s a place I hope to visit again, although a different route to Hermit Creek is in the works, taking a few days to backpack down the Bright Angel Trail and across the Tonto platform to Hermit Creek. My second was also a backpacking trip, descending the Grandview Trail to Horseshoe Mesa, then down to Cottonwood Creek where we camped for two nights. A day hike to the Colorado River on the Old Grandview Trail was memorable but daunting, and something I have no desire to repeat. Deciding to get out of the canyon a day early because of concerns about the weather, we doubled our mileage on the last day, traversing east on the Tonto Trail along the foot of Horseshoe Mesa and climbing out on tired legs at Grandview Point. You can read more about that trip here in Issue 54. All of my hikes required careful planning and each configuration had its logistical idiosyncrasies. The reason I did Hermit and Grandview first was that backcountry permits for their relatively off-the-beaten-path campsites were easier to obtain than those in “The Corridor” at the time I wanted to go. The Corridor encompasses the maintained trails which cross the canyon north to south in the most developed area of the national park and include North Kaibab Trail, South Kaibab Trail, and Bright Angel Trail. Although you do not need a permit to hike these trails, you must have one if you plan to camp along any of them. There are three campgrounds: Havasupai Gardens on Bright Angel Trail; Bright Angel Campground near Phantom Ranch on the floor of the canyon; and Cottonwood Campground on the North Kaibab Trail. The park uses a lottery system to award preference for permits; it is a somewhat complex process I will not try to explain, but you can find all the details here. Suffice it to say you must start planning early, and the odds of getting a campsite in the Corridor through this process are slim. If, however, you are a seasoned hiker and want to backpack, seeking a campsite in areas outside the Corridor improves your chances considerably. I had no difficulty obtaining permits for sites on the Hermit and Grandview Trails during spring and fall. There are simply fewer people wanting to go to these less-developed areas. Day Hiking the Grand Canyon: Rim to Rim and Beyond Although the first two trips were amazing, the third was truly a charm. It was a Rim-to-Rim day hike with my oldest son, Mark, on my sixty-fifth birthday and just after his fortieth. We started on the North Kaibab Trail and finished on Bright Angel, with the requisite side trip to Ribbon Falls. It was everything I had hoped for, and a wonderful way to commemorate our big personal milestones. Most recently, I completed a Rim-to-River-to-Rim hike from the South Rim, the shortest of my Grand Canyon hikes but no less respectable an achievement. Logistically, however, it was certainly the easiest. As previously mentioned, obtaining Corridor camping permits can be difficult. If you want to avoid the permitting process completely, day hiking is a good alternative, although the National Park Service does not endorse day hikes either across the canyon, i.e. Rim to Rim, or to the river and back, better known as Rim to River to Rim. It’s easy to understand their position given that rangers are constantly having to assist or rescue hikers who attempt these feats without proper preparation. They recently released a YouTube video attempting to get the message across, on top of the multiple warnings they issue in many other ways, but some people just don’t get the message. Hiking the Grand Canyon Rim to Rim Although the hike itself is straightforward, logistics for a Rim-to-Rim day hike are a bit of a challenge. First, unless you are prepared to do Rim to Rim to Rim, you must go when the North Rim is open, between May 15 and October 15 (there is some wiggle room on this date, depending on what services you require at the North Rim). Our itinerary involved arriving to Flagstaff, spending a night there (booked in advance), driving the next day to the South Rim, parking in the Backcountry Information Center parking lot, catching a shuttle (booked in advance) to the North Rim, a process which took most of the day, having dinner (booked in advance) in the North Rim Lodge, staying the night in a cabin (booked in advance) at the North Rim Lodge, catching a shuttle the next morning to the North Kaibab Trailhead (arranged the night before), hiking our hike across the canyon, walking to our car from the Bright Angel Trailhead, and staying that night at a hotel in Tusayan (booked, of course, in advance). Whew! It was, by the way, totally worth it. At the bottom of the Grand Canyon The Rim to River to Rim Hike Probably the easiest (logistically) and most flexible major hike is the Rim-to-River-to-Rim. You can do it any time of year, and you do not need a permit, it is very doable in one day for a prepared hiker, and you can camp on the rim or stay elsewhere, it’s all up to you. Our group of four drove in from Oklahoma and stayed in Tusayan, driving into the park early on the day of the hike to catch the 6 a.m. shuttle to the South Kaibab Trailhead (no parking is allowed at the trailhead). We were on the trail about 6:15. The most popular route is down South Kaibab to the river, then up Bright Angel back to the South Rim. Although longer, Bright Angel is more gradual than South Kaibab and under normal circumstances has spigots with potable water every few miles. South Kaibab offers no water. When we did the hike in April of 2024, however, we used South Kaibab for both descent and ascent because Bright Angel was closed for the waterline project then underway. It took us just under five hours to descend the 4,300 feet and 6 ½ miles on South Kaibab Trail, with one long wait for a mule train to take a rest before we could pass. The weather was pleasant, meaning it was 32 degrees at the rim when we started around sunrise, and by the time we reached Phantom Ranch for our lunch stop the temperature had risen to 90 degrees. Starting back up after lunch and lemonade with three liters of water since none would be available on the climb, we dreaded the steep ascent on a path we understood to be fully exposed, with no shade. Thankfully, it was much better than expected. Shade does actually exist in the nooks and crannies of the canyon walls on South Kaibab and we had a nice breeze as the temperatures became cooler the higher we rose. Reaching the top after about six hours was exhilarating and emotional. We caught the shuttle back to our car at the visitor center and celebrated our accomplishment with dinner that night in Tusayan. The Grand Canyon offers exploration opportunities ranging from extended backpacking trips, to marathon or easy day hikes. Easier Grand Canyon Day Hikes Of course, there are other hiking options at the Grand Canyon, shorter ones and certainly easier ones. First and foremost, the Rim Trail on the South Rim is mostly flat, mostly paved and runs about thirteen miles from Hermit’s Rest to the South Kaibab Trailhead, with multiple shuttle bus stops along the way so you can hop off and on as you wish. Along the way you can access numerous canyon viewpoints and, on the western end, walk the Trail of Time, an interpretive segment of the Rim Trail which helps visitors consider the magnitude of geologic time and the stories told by the canyon’s rock layers. All of the South Rim trails offer the option to descend a short distance and return to the rim. Some popular choices are hiking to Santa Maria Springs on the Hermit Trail (5 miles round trip), to Horseshoe Mesa on the Grandview Trail (6.5 miles round trip), and to Ooh-Ah Point (1.8 miles round trip and a great place to catch the sunrise) or Cedar Ridge (3 miles round trip) on the South Kaibab Trail. The Bright Angel Trail also offers multiple opportunities for day hikes. There are many hiking options on the North Rim as well, including hiking to Coconino Overlook (1.5 miles round trip) or Supai Tunnel (4 miles round trip) on the North Kaibab Trail. Keep in mind, the only truly easy trails at the Grand Canyon are the flat, paved ones on the rims! Grand Canyon sunrise views More Information Aside from logistics, complete preparation for any of these hikes requires a high level of physical conditioning, proper clothing and footwear, and appropriate nutrition, hydration, et cetera. The heat in the inner canyon in summer is dangerous, so pick a more optimal season for your visit. Late March to early April and late September to early October are my favorite times to go. The Grand Canyon National Park website is an excellent choice for detailed information on any of these hikes. For additional trip ideas and information, see all of our past TrailGroove articles here on our TrailFinder Page and more can be found with a search here for “Grand Canyon”. The Grand Canyon Hiker Dude Show is a podcast that has been a great resource. I have also found the Falcon Guide on Hiking the Grand Canyon very useful as well as the National Geographic Trails Illustrated Grand Canyon maps. For easier day hikes, Best Easy Day Hikes Grand Canyon is worth a look. For getting to and from trailheads, as well as for exploring other destinations in the state, the Arizona Delorme Atlas is a great mapping resource to have on hand. I hope you will get out there and give it a try – properly prepared and well informed, of course. But be careful, you may just find yourself addicted, like me!1 point
-
The forested slopes of southeastern Oklahoma’s ironically named Sans Bois Mountains provide the backdrop for much of the excitement in “True Grit,” a novel by Charles Portis and two major motion pictures (1969 and 2010). You wouldn’t know it though, for the mountain peaks shown in the films suggest places farther west. Indeed, the movies were filmed in Colorado and New Mexico, but pursuing outlaws in post-Civil War Indian Territory, as the main characters are portrayed as doing in “True Grit,” was not just one of Hollywood’s fictional creations. Here in the foothills of the larger Ouachita Mountain range, deep forests and rugged terrain did indeed shelter folks on the wrong side of the law during and after the Civil War. During that conflict, deserters found refuge in these isolated backwoods. And for many years after the war, Indian Territory maintained a reputation for lawlessness. Legend has it that unsavory characters such as Jesse and Frank James, the Doolin Gang, and Henry and Belle Starr hid out in these parts, some even living in sandstone caves in the cliffs of the Fourche Maline River. Whether or not any of these notables ever used it as a hideout, the name “Robbers Cave” seemed apropos for the signature feature of this Oklahoma state park when it was built by the Civilian Conservation Corps along the banks of the Fourche Maline in the 1930s. As for the decidedly wooded mountain range named Sans Bois, which is French for "without wood,” a creek with very little timber and its source in these mountains is said to have given the range its name. The dense forest is dominated by short-leaf pine and post oak, hickory and cedar, with dogwood and redbud adding color to the landscape. With its diverse geology and ecology, Robbers Cave State Park offers abundant opportunities for hiking and exploring. Hiking at Robbers Cave All of this makes for excellent hiking, with challenging terrain and beautiful scenery, and the cave itself is a must-see, although not a cave in the true sense of the word. Robbers Cave is more a crevice created by the shifting of inclined layers of sedimentary rock. It is easily accessed from a parking lot on the northeast side of the park via a short but steep climb. Whether or not Belle Starr ever set foot in it, climbing up, sitting inside and peering out is a satisfying accomplishment. No less interesting are the rock formations below the cave, which create narrow passageways reminiscent of slot canyons. It’s a worthwhile place to spend some time. Three main paths – Rough Canyon Trail, Cattail Pond Loop, and Mountain Trail – dominate the Robbers Cave State Park trail system, and the ability to connect them with a multi-use trail and four backcountry camp sites makes it possible to put together an enjoyable backpacking experience. The Rough Canyon trailhead is adjacent to the cave parking lot, and what hiker could resist a trail called “Rough Canyon”? The first mile lives up to the “rough” appellation with lots of rocky uphill, briefly running along a stream before opening up, then flowing into a dense pine forest. The trail continues uphill then intersects with the Cattail Pond Loop, which incorporates a stream crossing and circles the eponymous body of water, passing a primitive campground before it turns toward lovely Lost Lake. Surrounded by maples and covered with lily pads, this is an intensely beautiful spot in the fall, and its rock dam and attendant stone structure are worth investigating. The trail continues with lots of rocky downhill, returning to the cave parking lot for a total of about four miles. These trails can be mixed and matched for various distances and, on the west, they connect with the park’s 4.8-mile Mountain Trail. On the park’s southern end, the Deep Ford Campground serves as the primary starting point for the Mountain Trail. This is really the park’s signature trail, tracing the western shores of Lakes Carlton and Wayne Wallace before connecting with the Rough Canyon Trail. Finding your way can be difficult in spots, however. As the trail climbs above Lake Carlton, it is easy to veer off course, confusing the well-worn spur to the bluffs with the main trail. The bluffs must be explored, as the view is breathtaking, but remember that the main trail goes above the bluffs, not below. Other hiking and equestrian trail branches also create confusion along the way and the park maps are not all that helpful. But if you sort it out, you’ll come to the Rocky Top primitive campground on the northern edge of the Mountain trail, near the intersection with the Rough Canyon Trail. A multi-use trail connects with the Mountain and Rough Canyon trails, allowing creation of an overnight backpacking loop of about 11.5 miles in length. Robbers Cave is also perfect for day hiking, with abundant campgrounds and cabins built in the 1930s in National Park Service rustic style. In fact, the park is so full of intact historical structures that it is listed on the National Register of Historic Places. After a vigorous hike, take a leisurely walk to explore such structures as the 1936 bathhouse on Lake Carlton, now serving as the park’s nature center. And, with its huge sandstone rock faces, Robbers Cave State Park is a popular destination for rock climbers. Robbers Cave in bloom Then and Now While you’re unlikely to find any outlaws hiding out there these days, hiking at Robbers Cave State Park, near Wilburton, Oklahoma, offers a taste of the backwoods that attracted those renegades 150 years ago and perhaps a glimpse into what life on the run might have looked like in those cliffs above the Fourche Maline. Need to Know Information There is no fee to access the park but a $10 per day parking fee is charged (annual parking passes are also available). Parking is, however, included in fees for cabin/lodge room rental or camping. The park offers ample camping, including 86 primitive tent campsites. Tent camping in backcountry campsites and campgrounds is $16 per night. Make reservations, obtain a parking pass and get complete park information here. Getting There Robbers Cave State Park is located five miles north of Wilburton, Oklahoma on State Highway 2. Wilburton is about 160 miles from Oklahoma City, 130 miles from Tulsa, and 75 miles from Fort Smith, Arkansas. Best Time to Go Spring and fall are the best times to go thanks to cooler temperatures and more color in the landscape (dogwood and redbud in spring and maples and other hardwoods in fall). Winter is also a very good time to go, as temperatures are usually mild. In the summer, while ticks and poison ivy can be annoying, the trails are generally well groomed and shady, so hiking then can be pleasant as well. Maps and Books Oklahoma Hiking Trails by Kent Frates and Larry Floyd, and True Grit by Charles Portis. The Oklahoma Delorme Atlas and Gazetteer can help with getting to and from and exploring the area. The Ouachita Maps web site offers topo maps and detailed hiking directions. Also see the Robbers Cave Historical Walking Tour.1 point